Manual Integration (PHP)
As Max Mega Menu overrides the standard WordPress function to output a menu location, no special configuration or theme setup is required.
We simply need to output a menu using the standard WordPress method.
Step 1: Registering a new menu location
First we’ll need to create a new menu location. If you already have a menu location registered you can skip this step.
Under Mega Menu > Menu Locations, click “Add another menu location”, give the new location a suitable name and click “Add menu location”.
In our case we’ve named the location “Sidebar”.
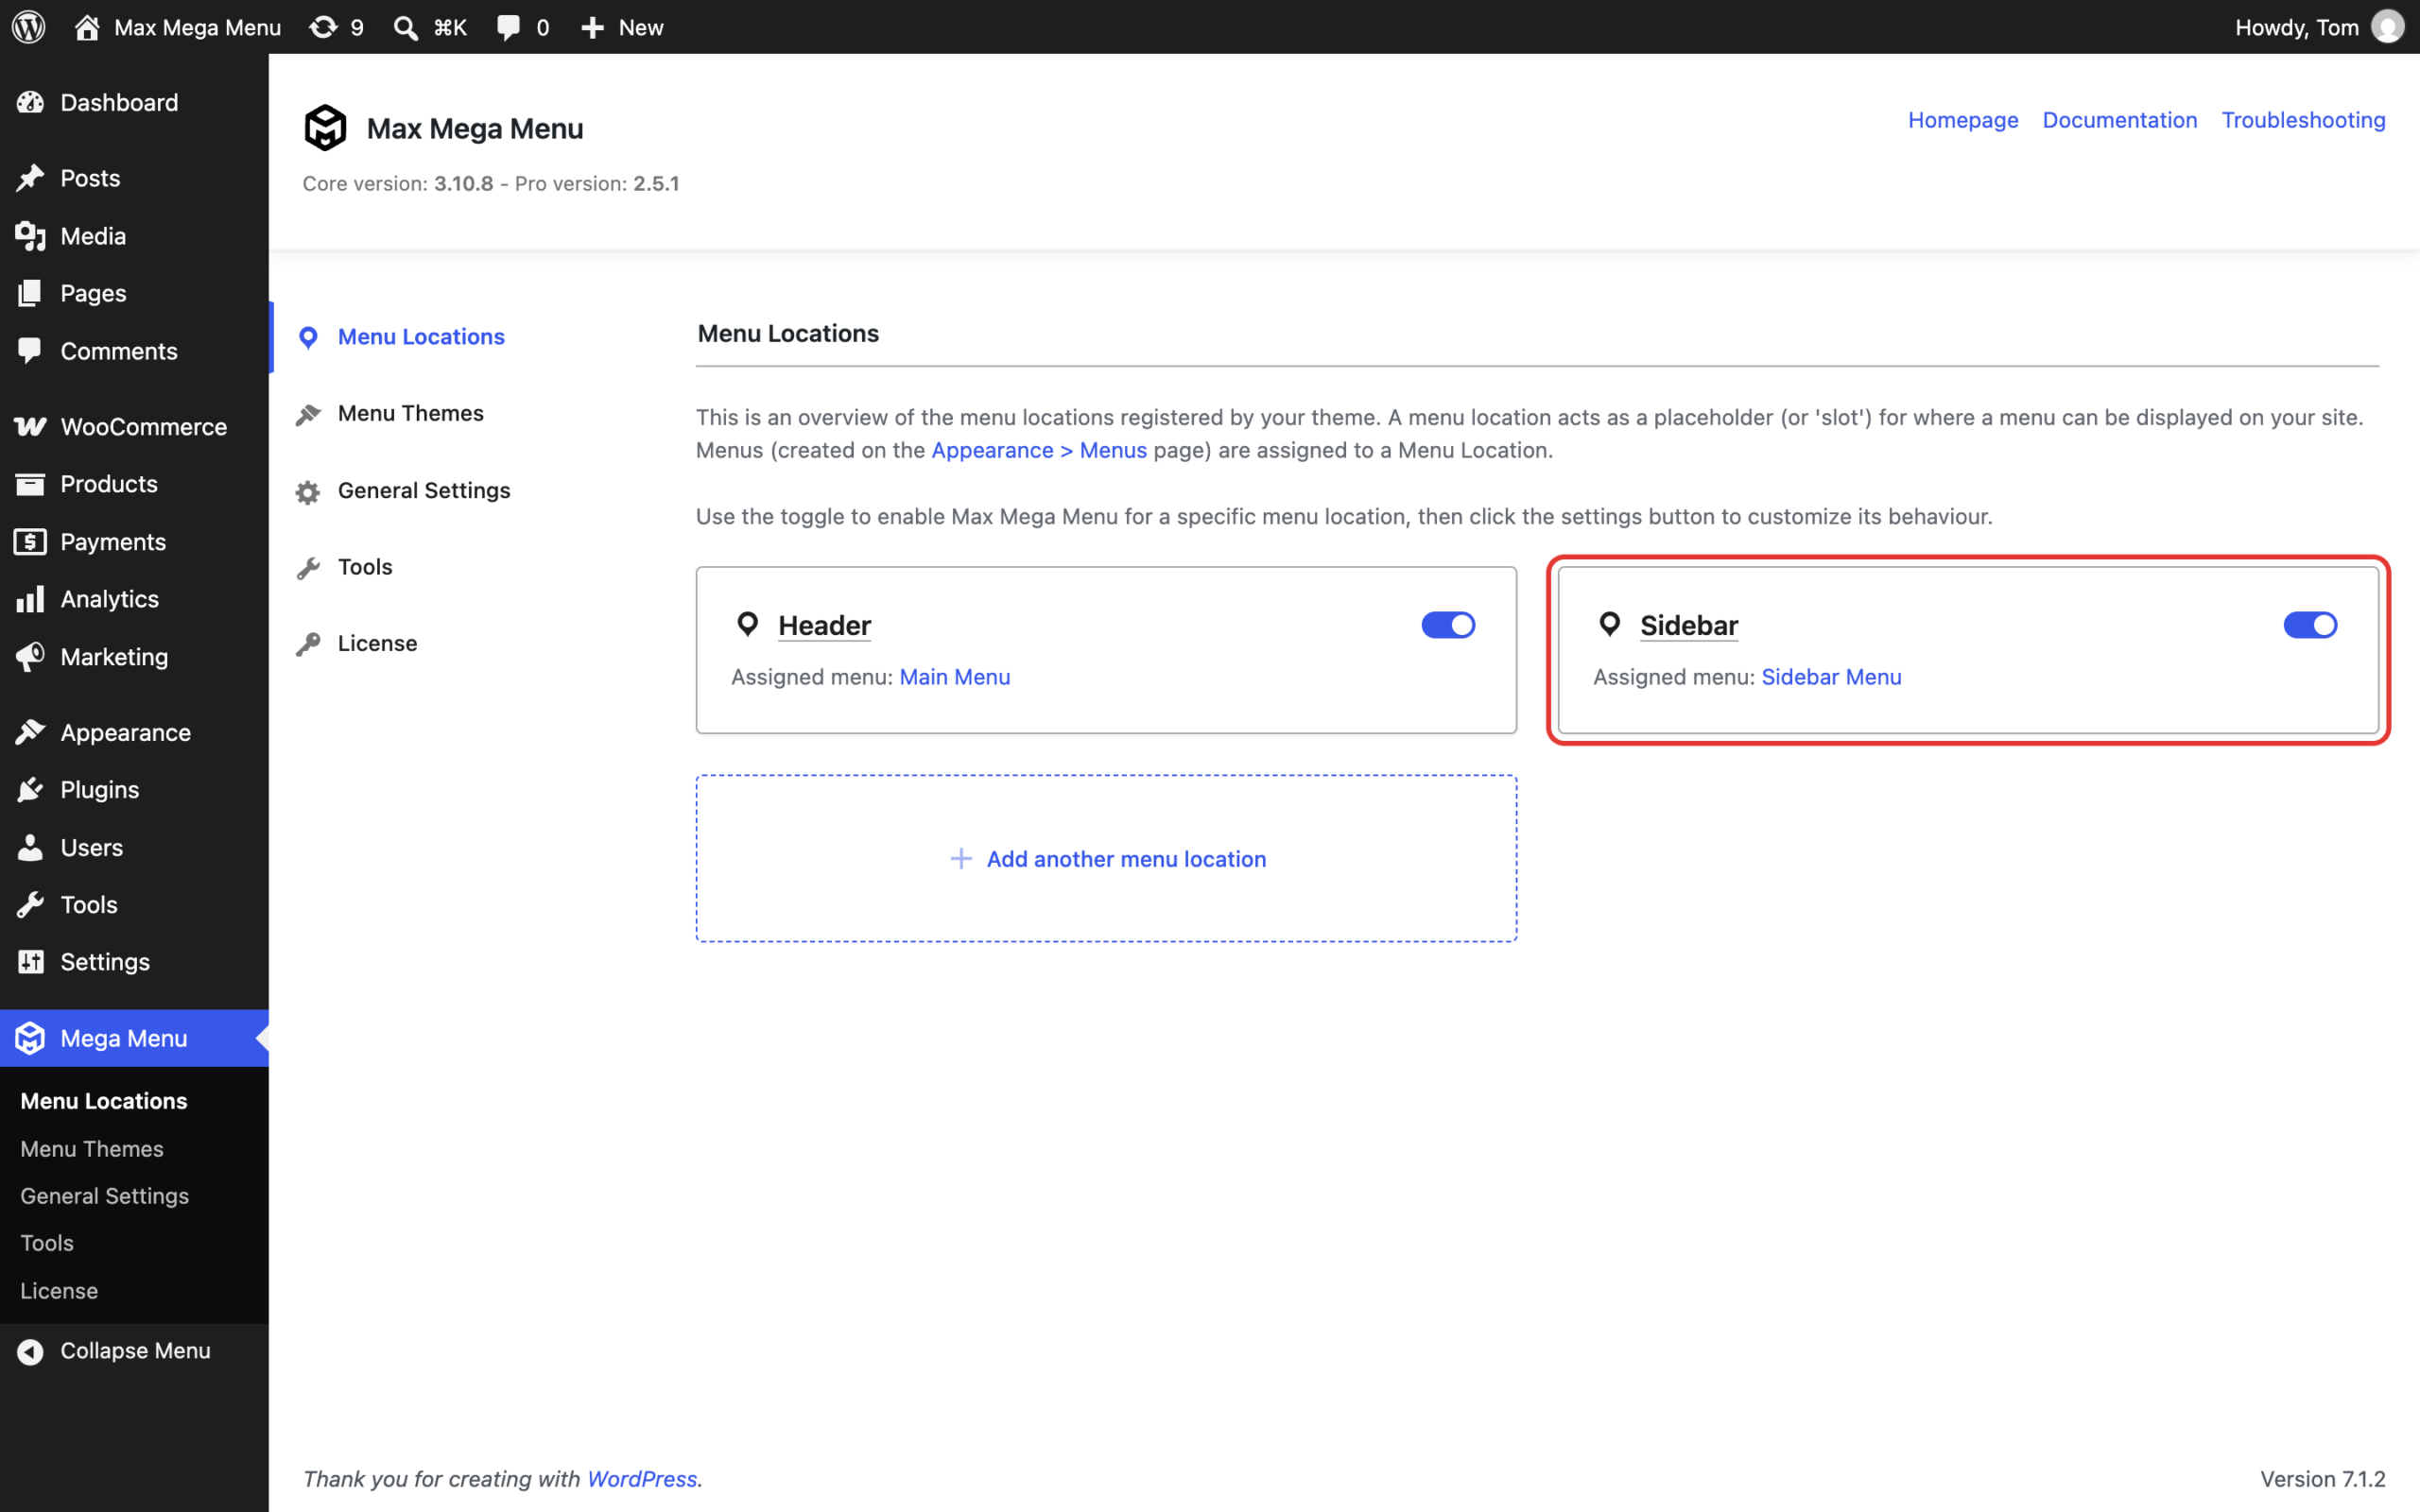
We now have a new menu location which we will output within our theme using PHP.
Tip: Advanced users may prefer to register a new menu location using the register_nav_menu function.
Step 2: Assigning a menu to the new location
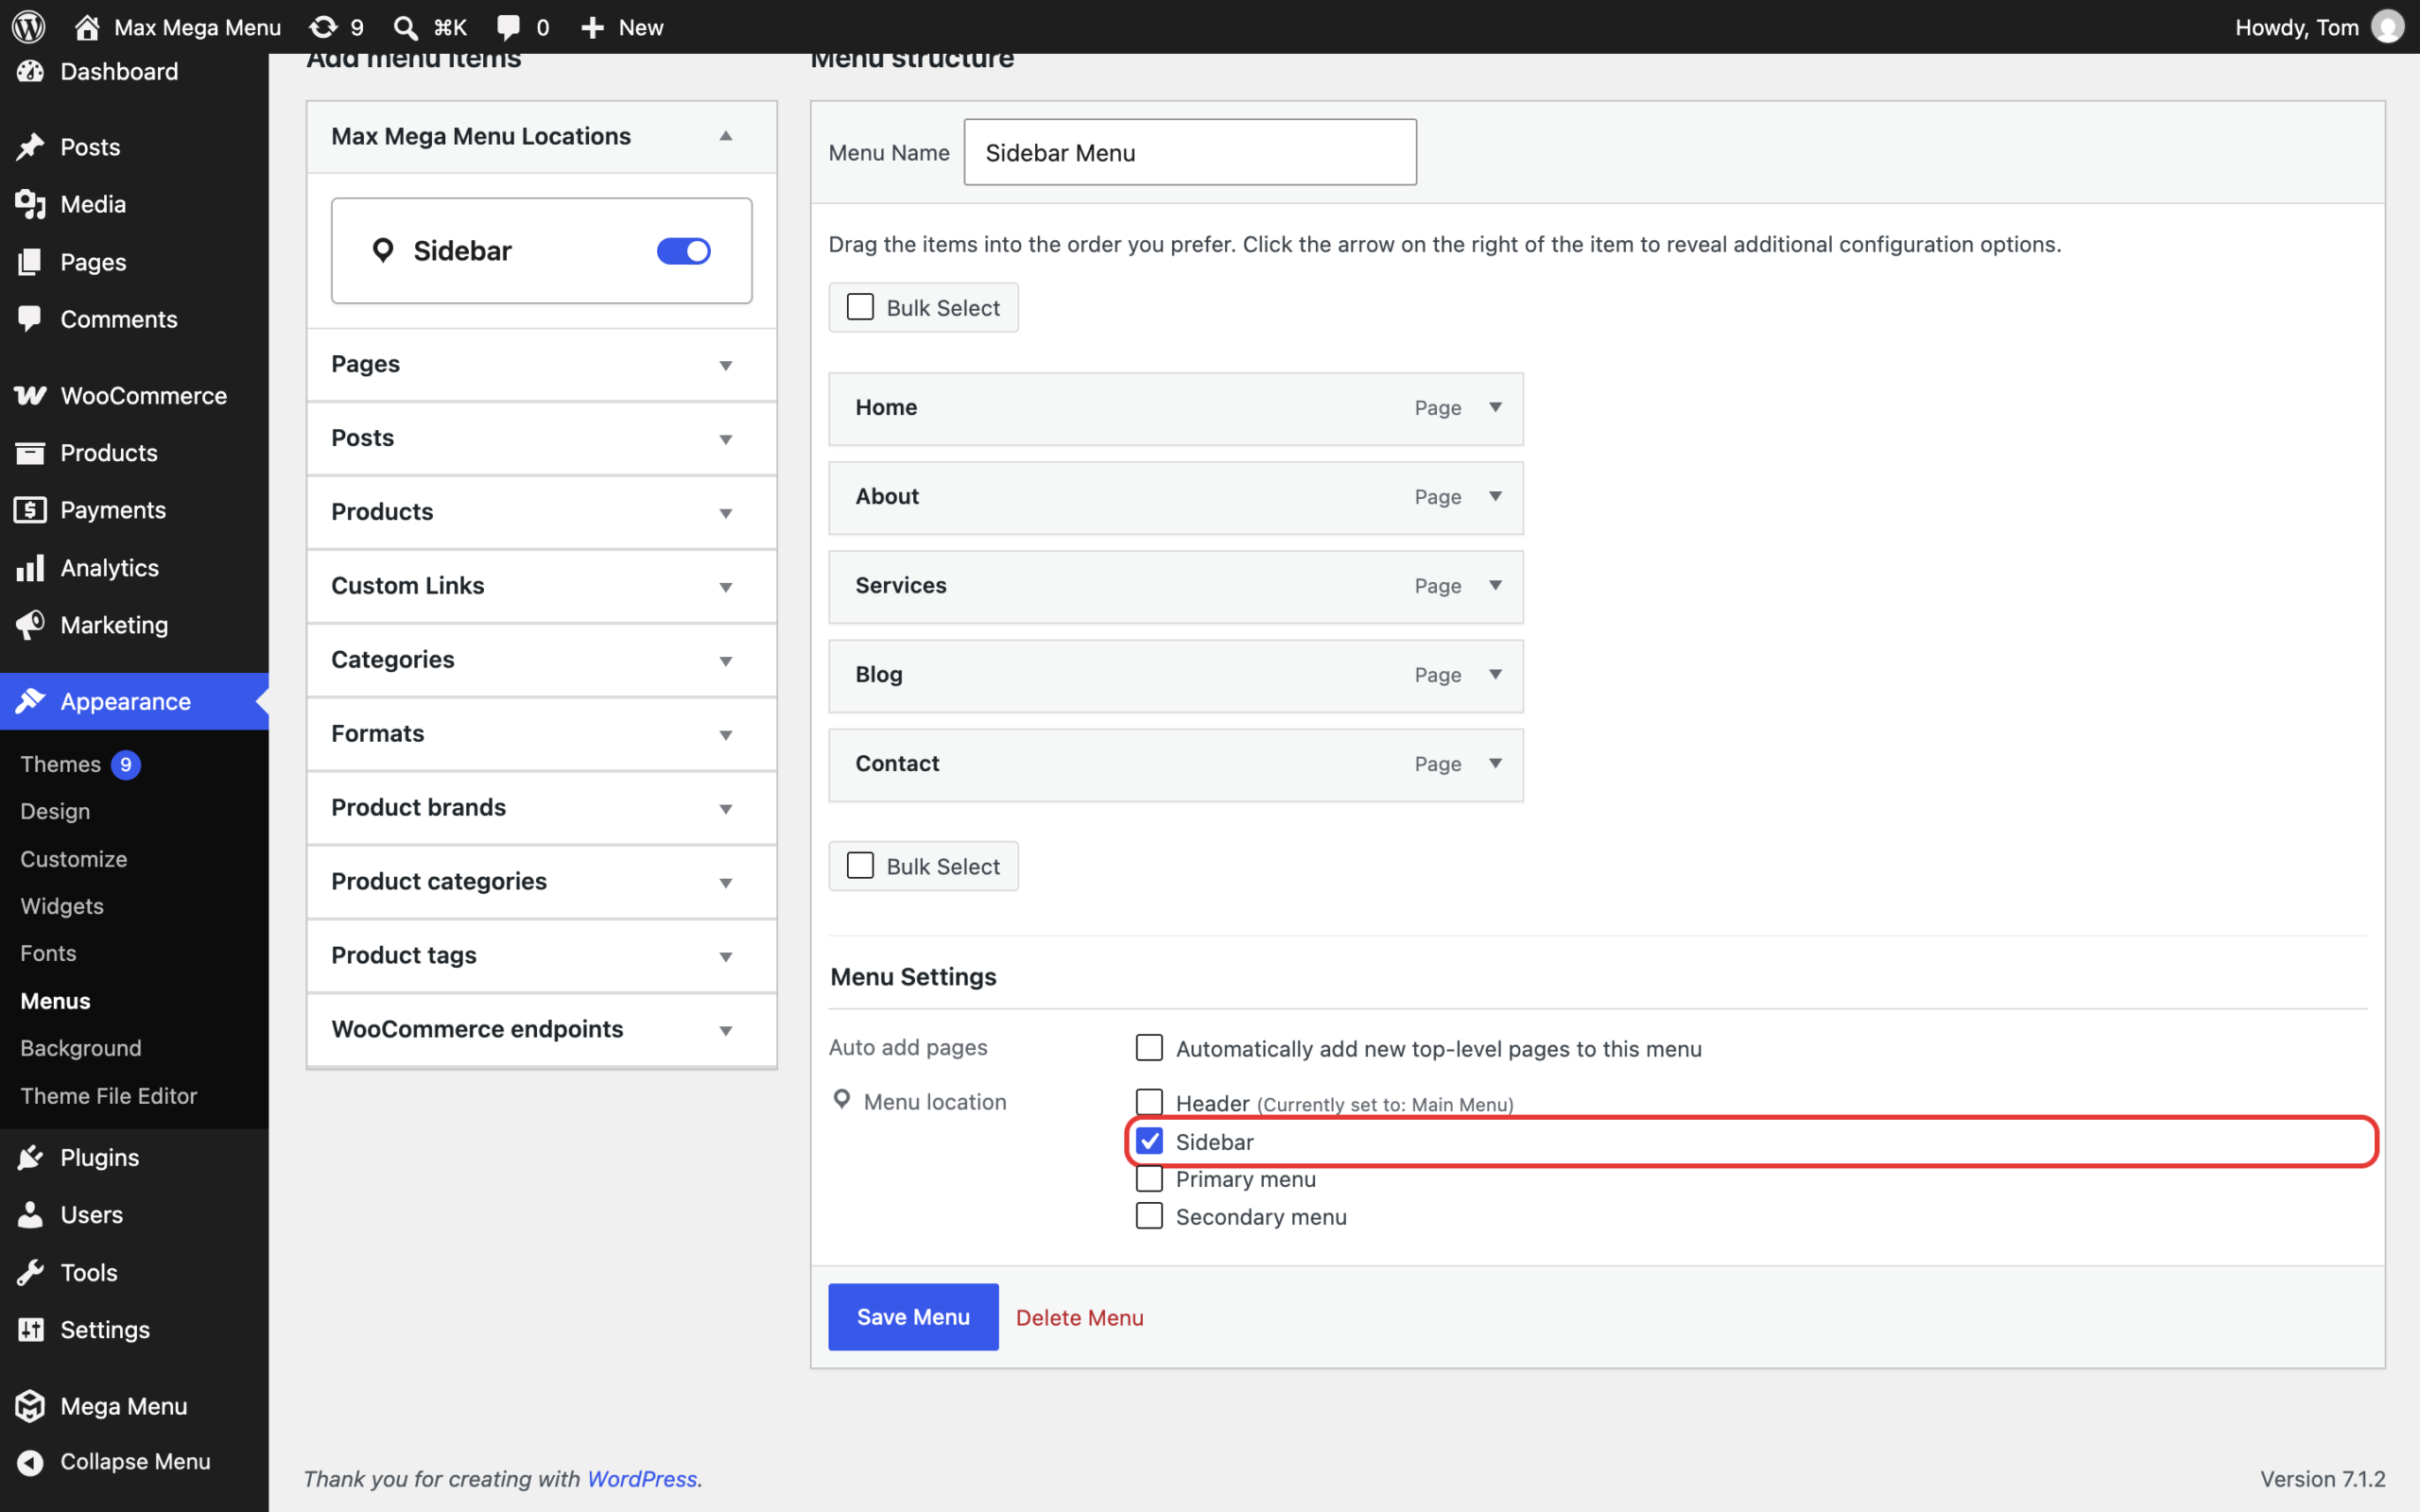
Under Appearance > Menus, create a new menu and tick the new location under “Menu location” in the Menu Settings (or assign a menu when creating the location in Step 1).
Step 3: Outputting the menu location
We have now registered a menu location, tagged a menu to that location and enabled MMM for that location. All we need to do now is output the menu in our theme template files.
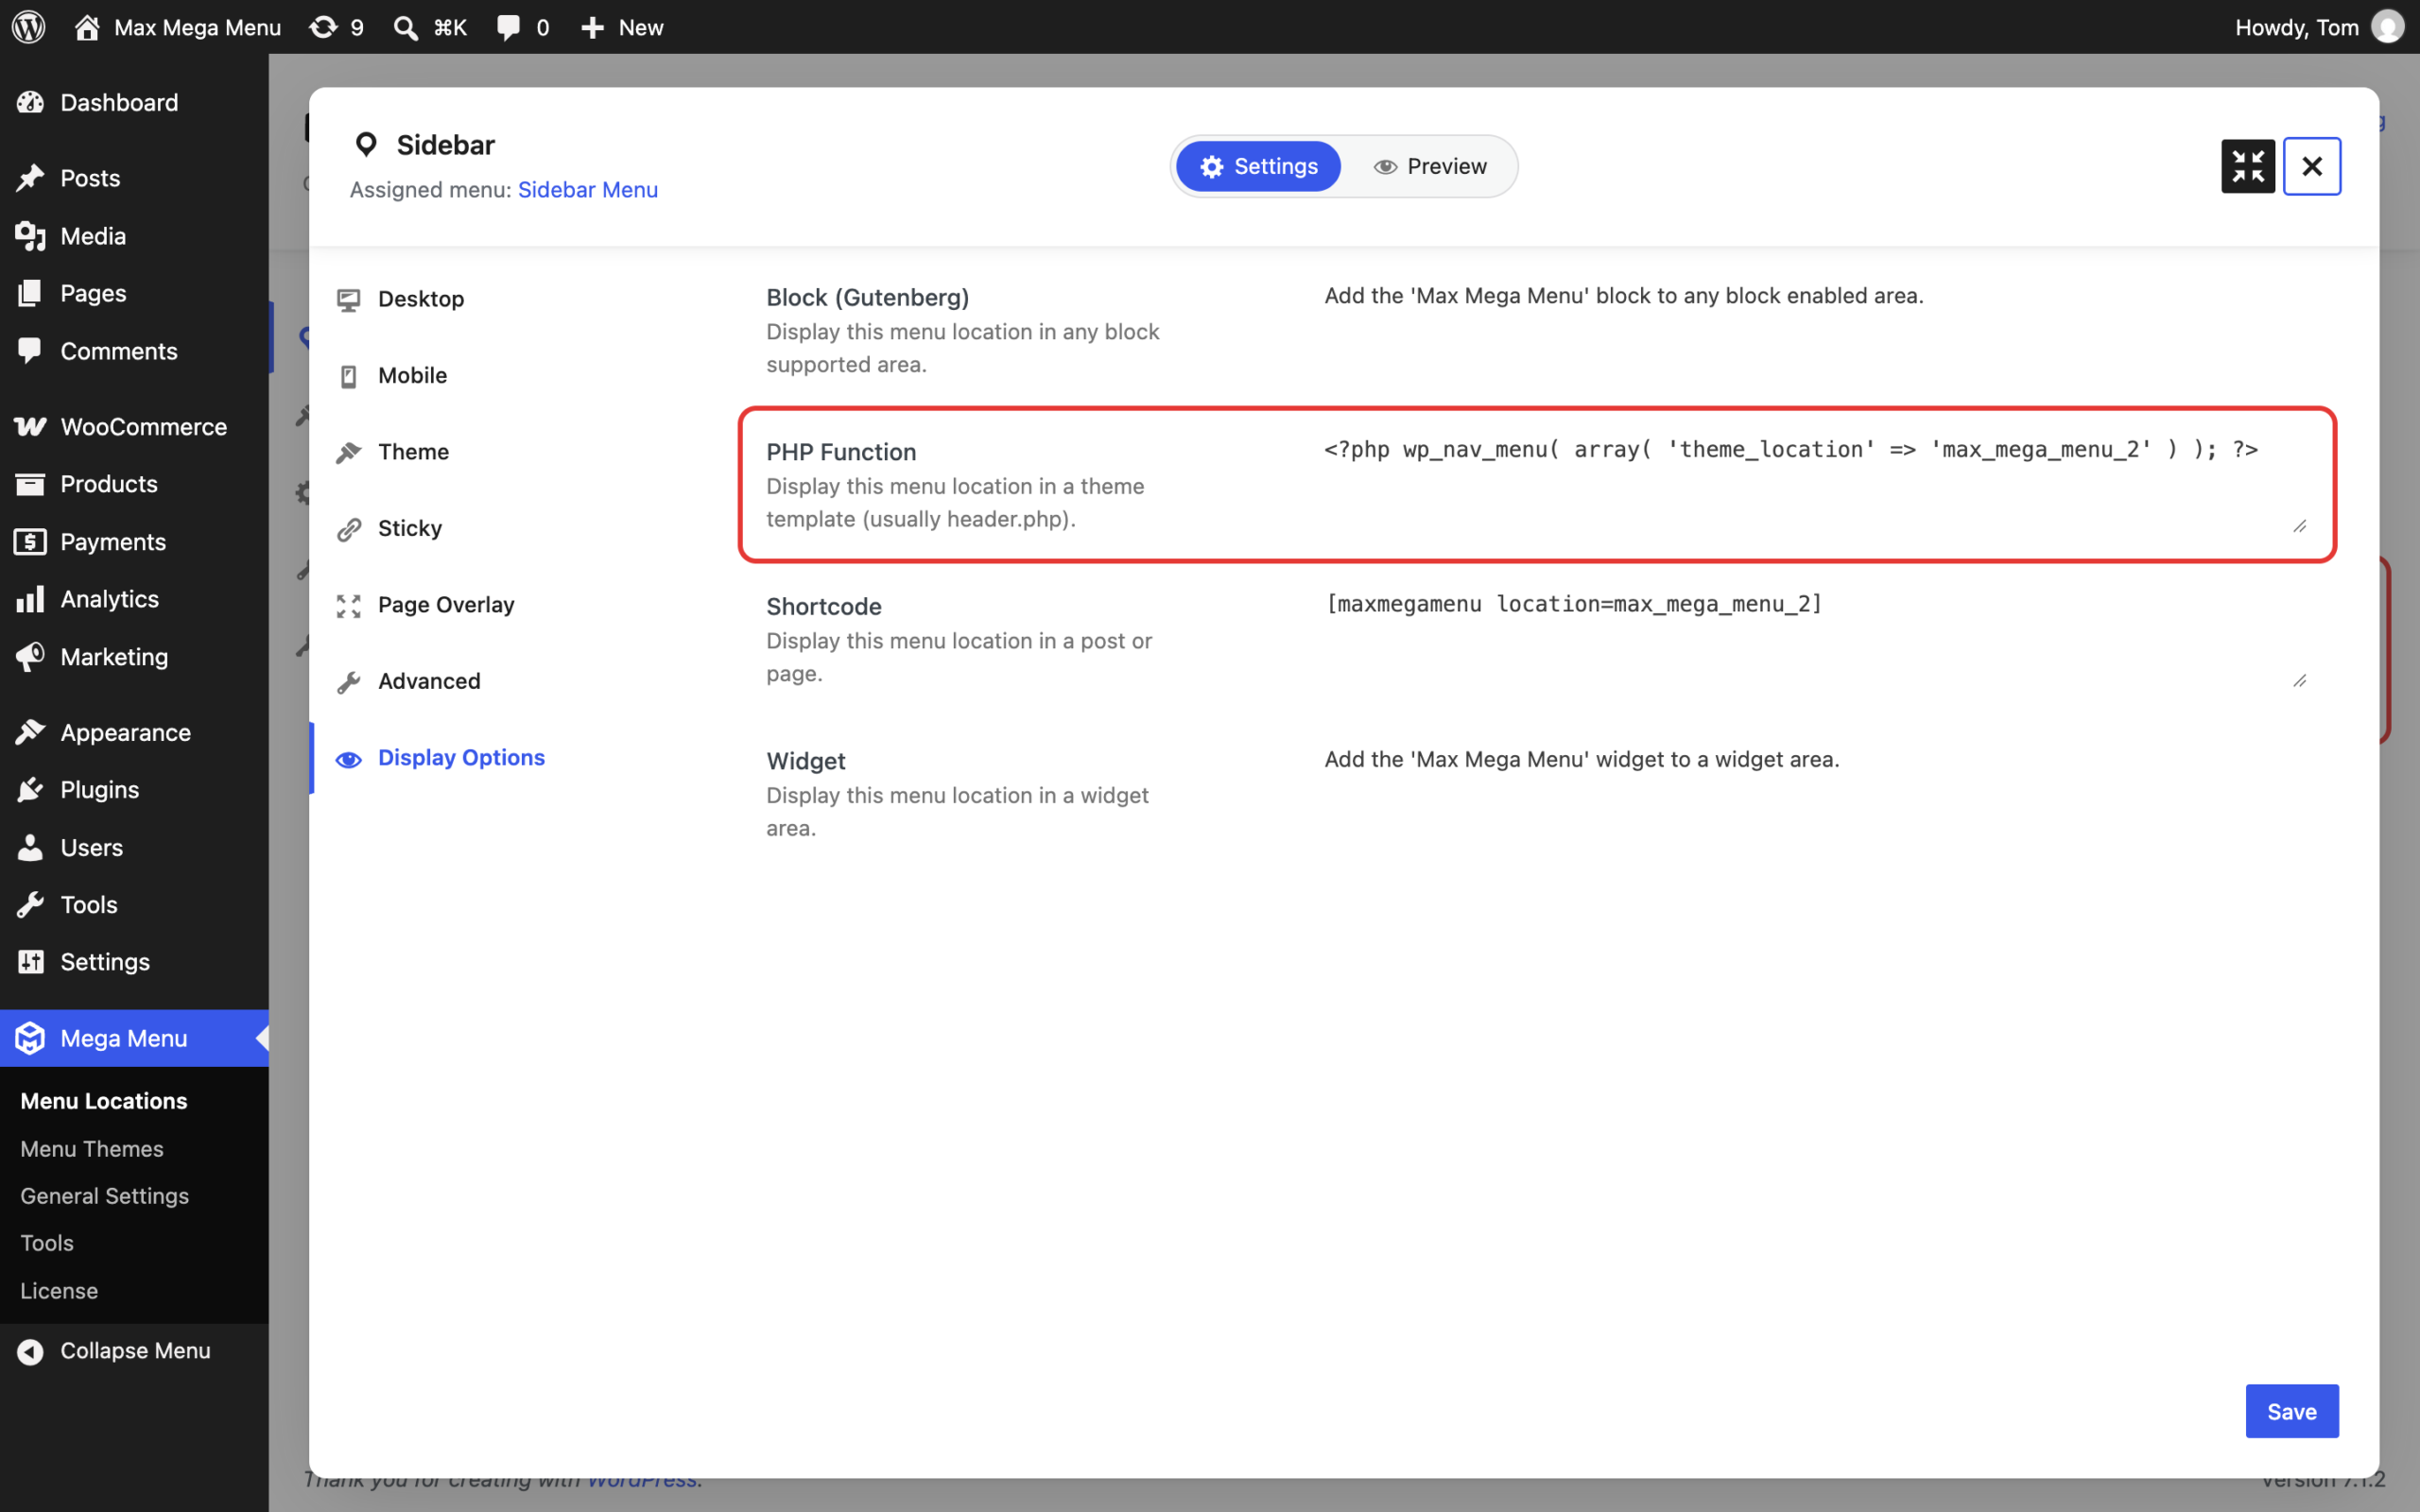
Head back to Mega Menu > Menu Locations and click the new menu location to open its settings. On the Display Options tab you will find the PHP code to use to output the menu location:
You can paste this code anywhere into your theme template files. Usually it is placed within the header.php file. In our case we’re using the WordPress theme editor (you can use your own text editor if you prefer), and have pasted the code just after the opening <body> tag: (Block themes such as Twenty Twenty-Five don’t have a header.php file. For those, use the Max Mega Menu block instead.)
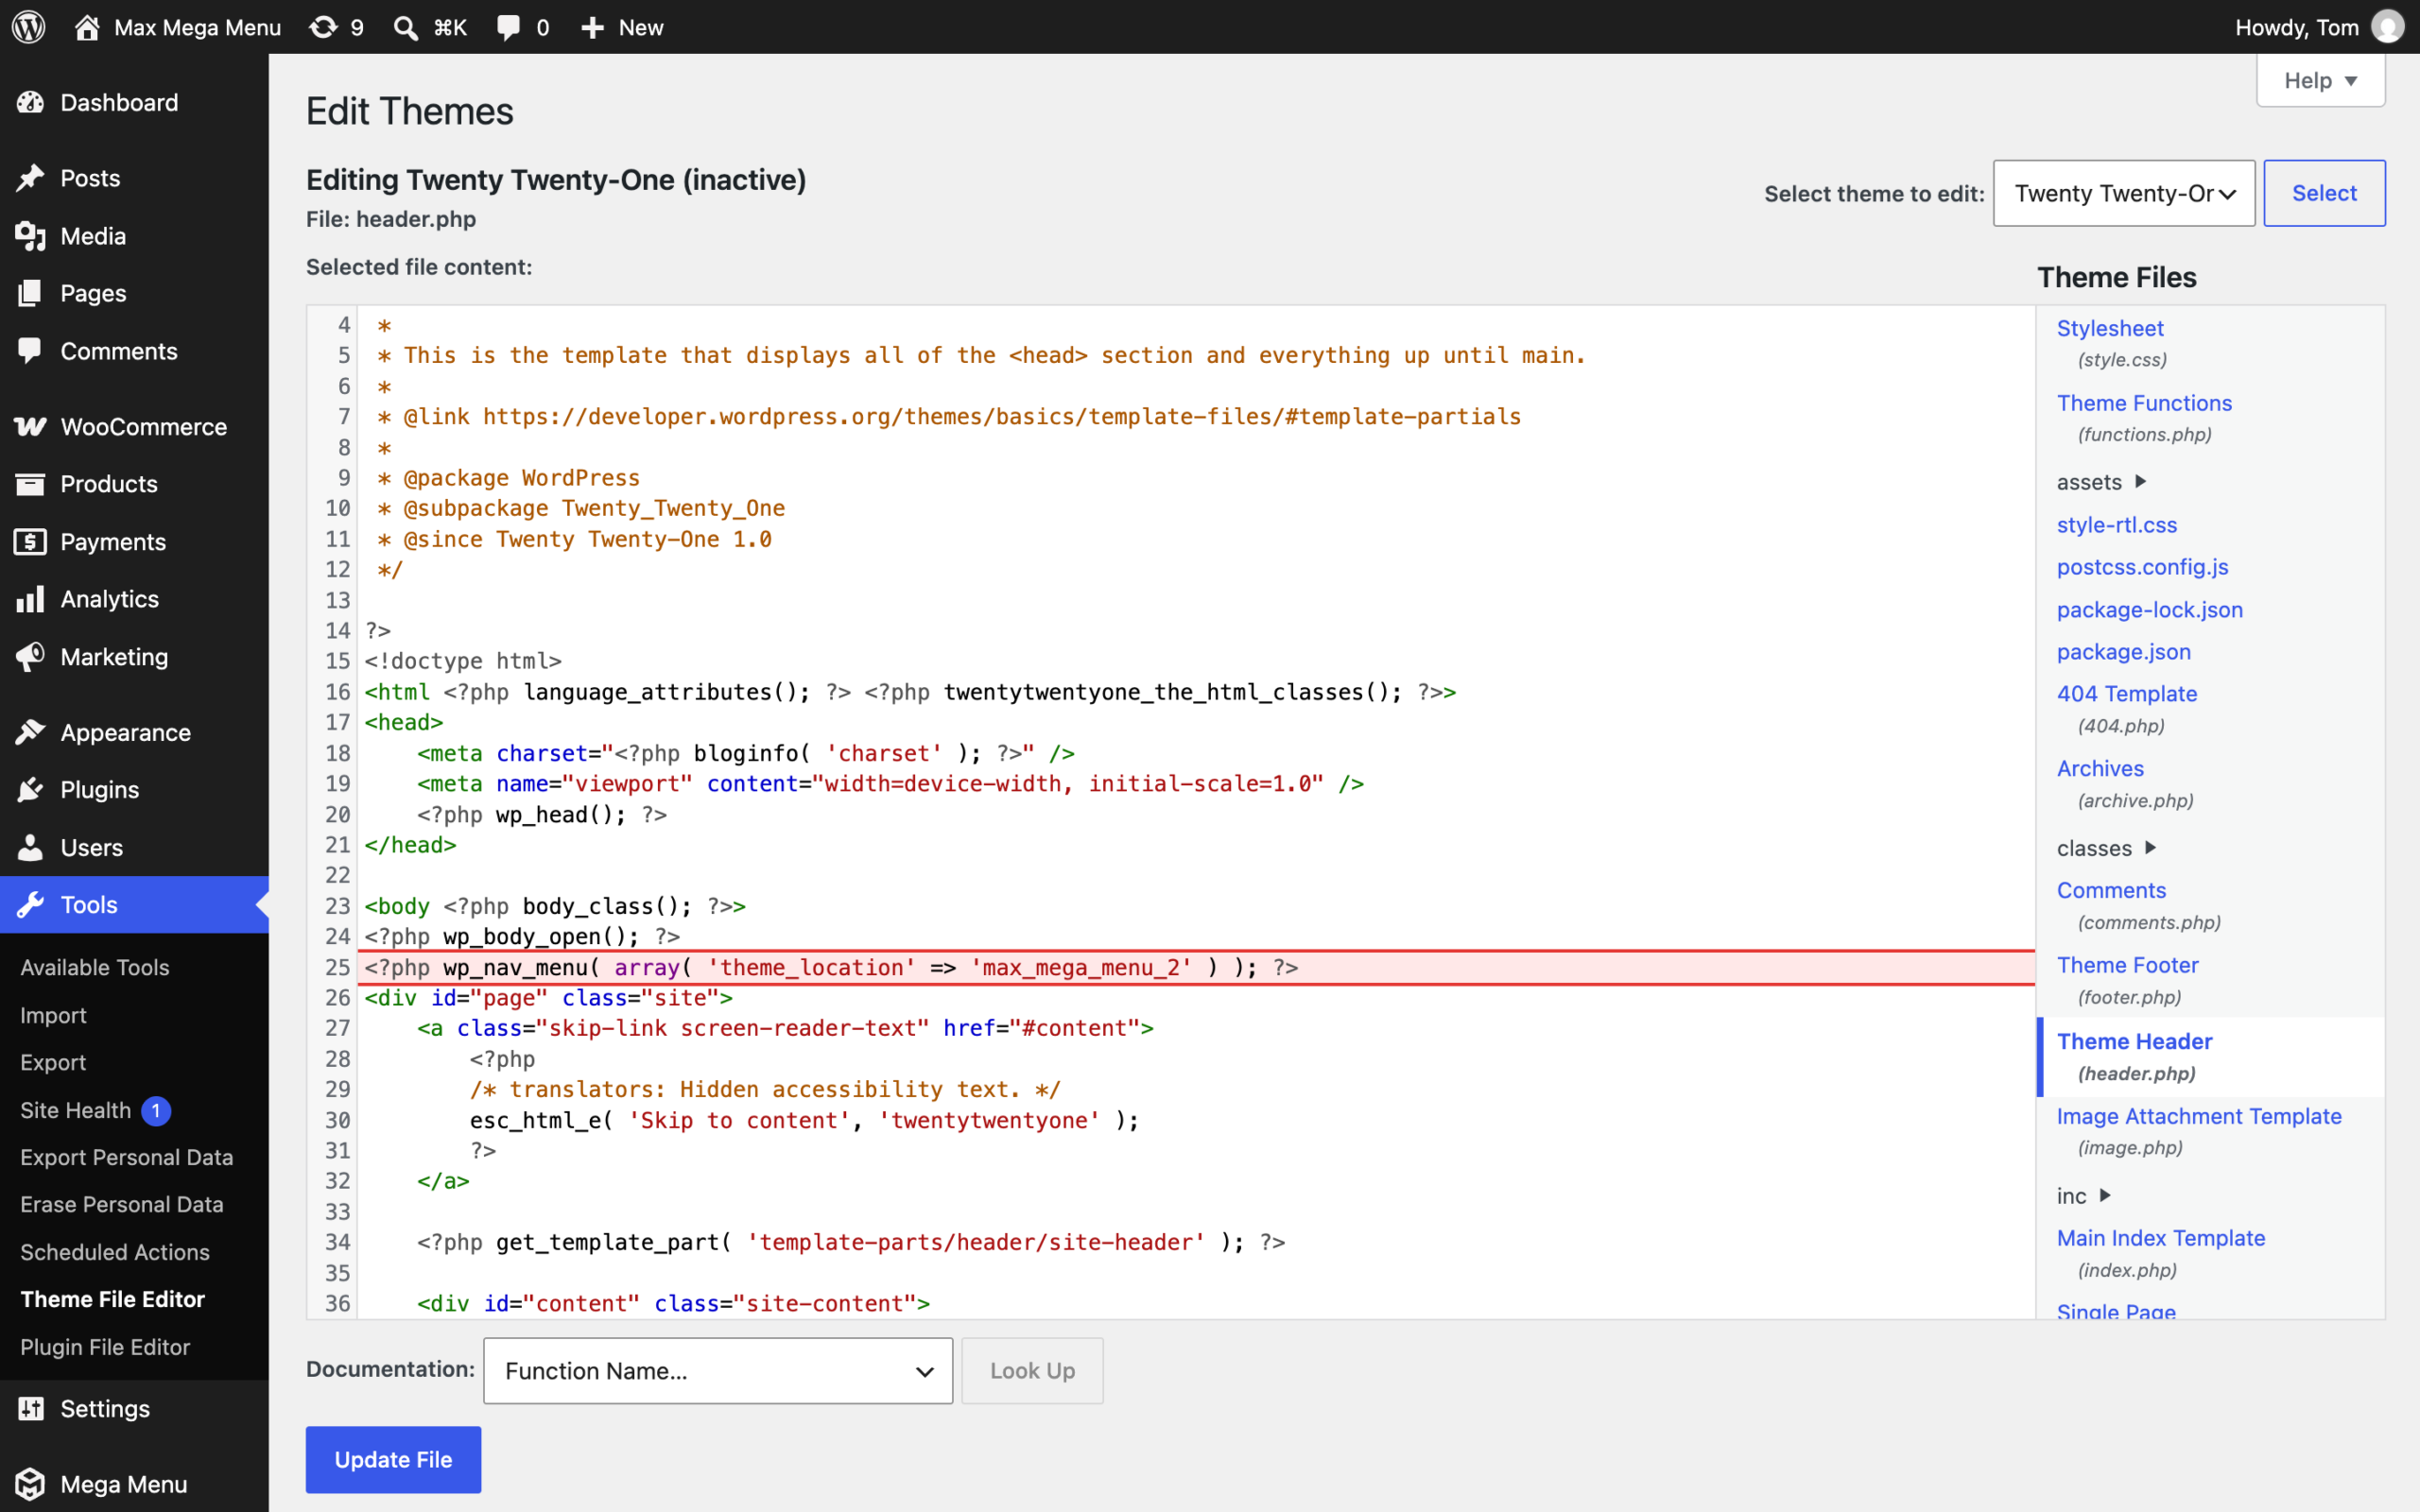
Save the file and the menu will now be output on your site.