Divi 4
Divi 4 includes a new header builder. The addition of the header builder allows us to perfectly integrate Max Mega Menu with Divi without the need for custom code or a child theme.
If you are using Divi 5, check out the integration guide which details the new Max Mega Menu native module for Divi.
Step 1 – Create the menu
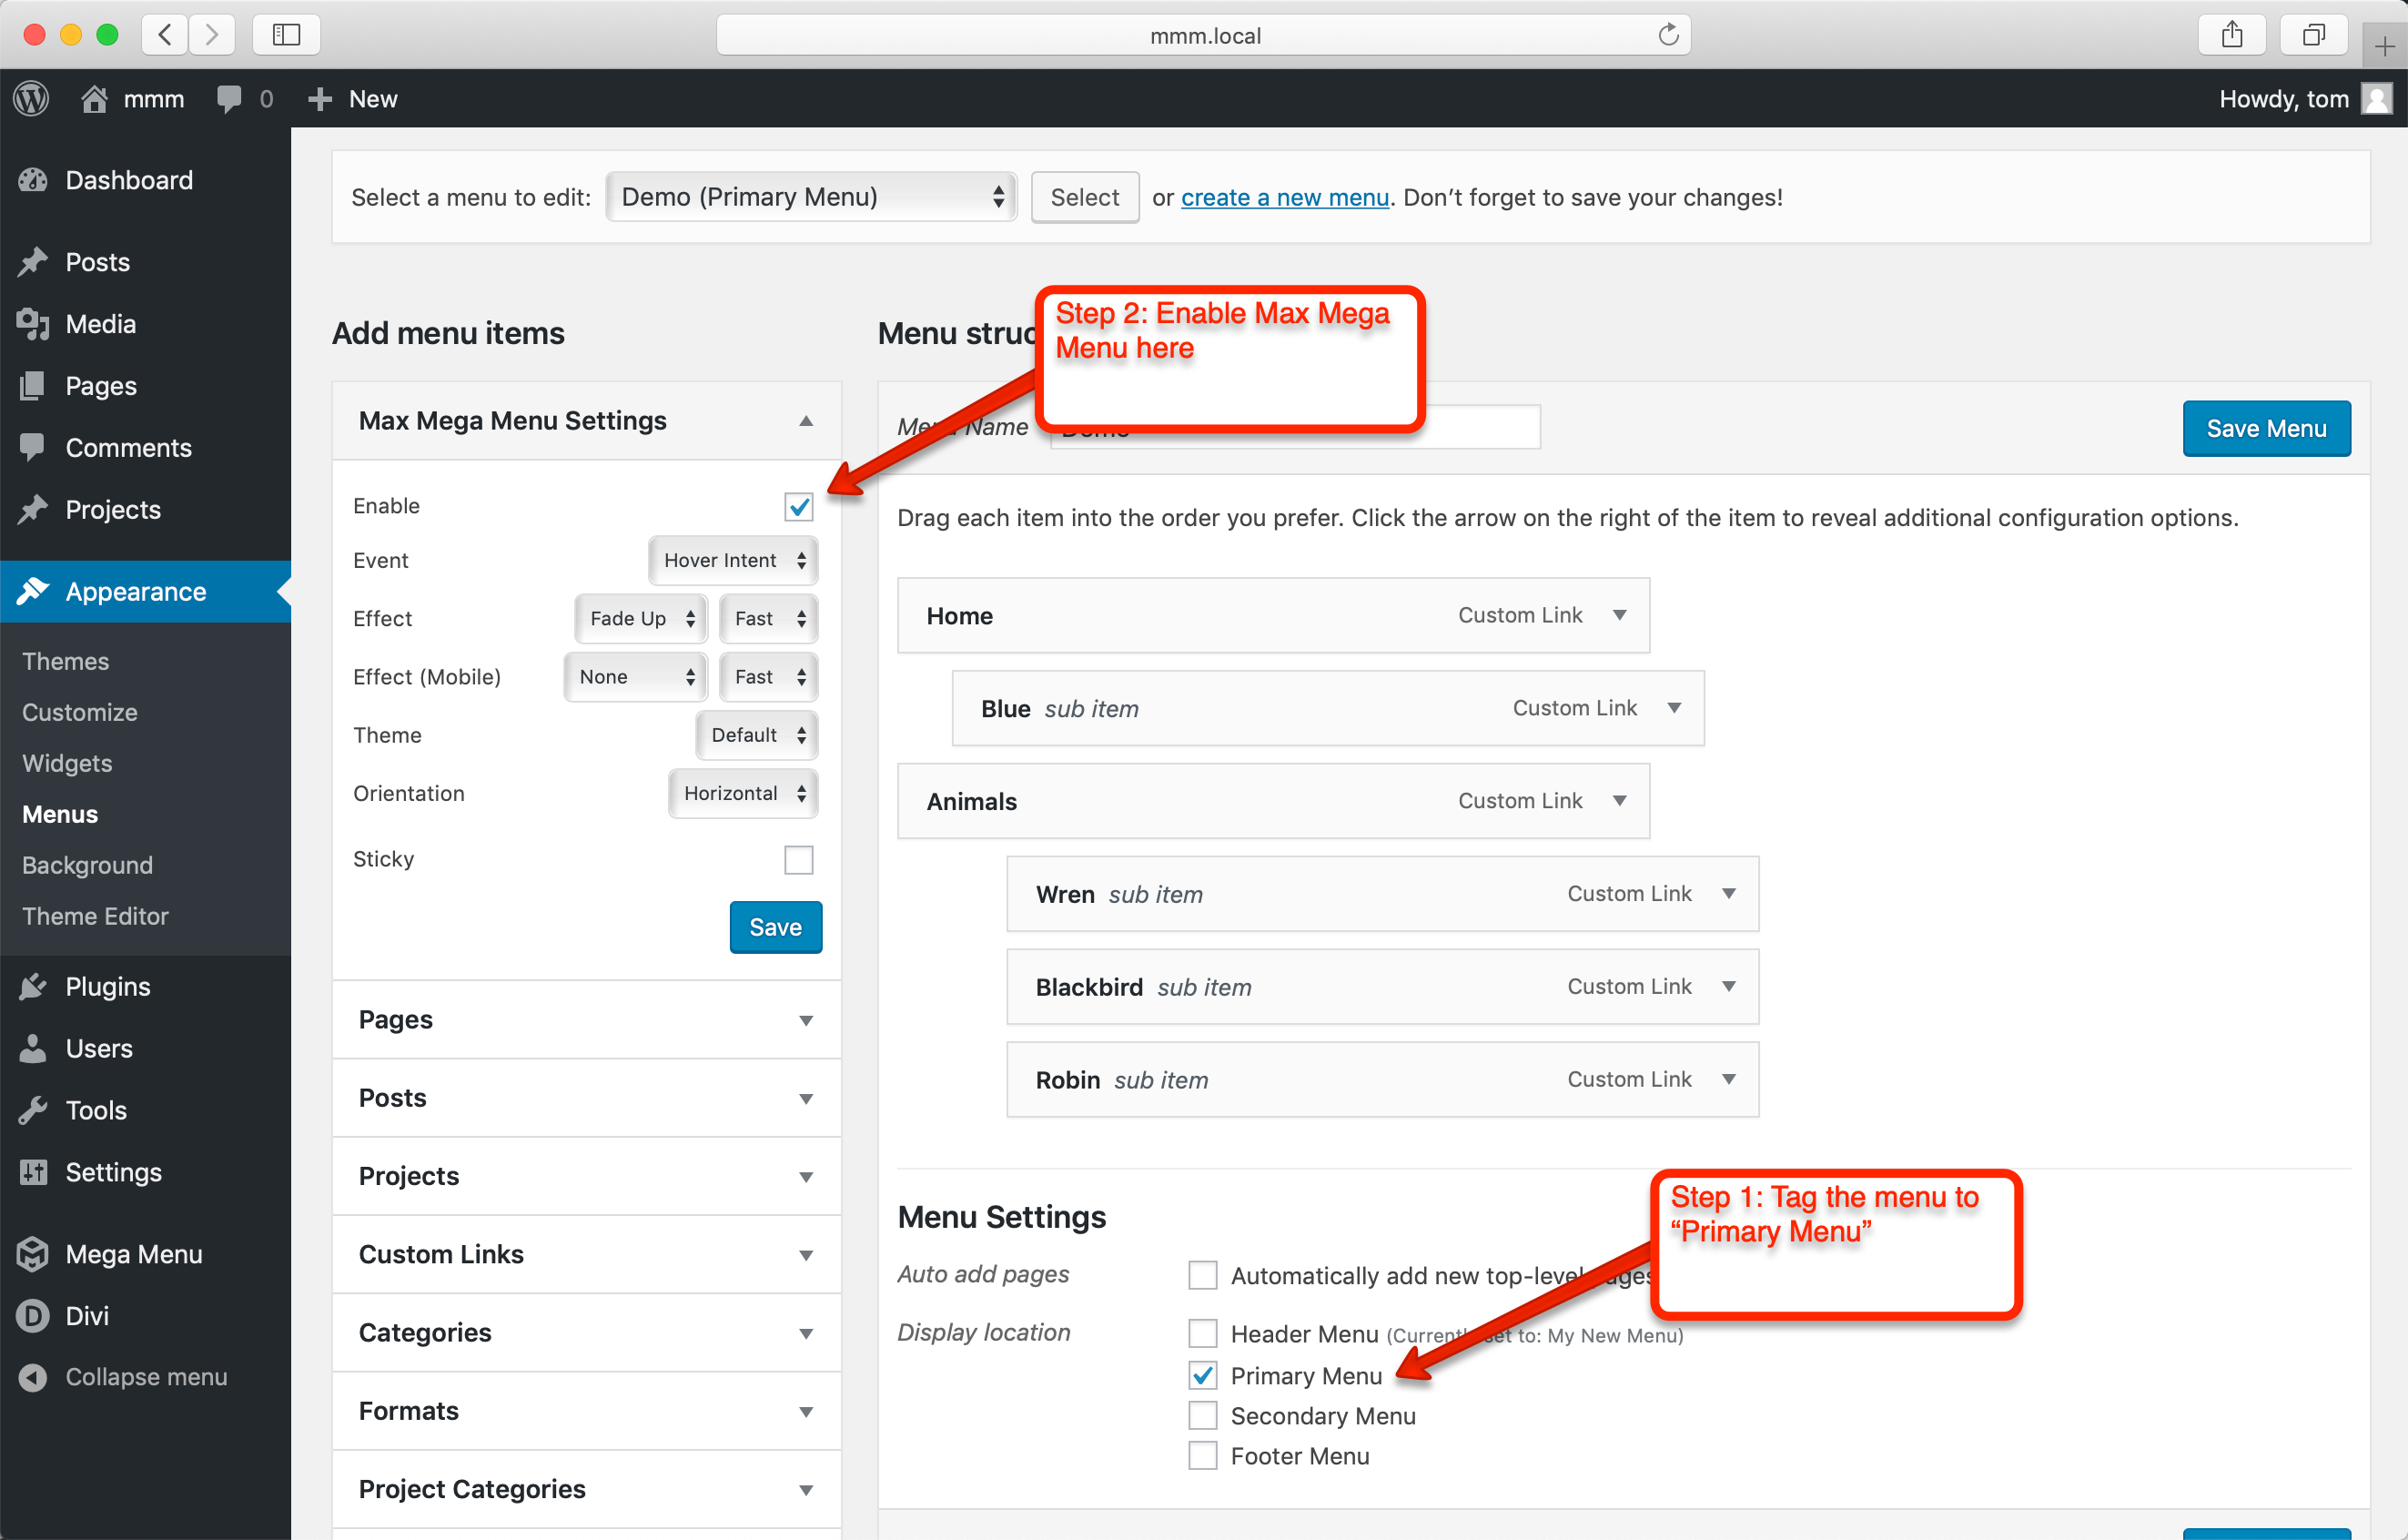
This step is the same for all themes. First we need to create a new menu, tag it the Primary Menu location and enable Max Mega Menu.
Step 2: Output the menu using the Divi Theme Builder
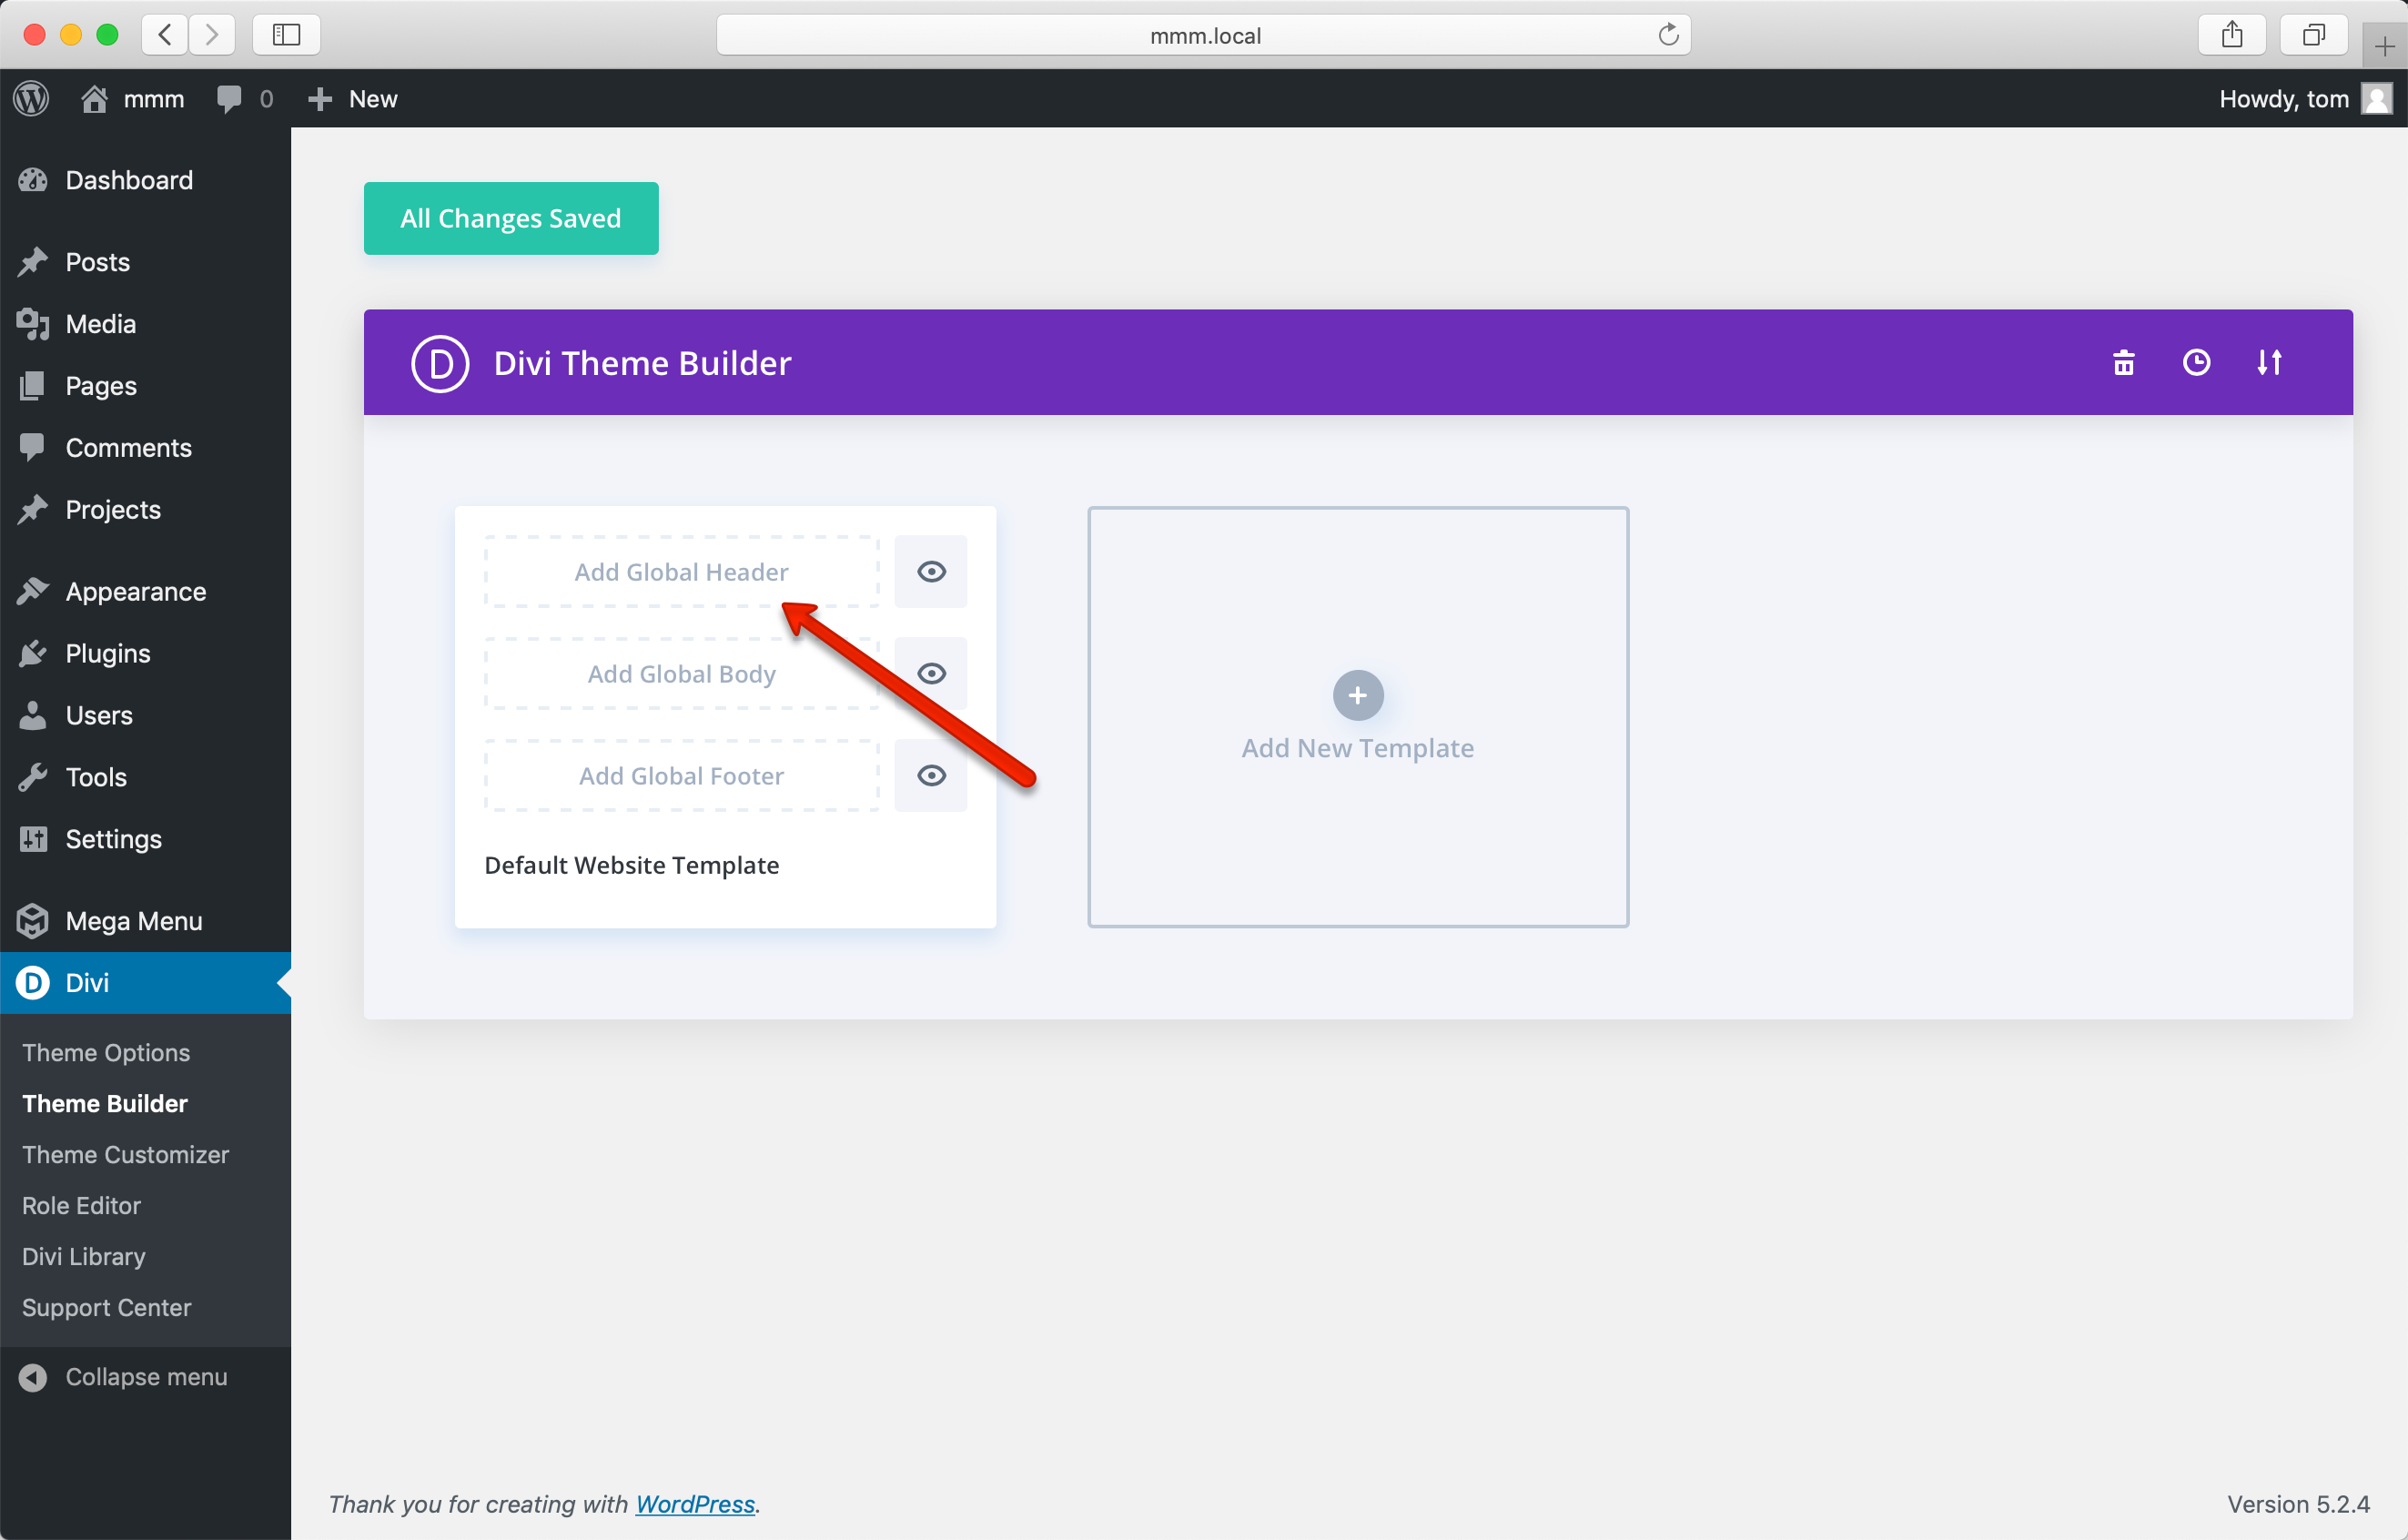
Go to Divi > Theme Builder and click “Add Global Header”. In the small popup that appears, click “Build Global Header”. On the next screen, click “Build From Scratch”.
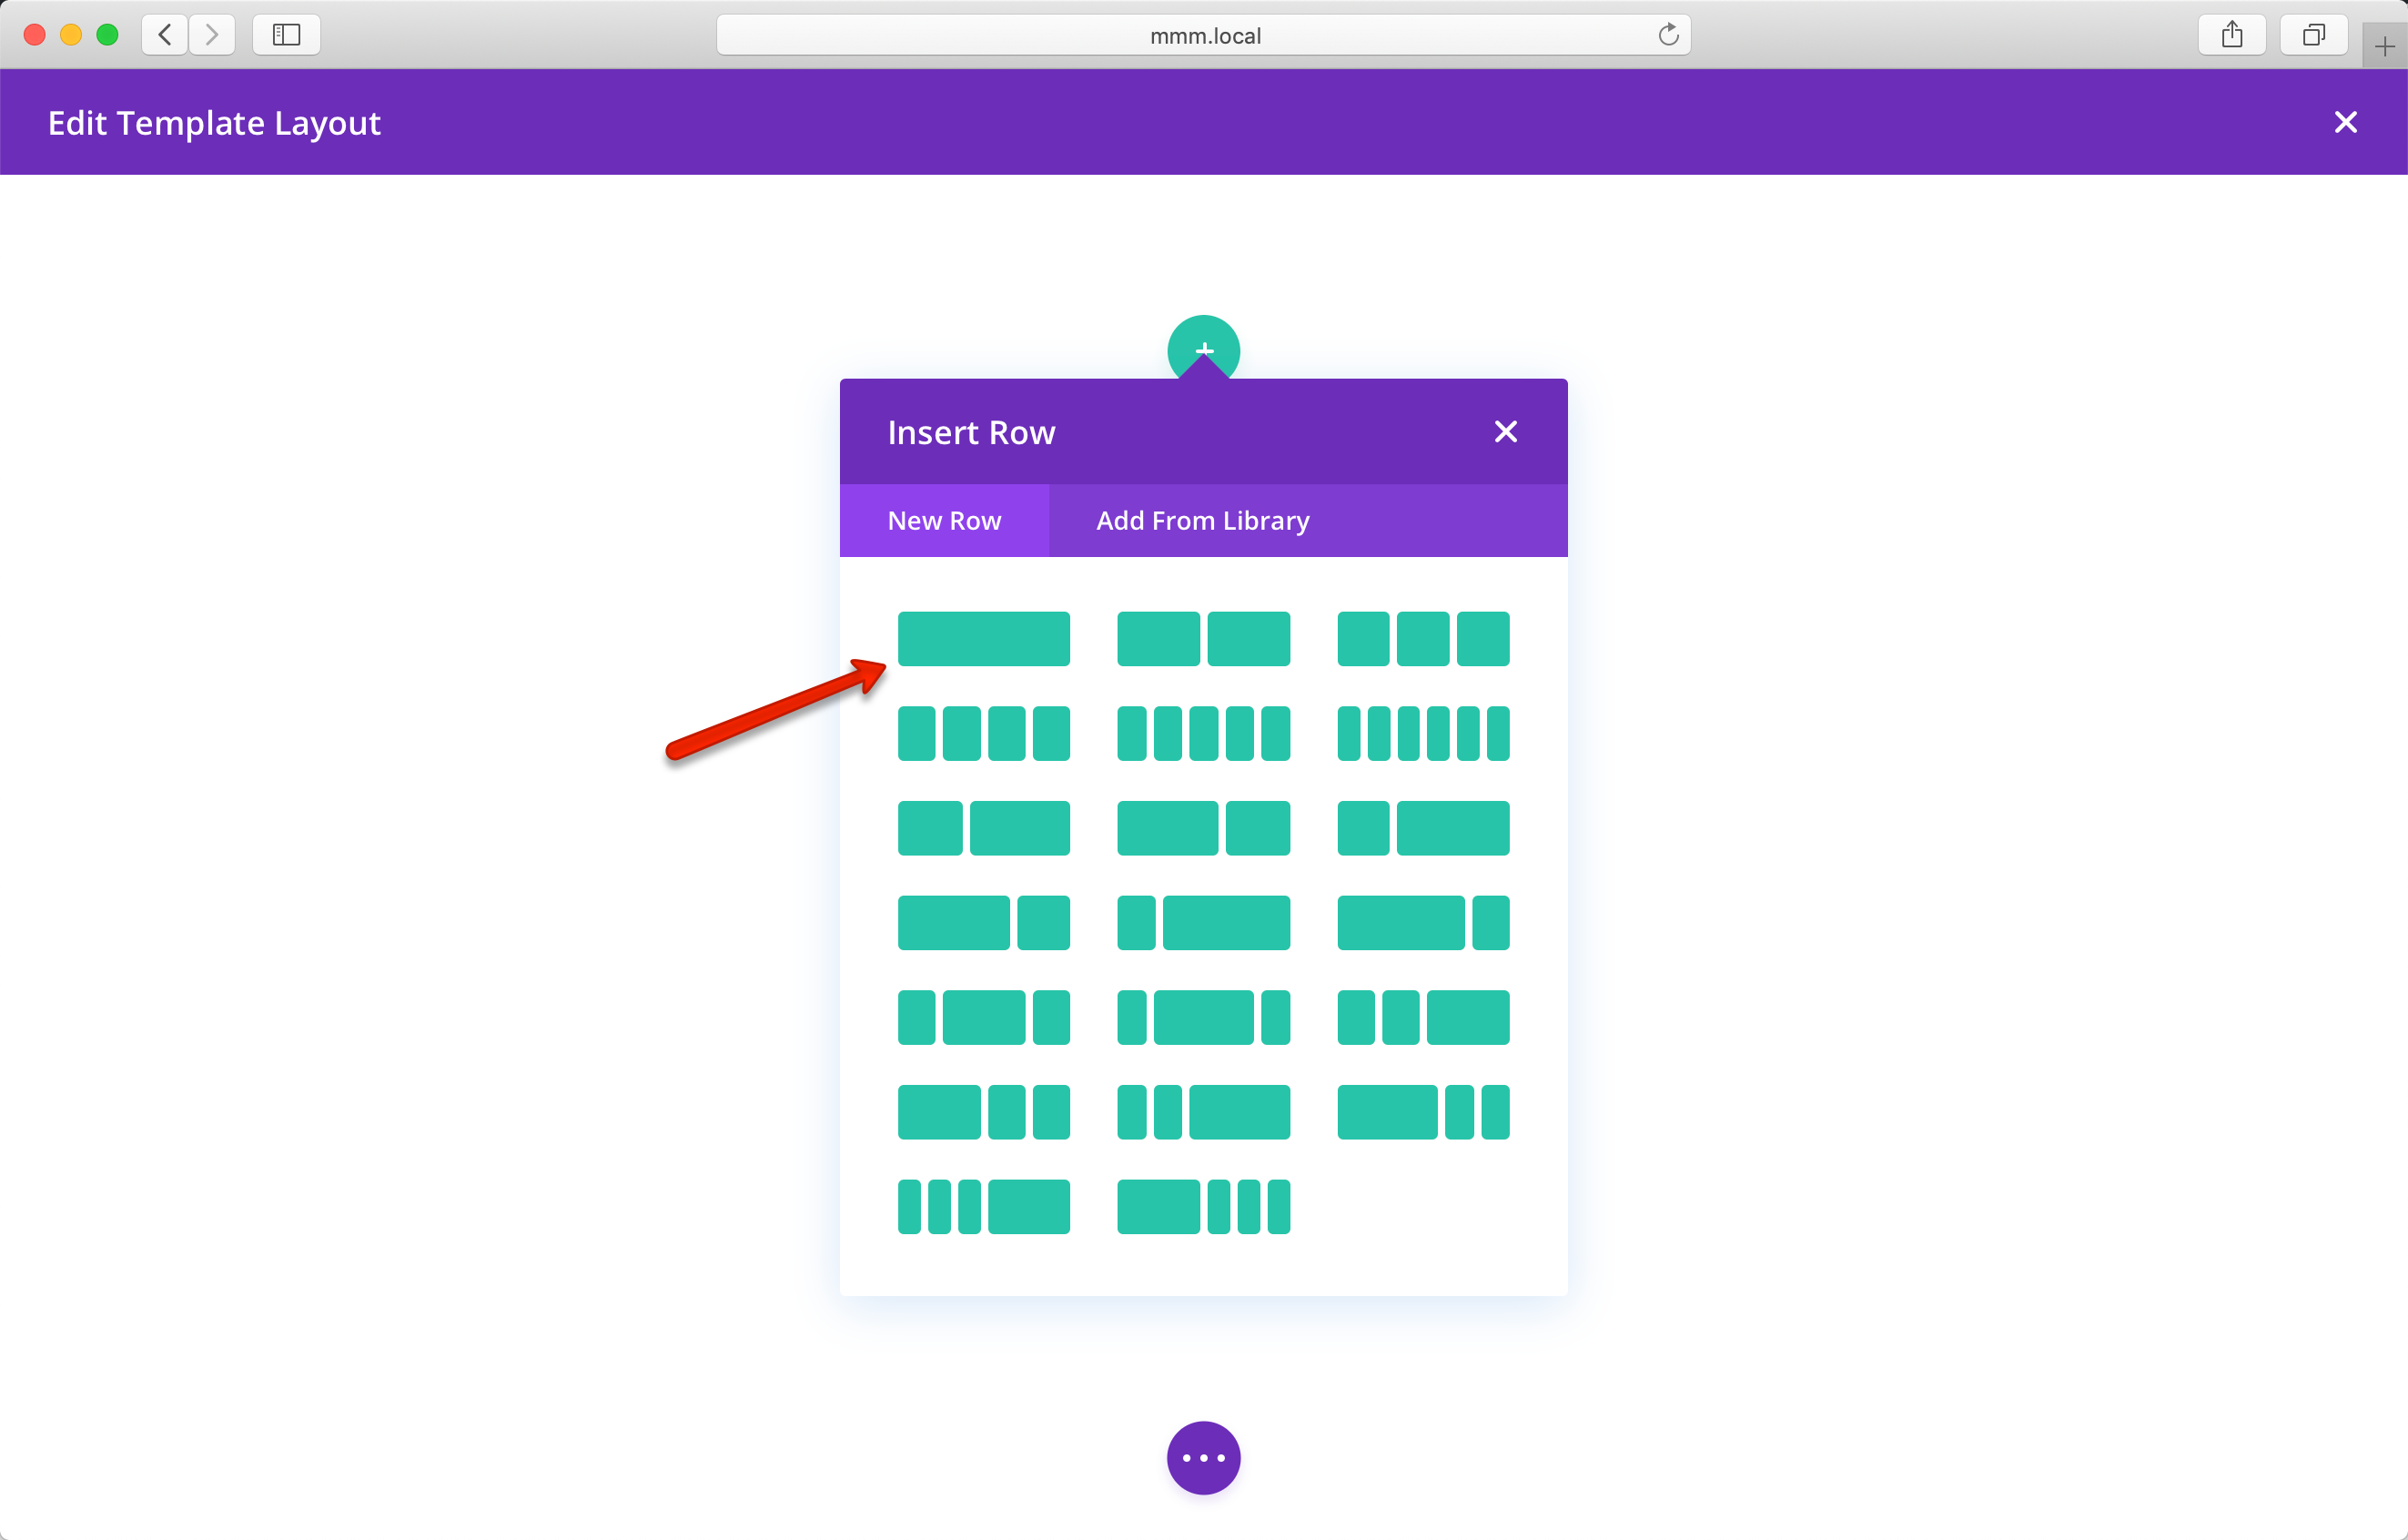
Create a new full width row:
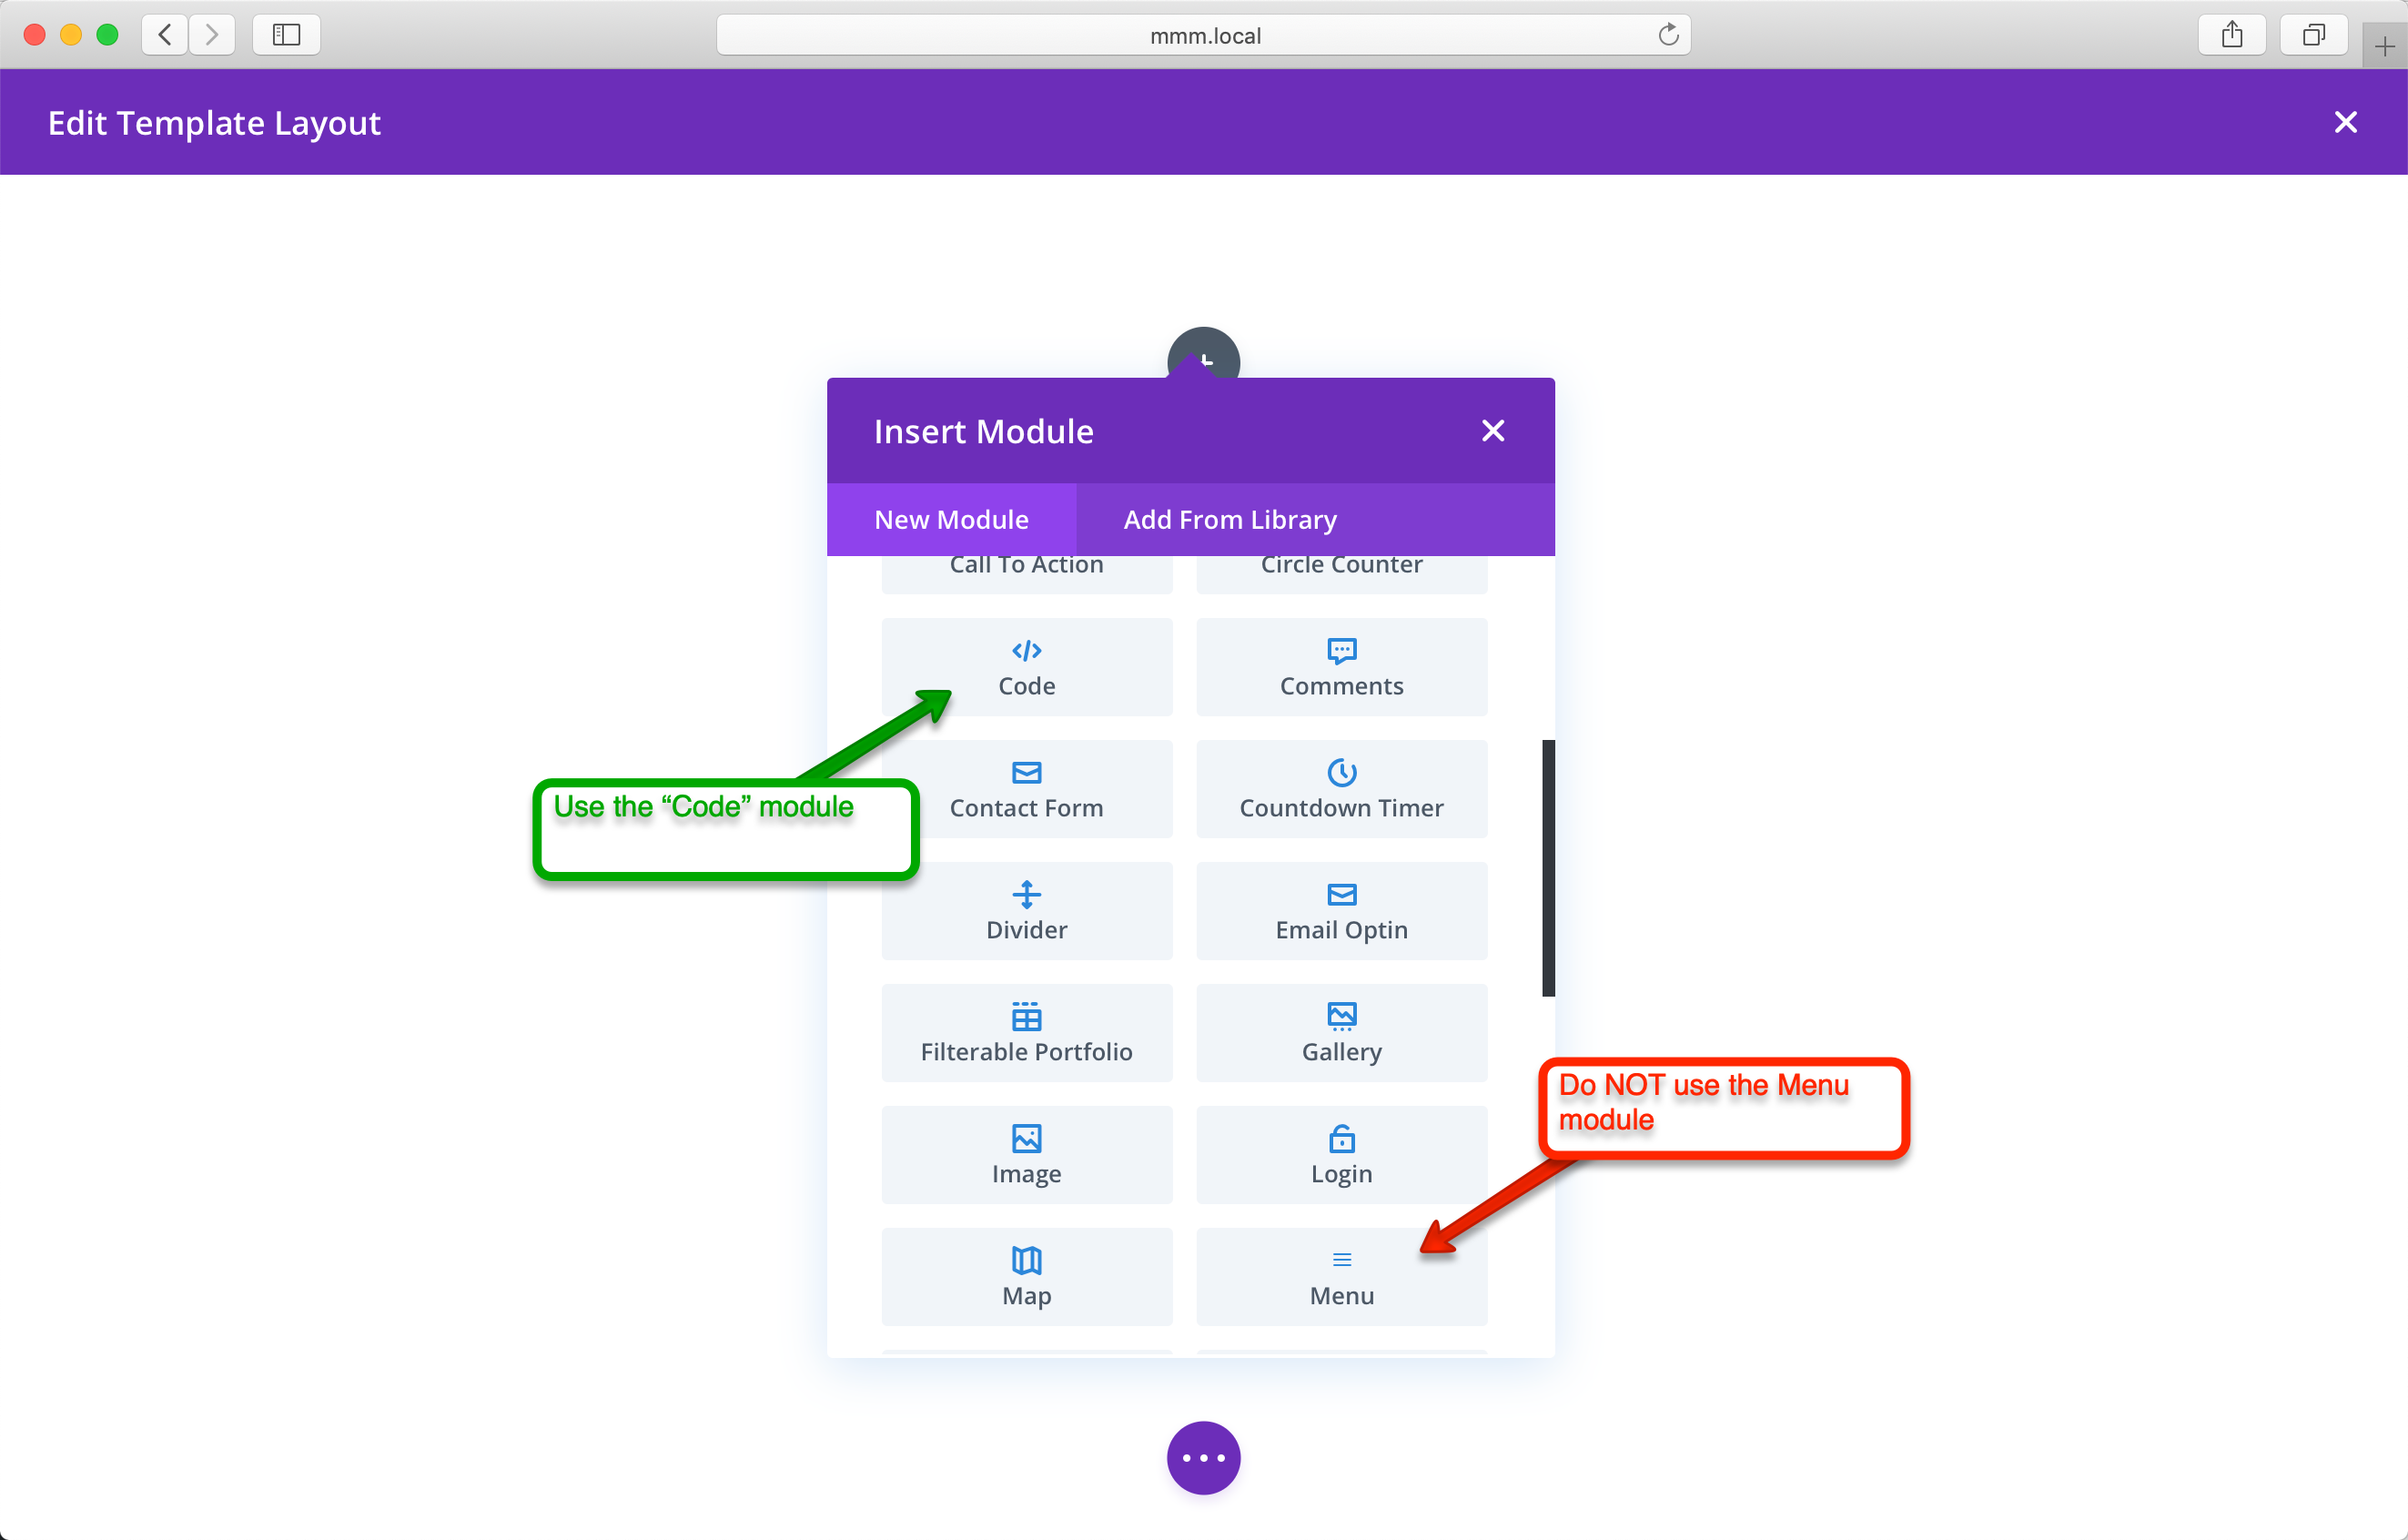
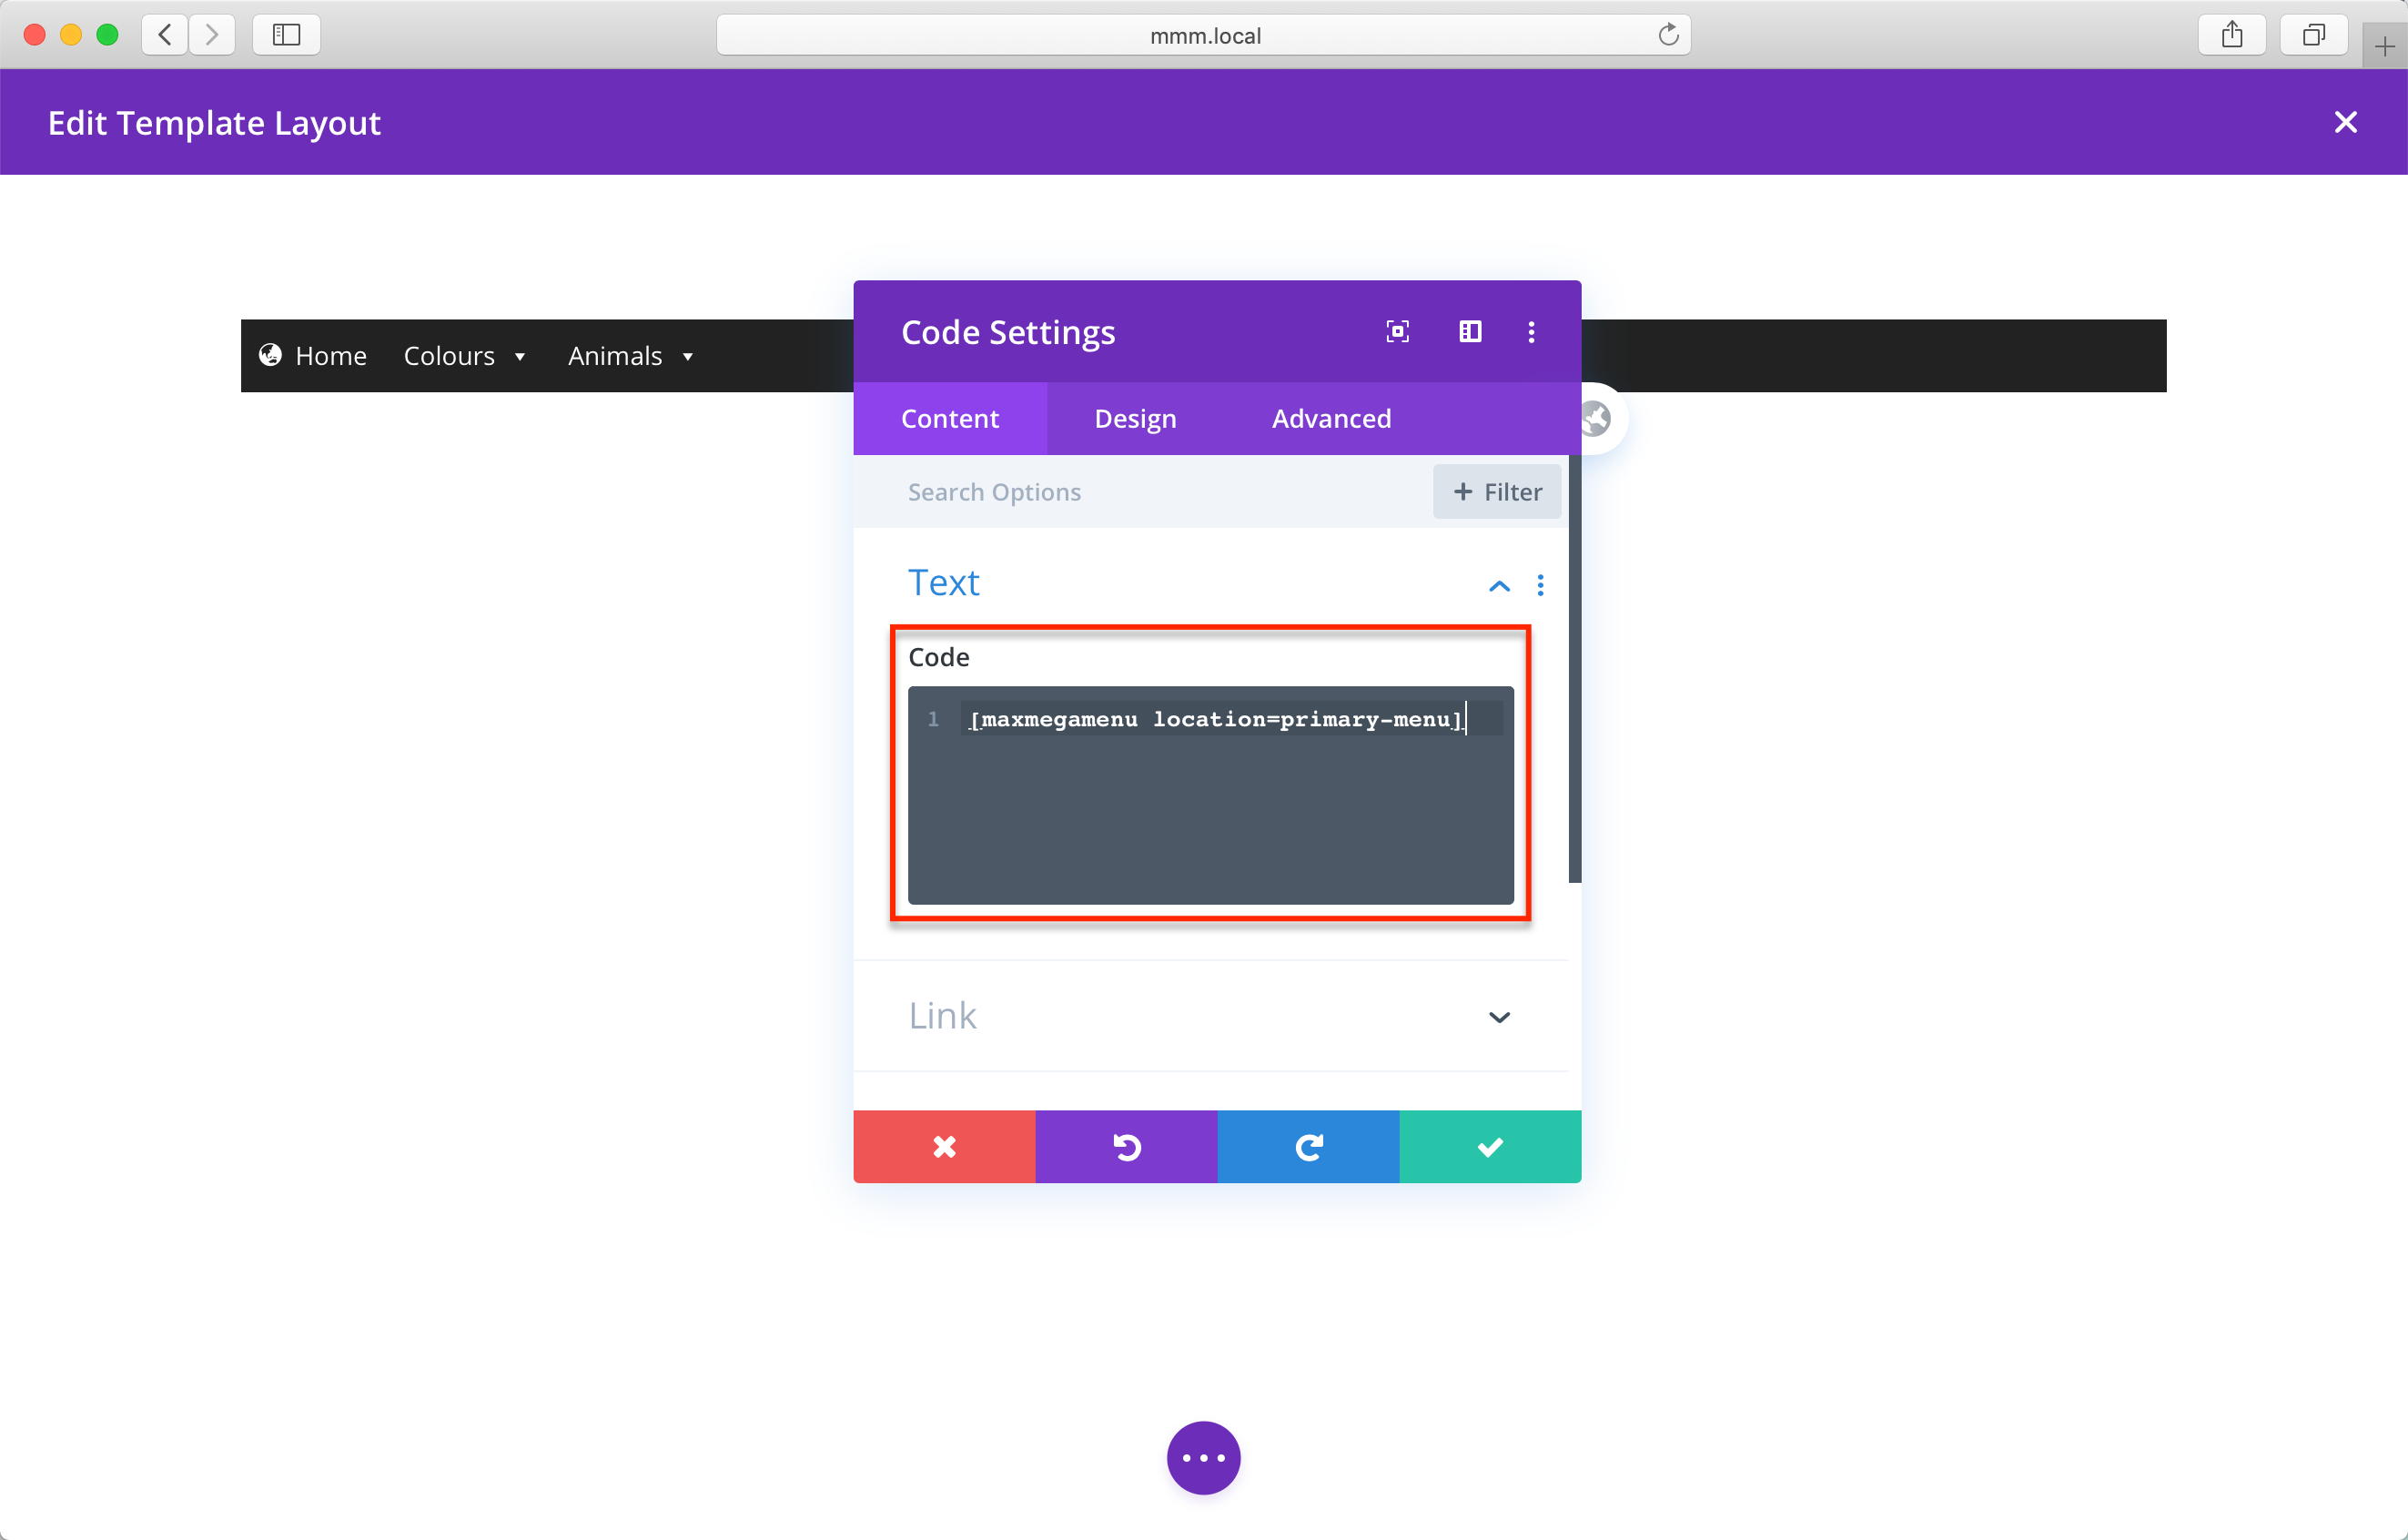
Add a new Code Module (not a Menu module!) to the row:
Paste the menu shortcode into the Text Box:
(This shortcode can also be found on the Mega Menu > Menu Locations page)
Save the module, then expand the three dots within the purple circle and click Save there also.
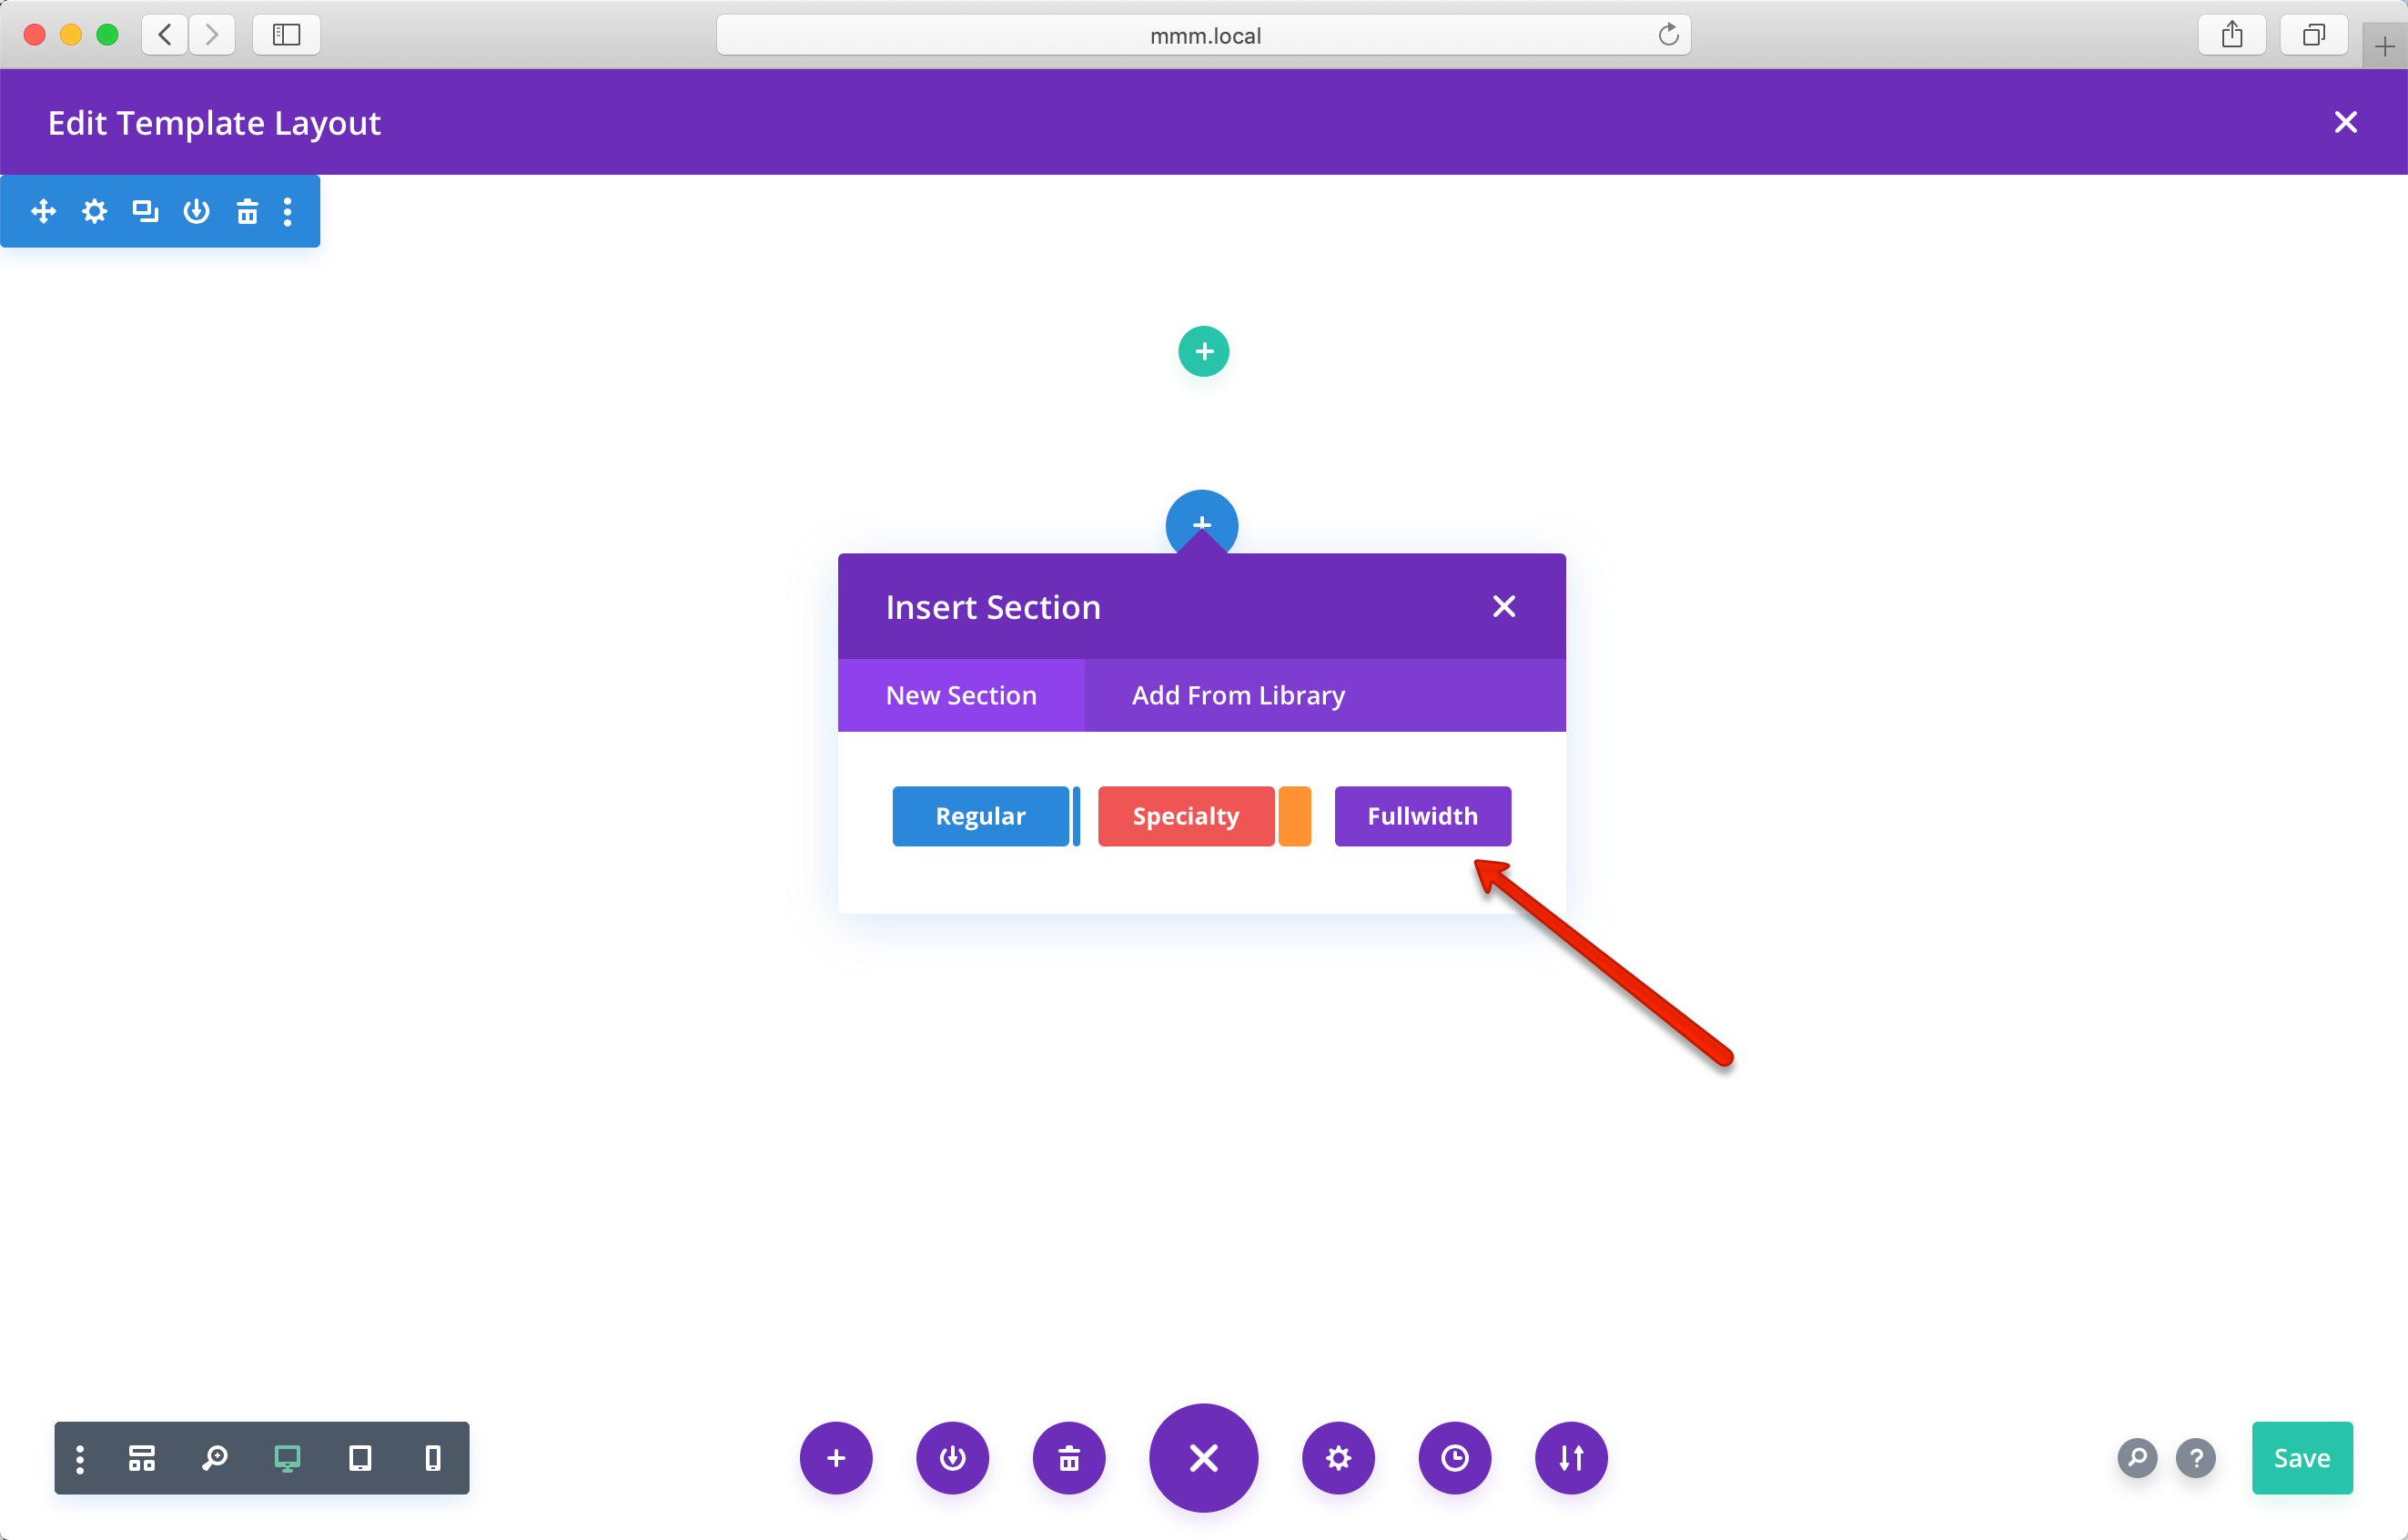
Full Width Menu
The previous steps will result in a “boxed” menu. To make the menu full width, add a full width section and repeat the previous steps.
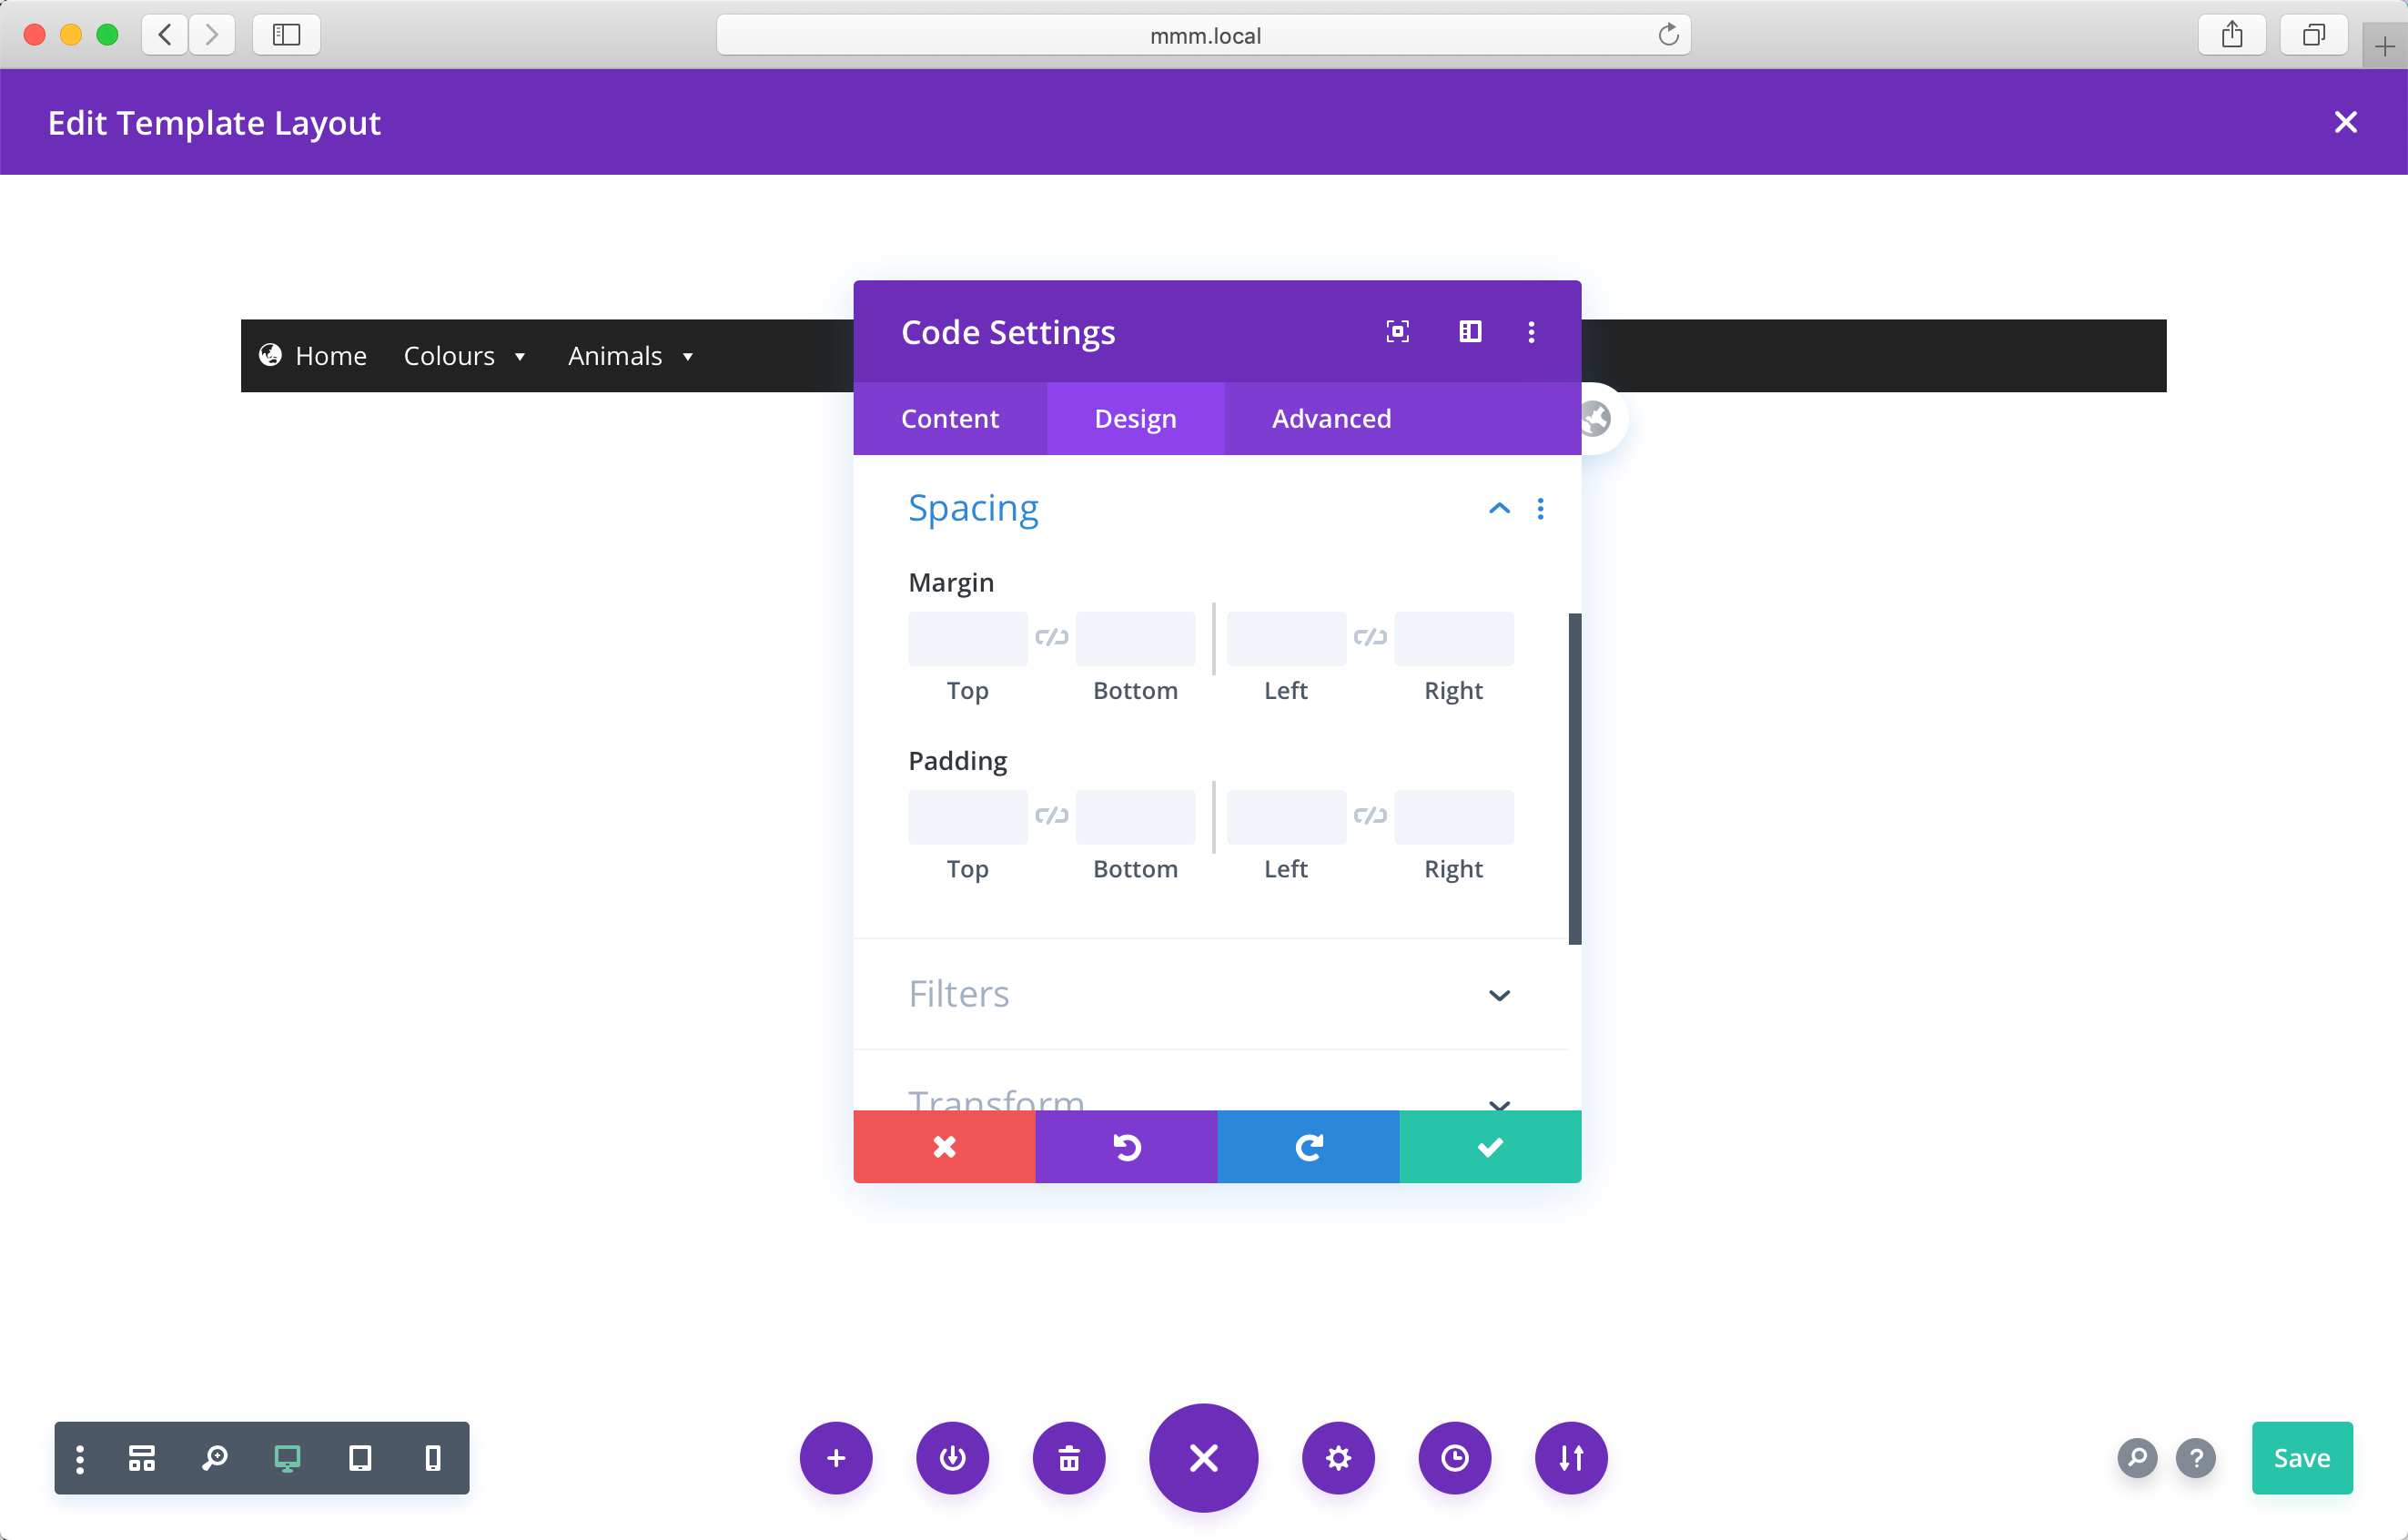
Removing white space from around the menu
By default there will be a lot of white space around the menu. You can remove this by editing the module and row settings and setting the Margin and Padding options to 0px. You may need to make other adjustments to suit your own requirements.
Fix z-index
If your menu is appearing behind other page elements, go to Appearance > Customize > Additional CSS and add the following:
header {
    position: relative;
    z-index: 9999999;
}
End Result
We now have a “stock” version of Max Mega Menu output on the site:
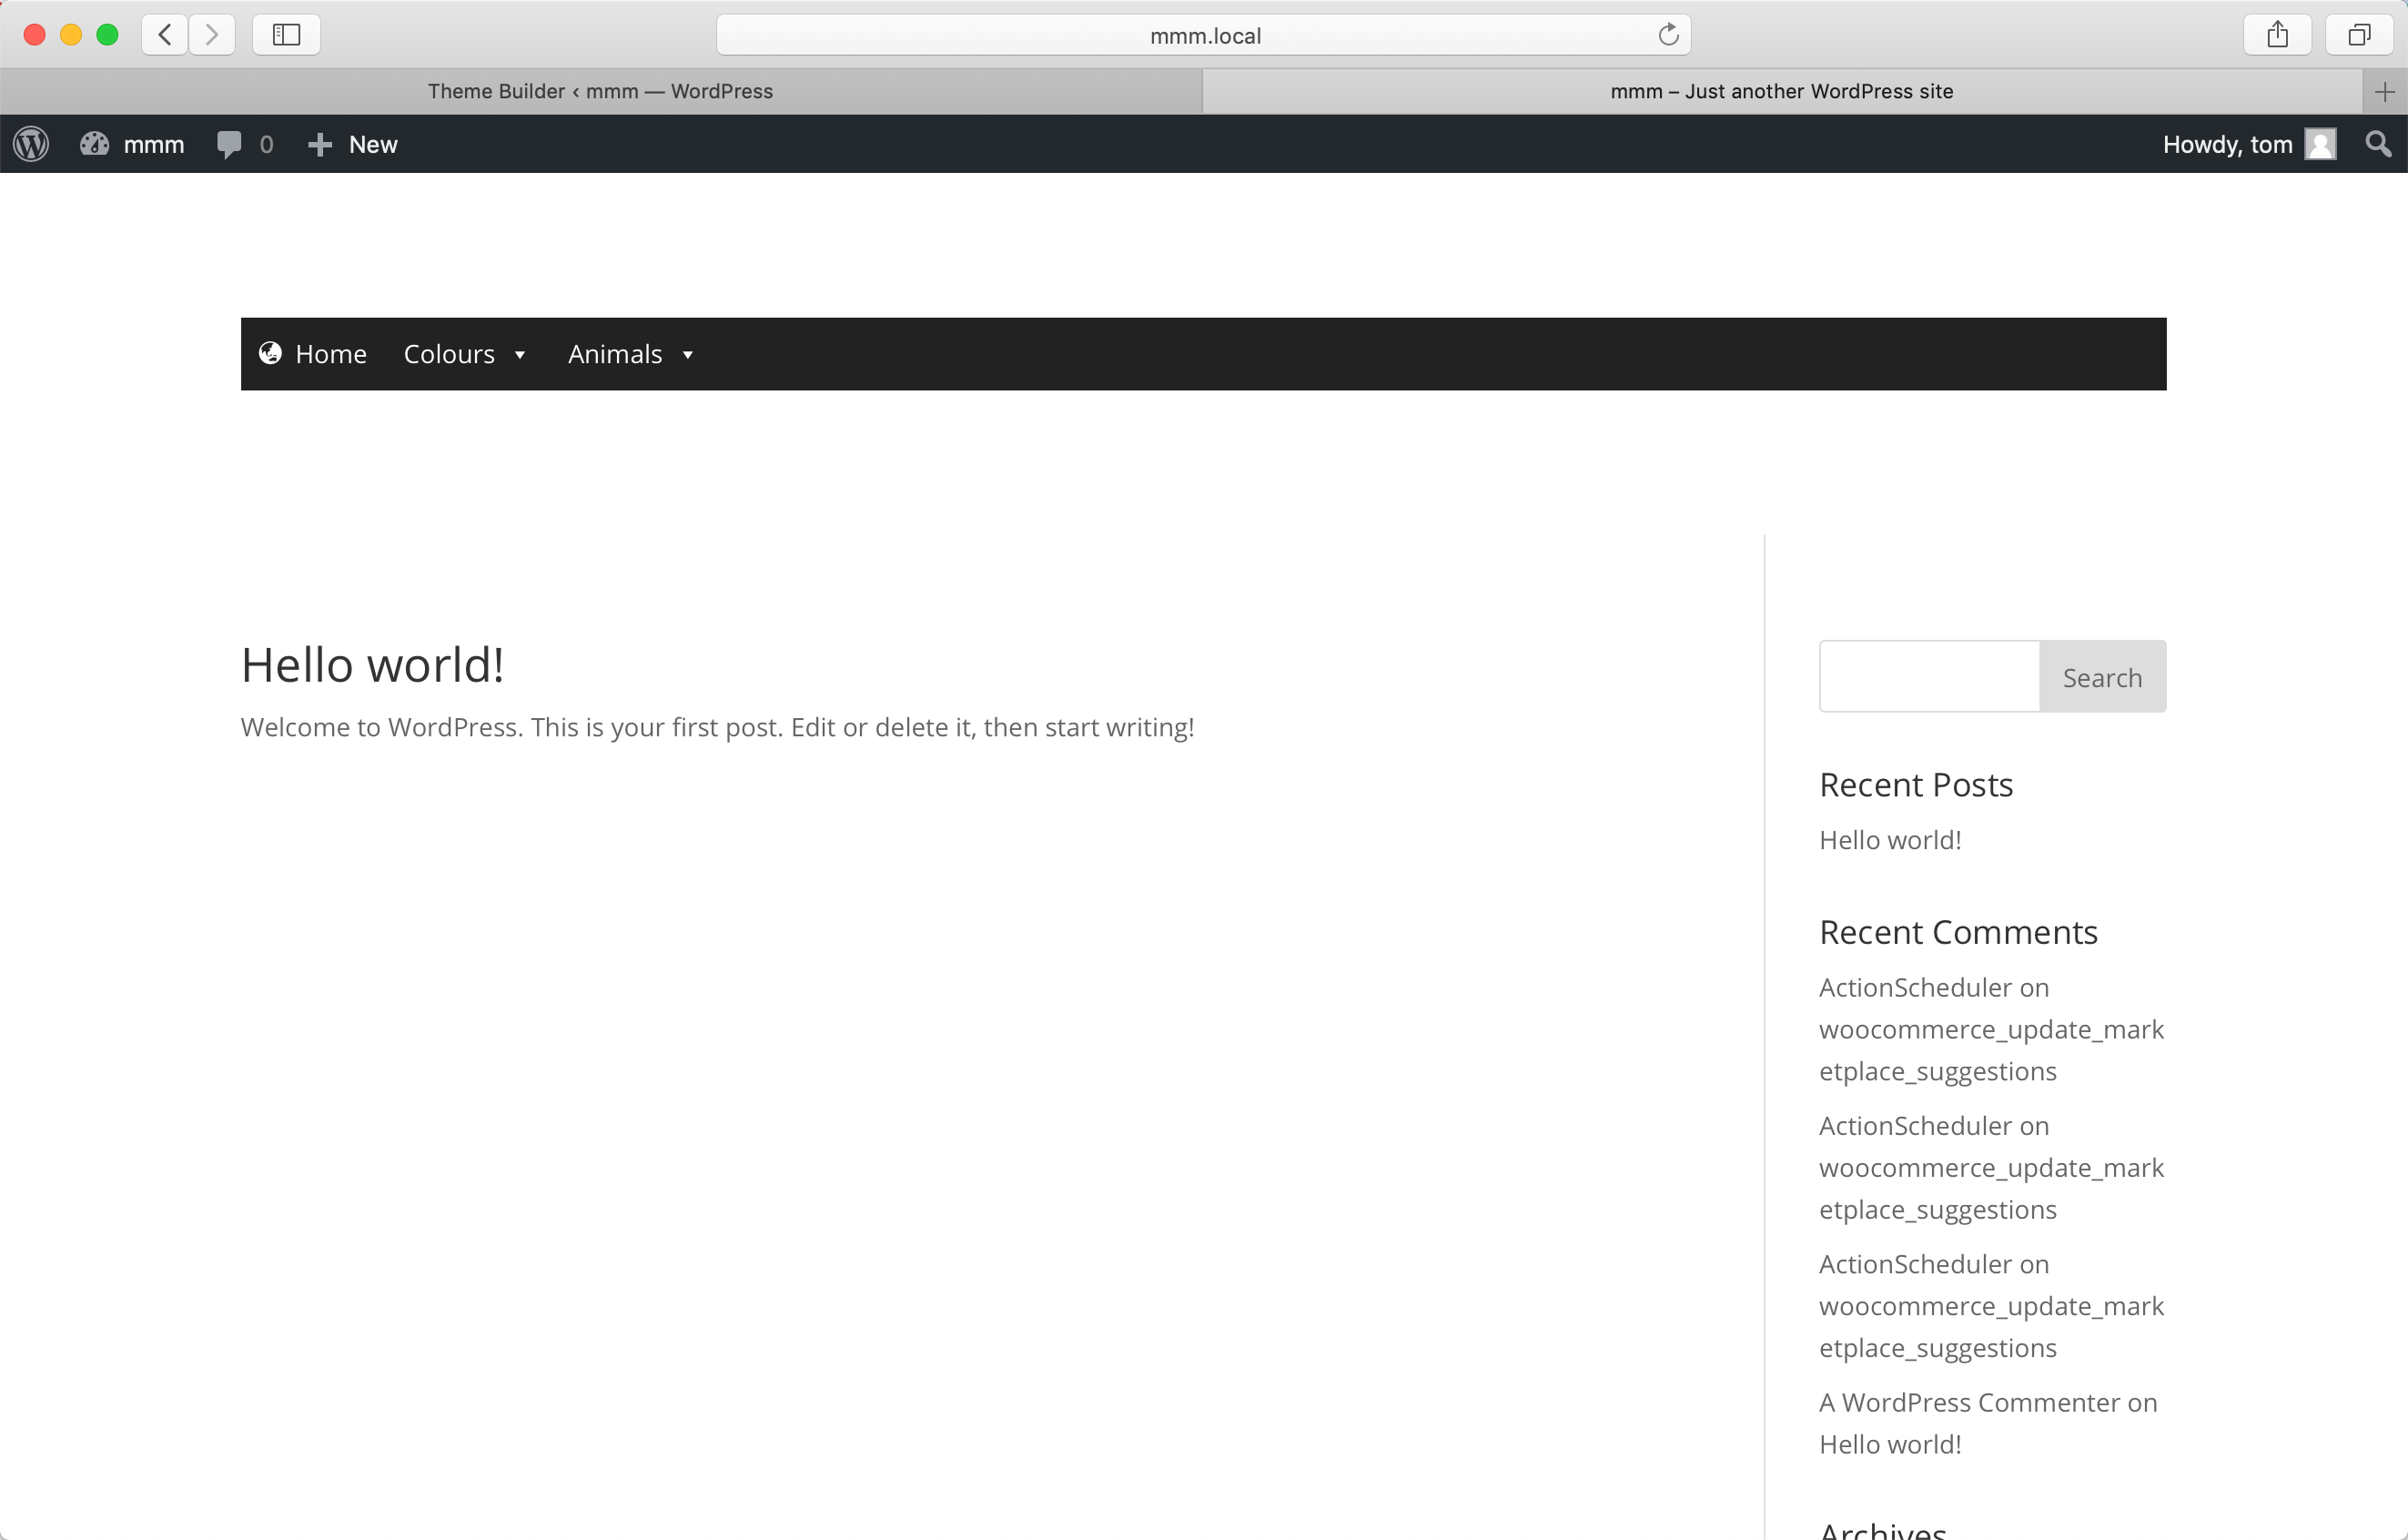
From here we can build the menu out, including changing the styling, adding a logo, search box, custom icons etc.