Please note this guide uses the “Replacements” functionality which is a feature of Max Mega Menu Pro.
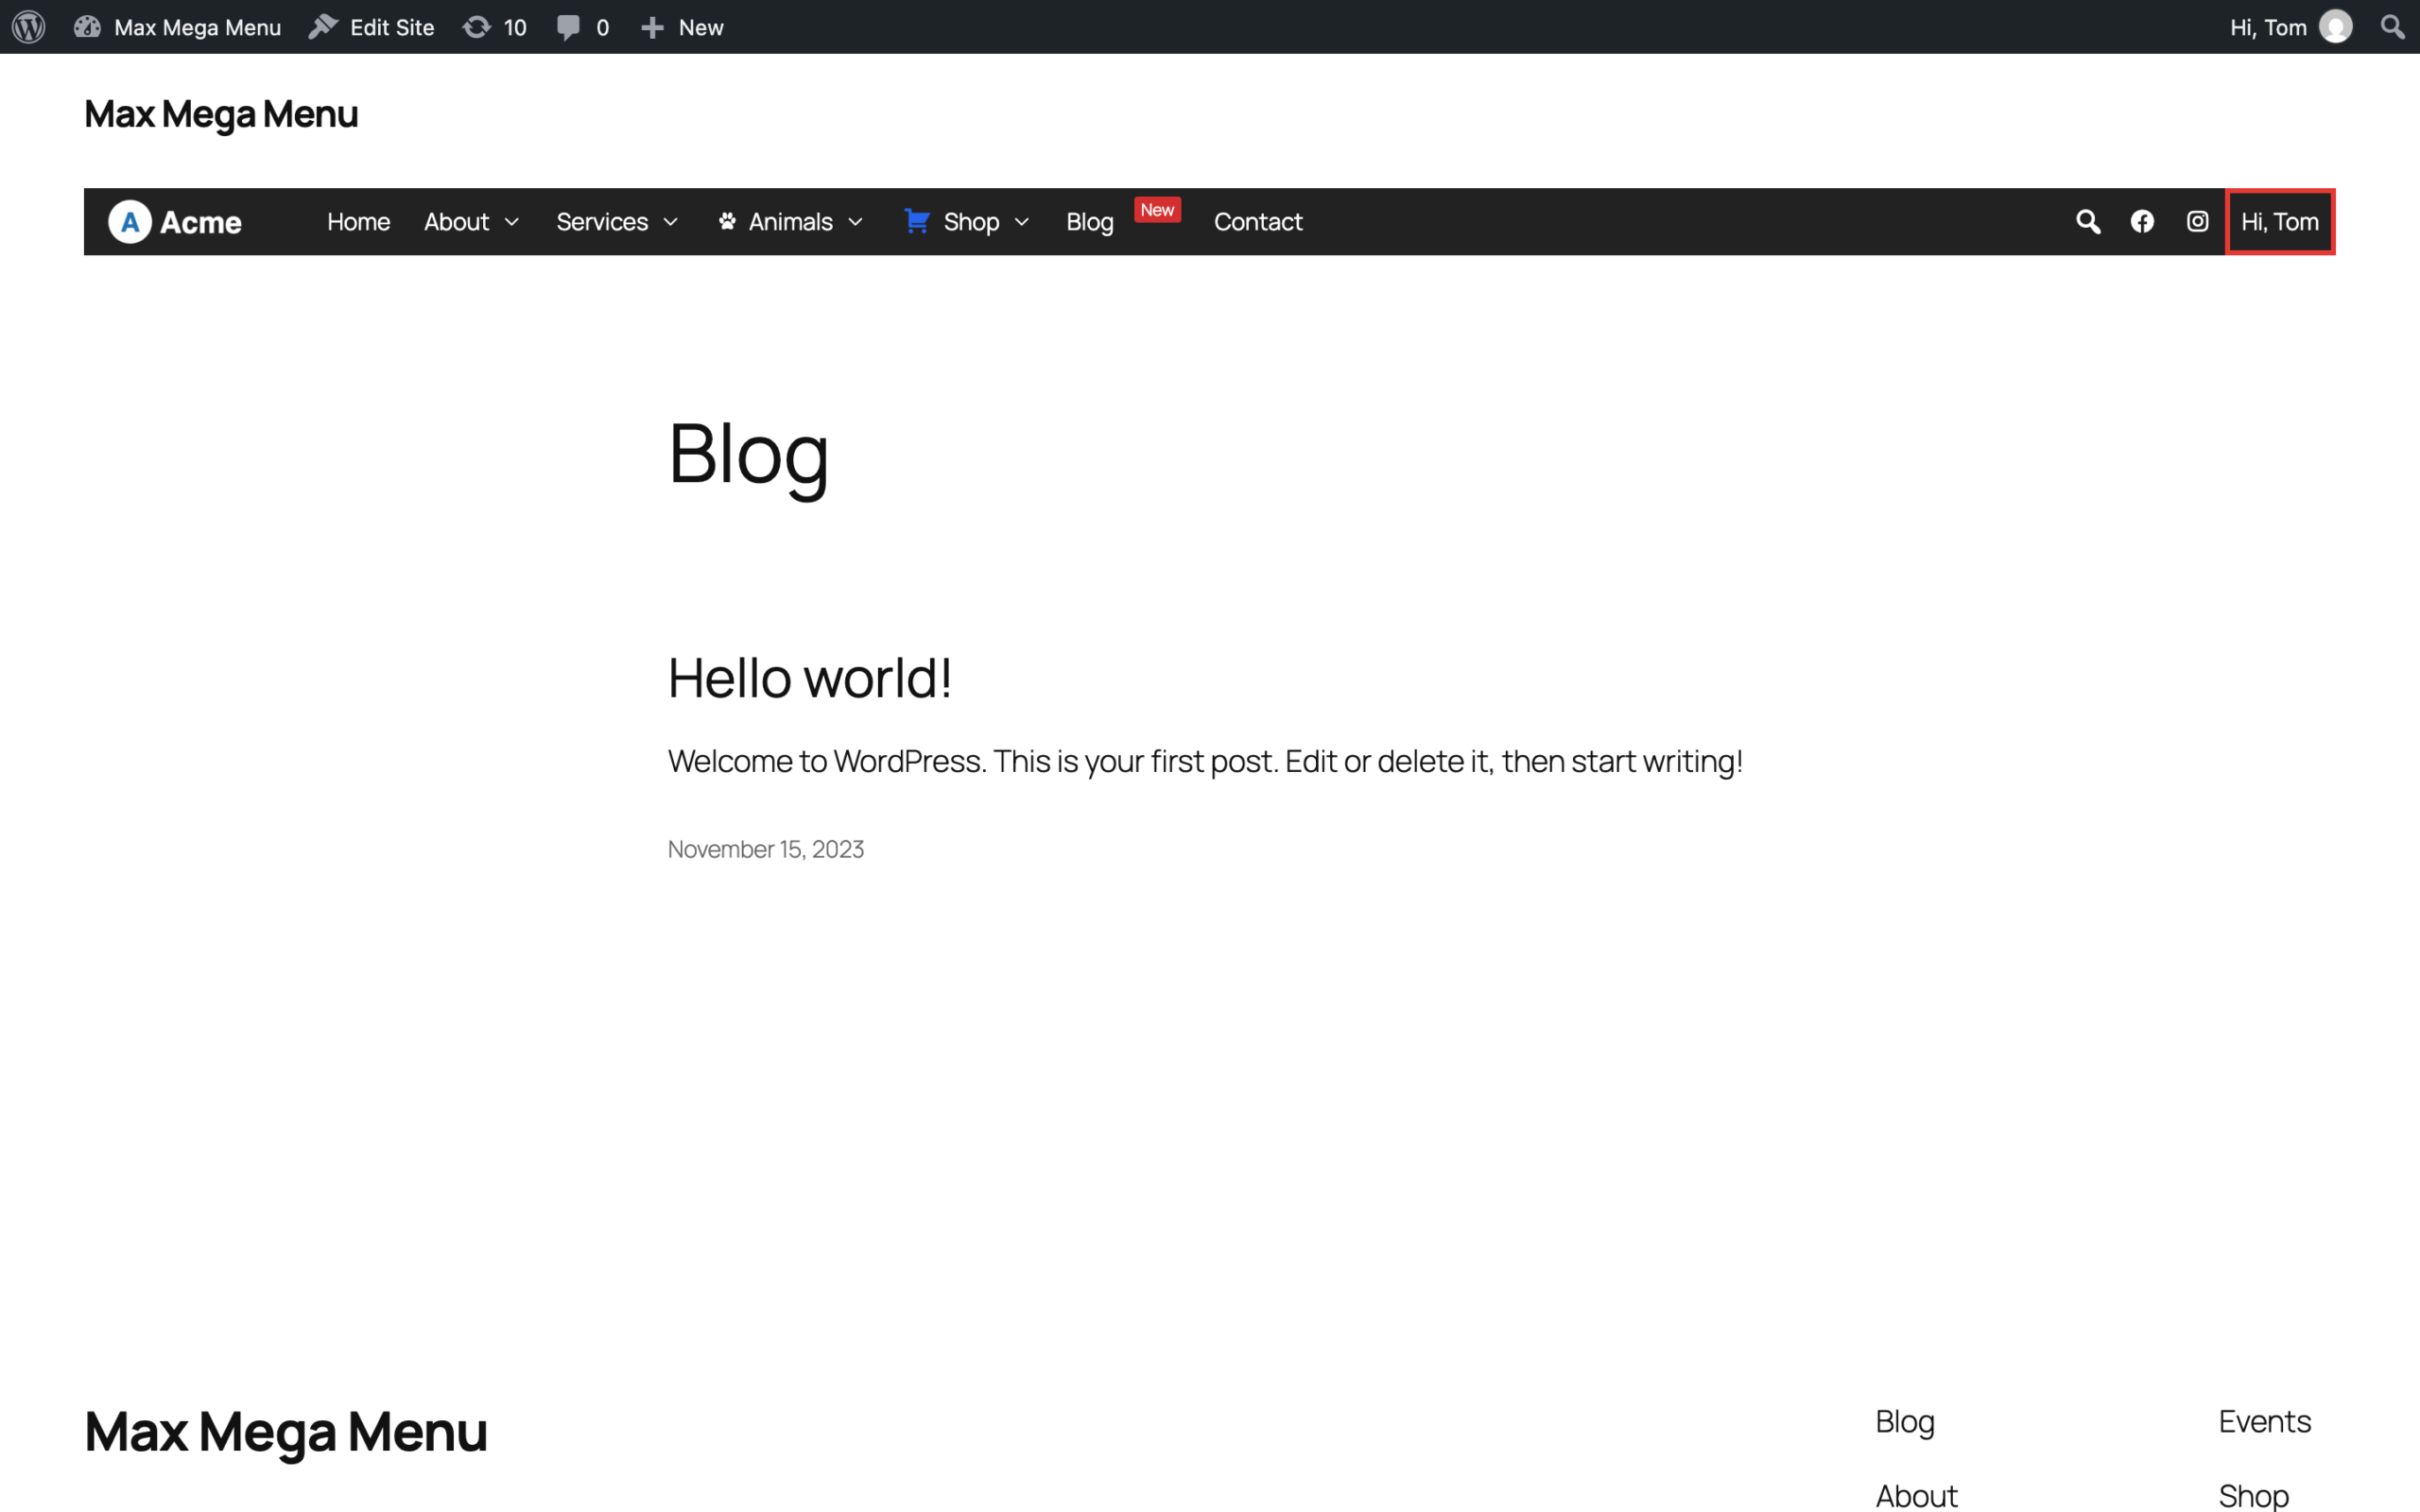
In this example we will display a personalised greeting (“Hi, Tom”) alongside the existing top level menu items, using the [maxmegamenu_user_info] shortcode which is built into Max Mega Menu Pro. The same steps can be used to display any other shortcode within a menu item.
Step 1 – Add a new item to the menu
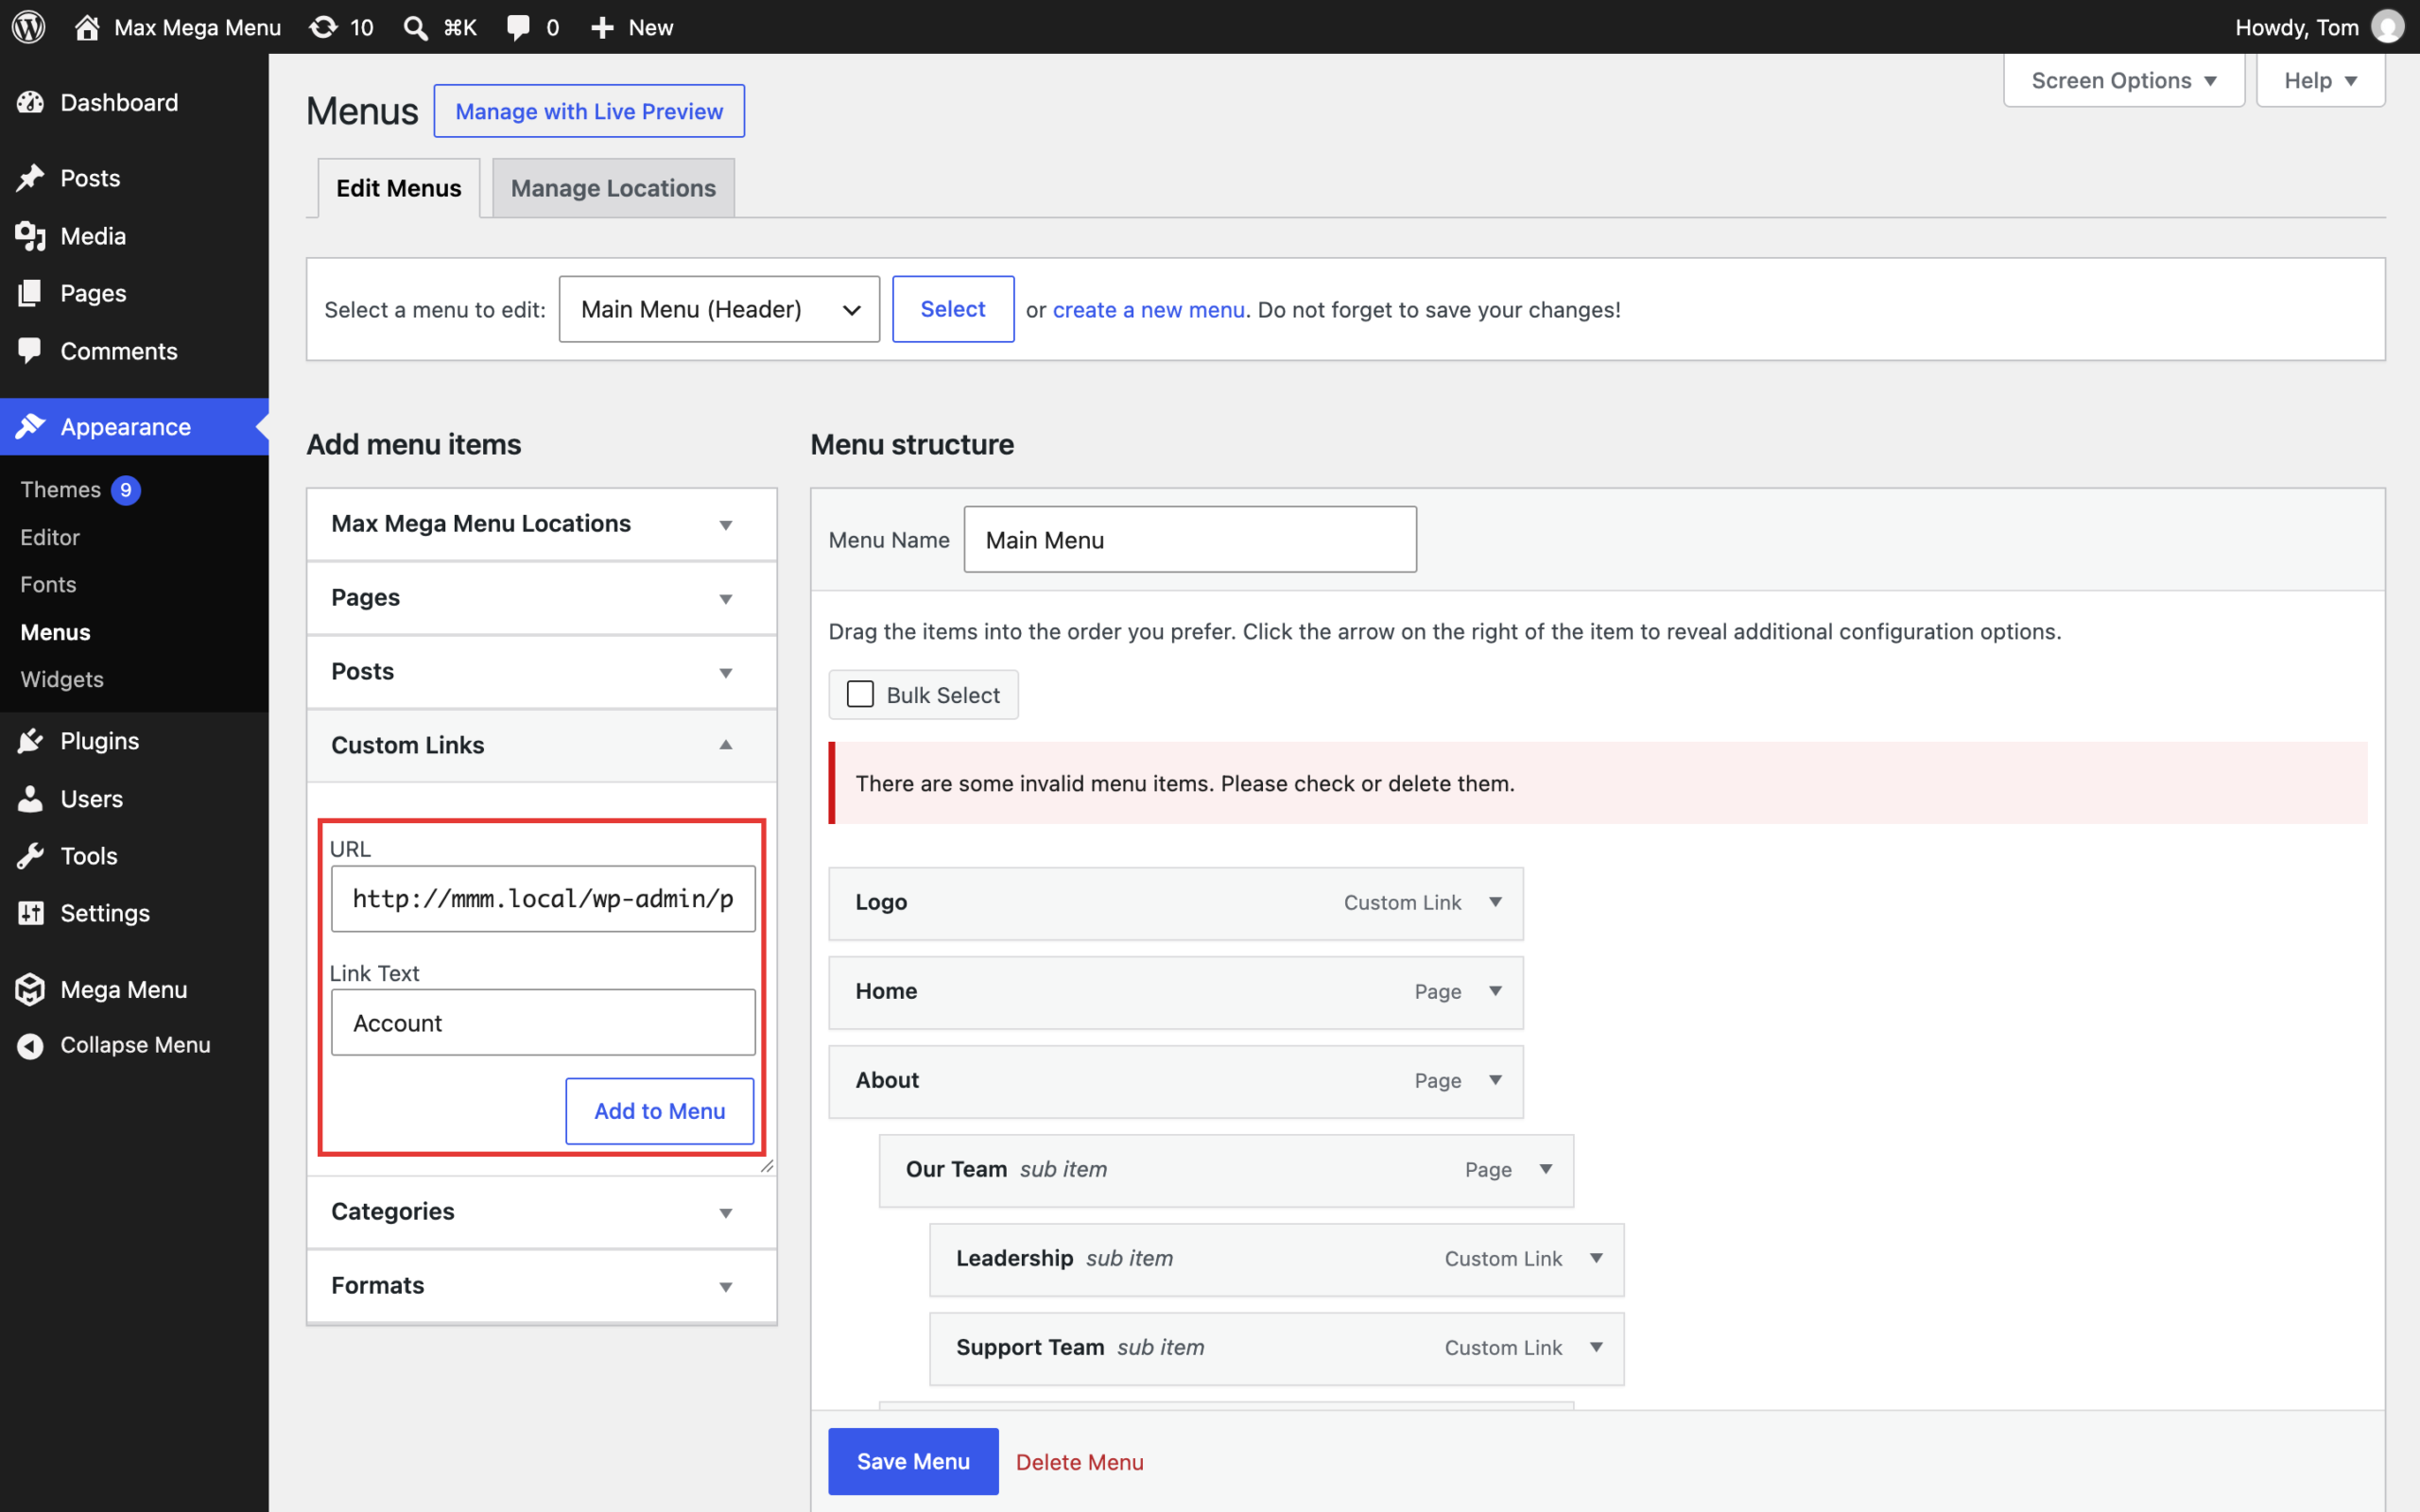
Go to Appearance > Menus, open the “Custom Links” section and add a new link to the menu. In this example we’ve set the Link Text to “Account” and the URL to the WordPress profile page.
Step 2 – Set up the shortcode replacement
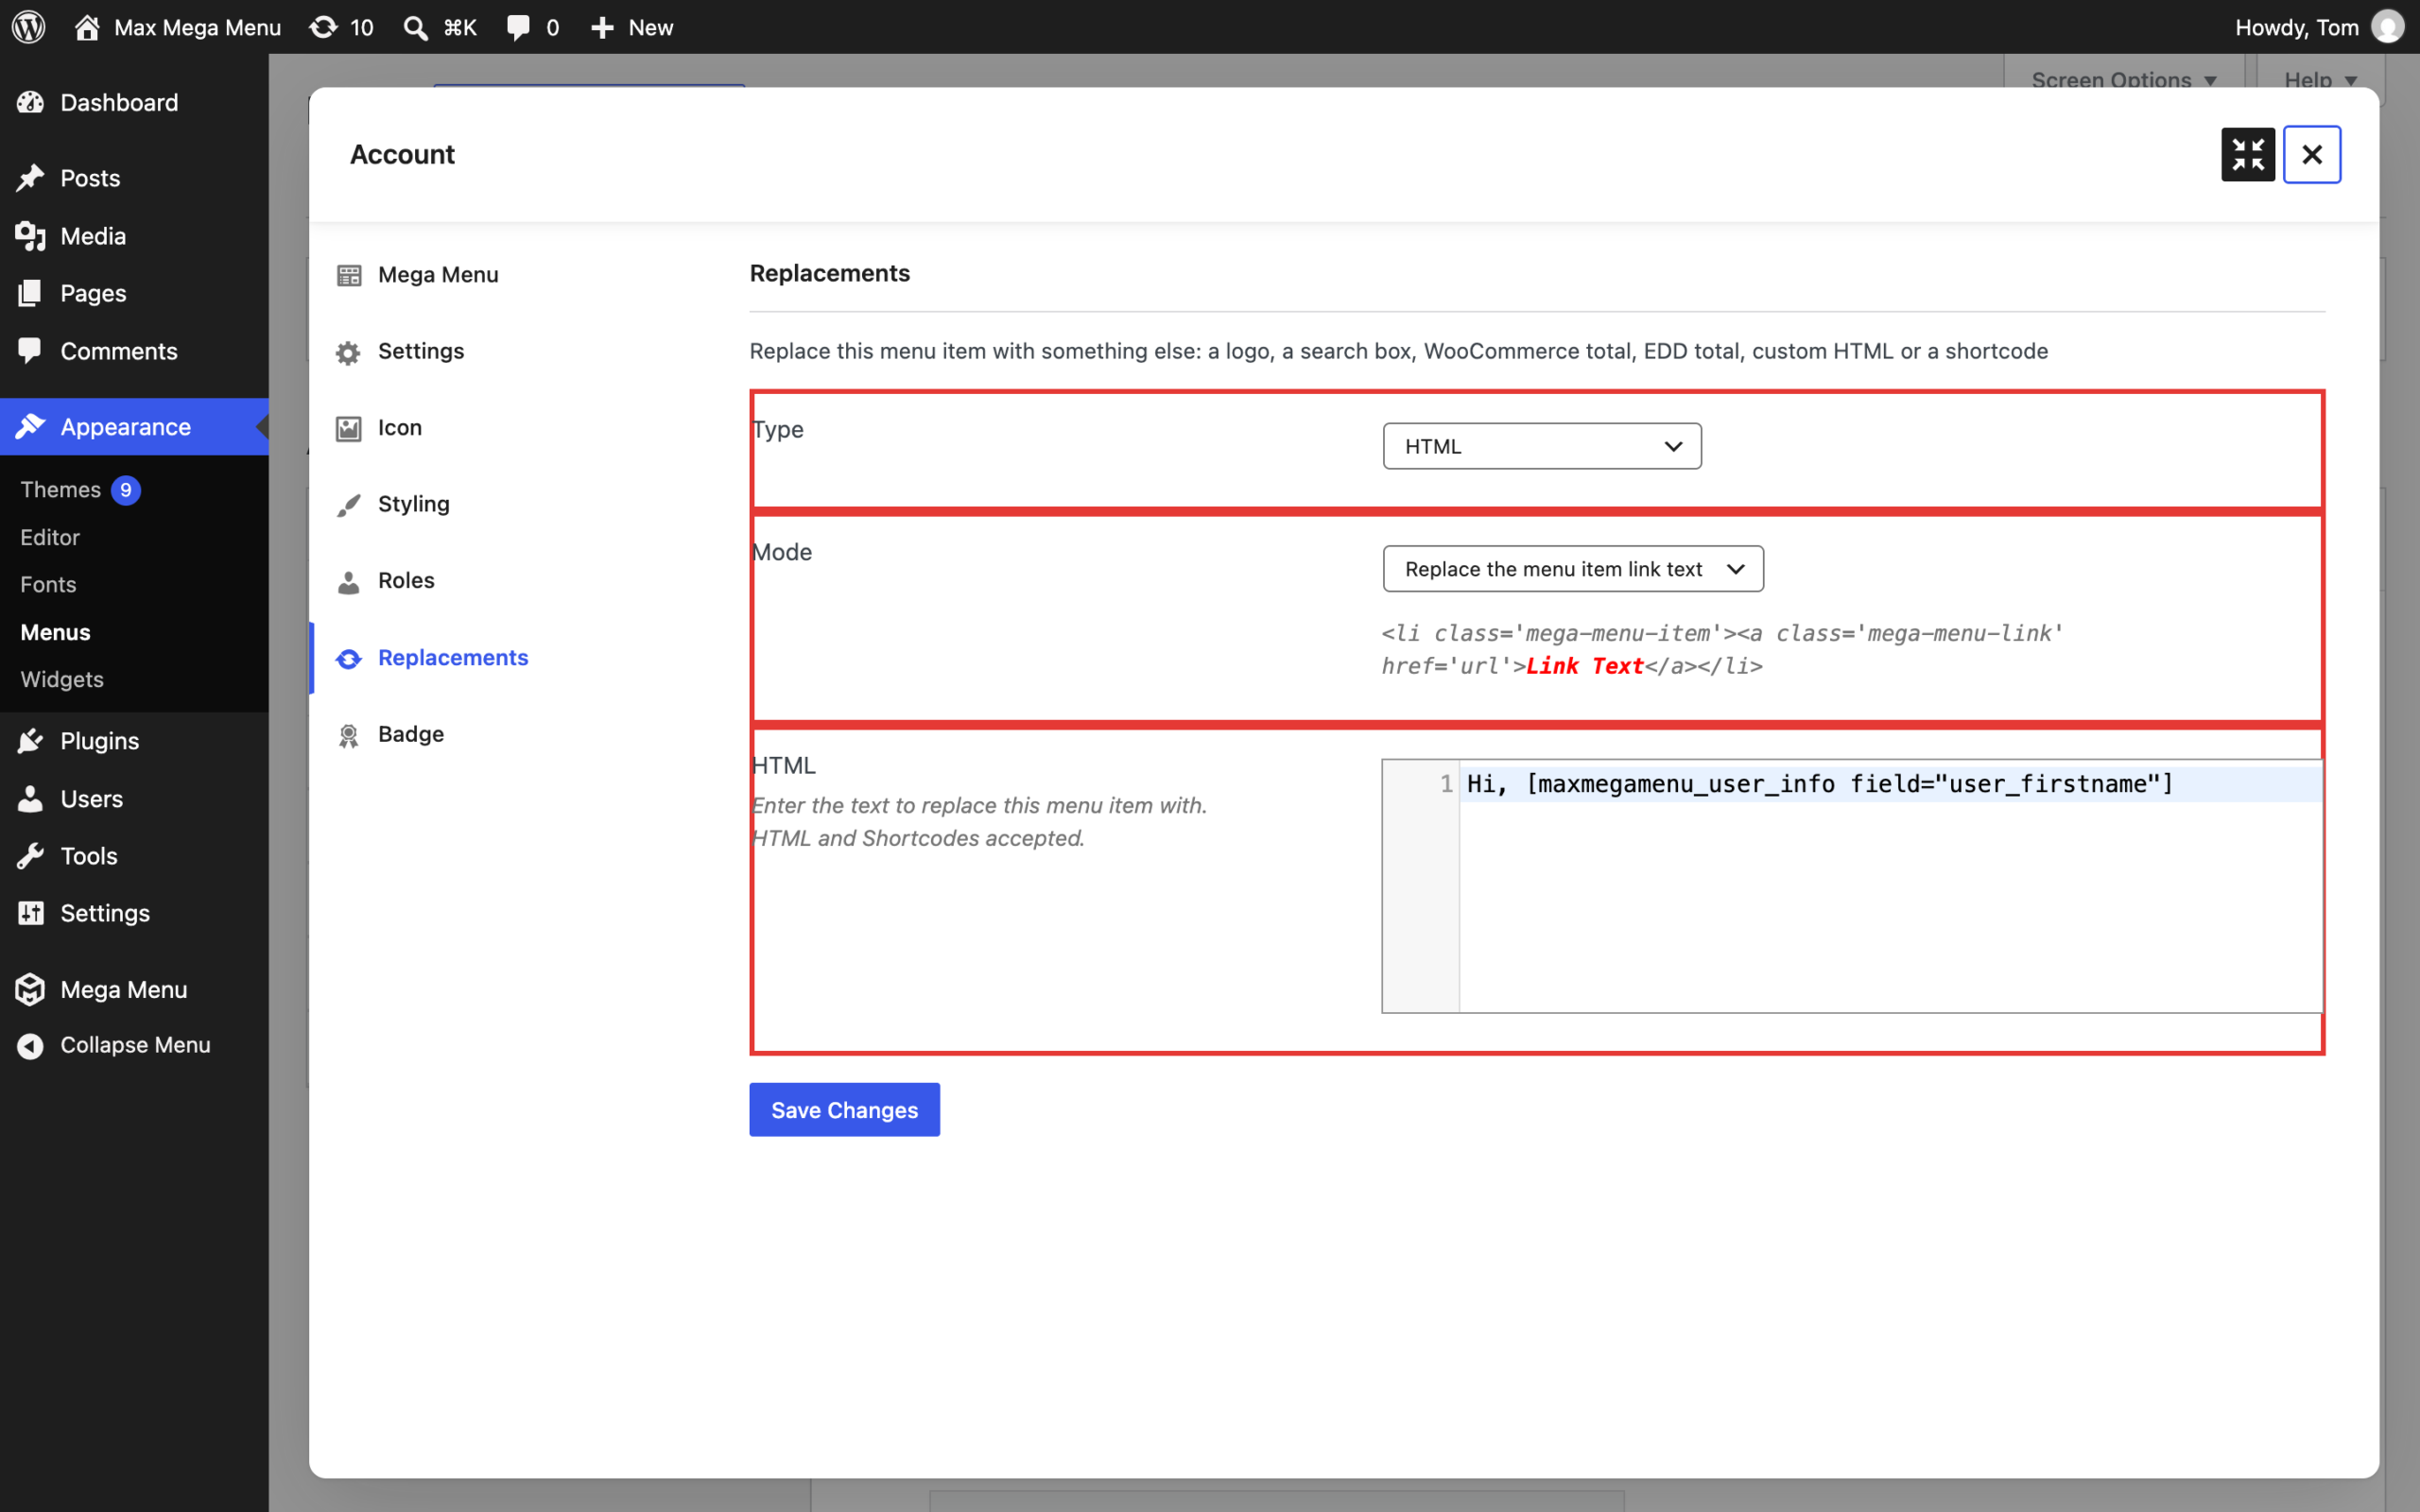
Save the menu, then hover over the “Account” item and click the blue “Mega Menu” button. Go to the “Replacements” tab:
- Set the Type to “HTML”.
- Set the Mode to “Replace the menu item link text”. This keeps the menu item link (and its styling) and only replaces the text.
- Enter the following into the HTML text area: Hi, [maxmegamenu_user_info field=“user_firstname”]
- Click “Save Changes”.
The field attribute can be set to user_firstname, user_lastname, display_name (the default), user_email or ID.
To replace the entire menu item with the output of a shortcode (for example, a language or currency switcher provided by another plugin), set the Mode to “Replace the whole menu item link” instead.
Step 3 – Only show the item to logged in users
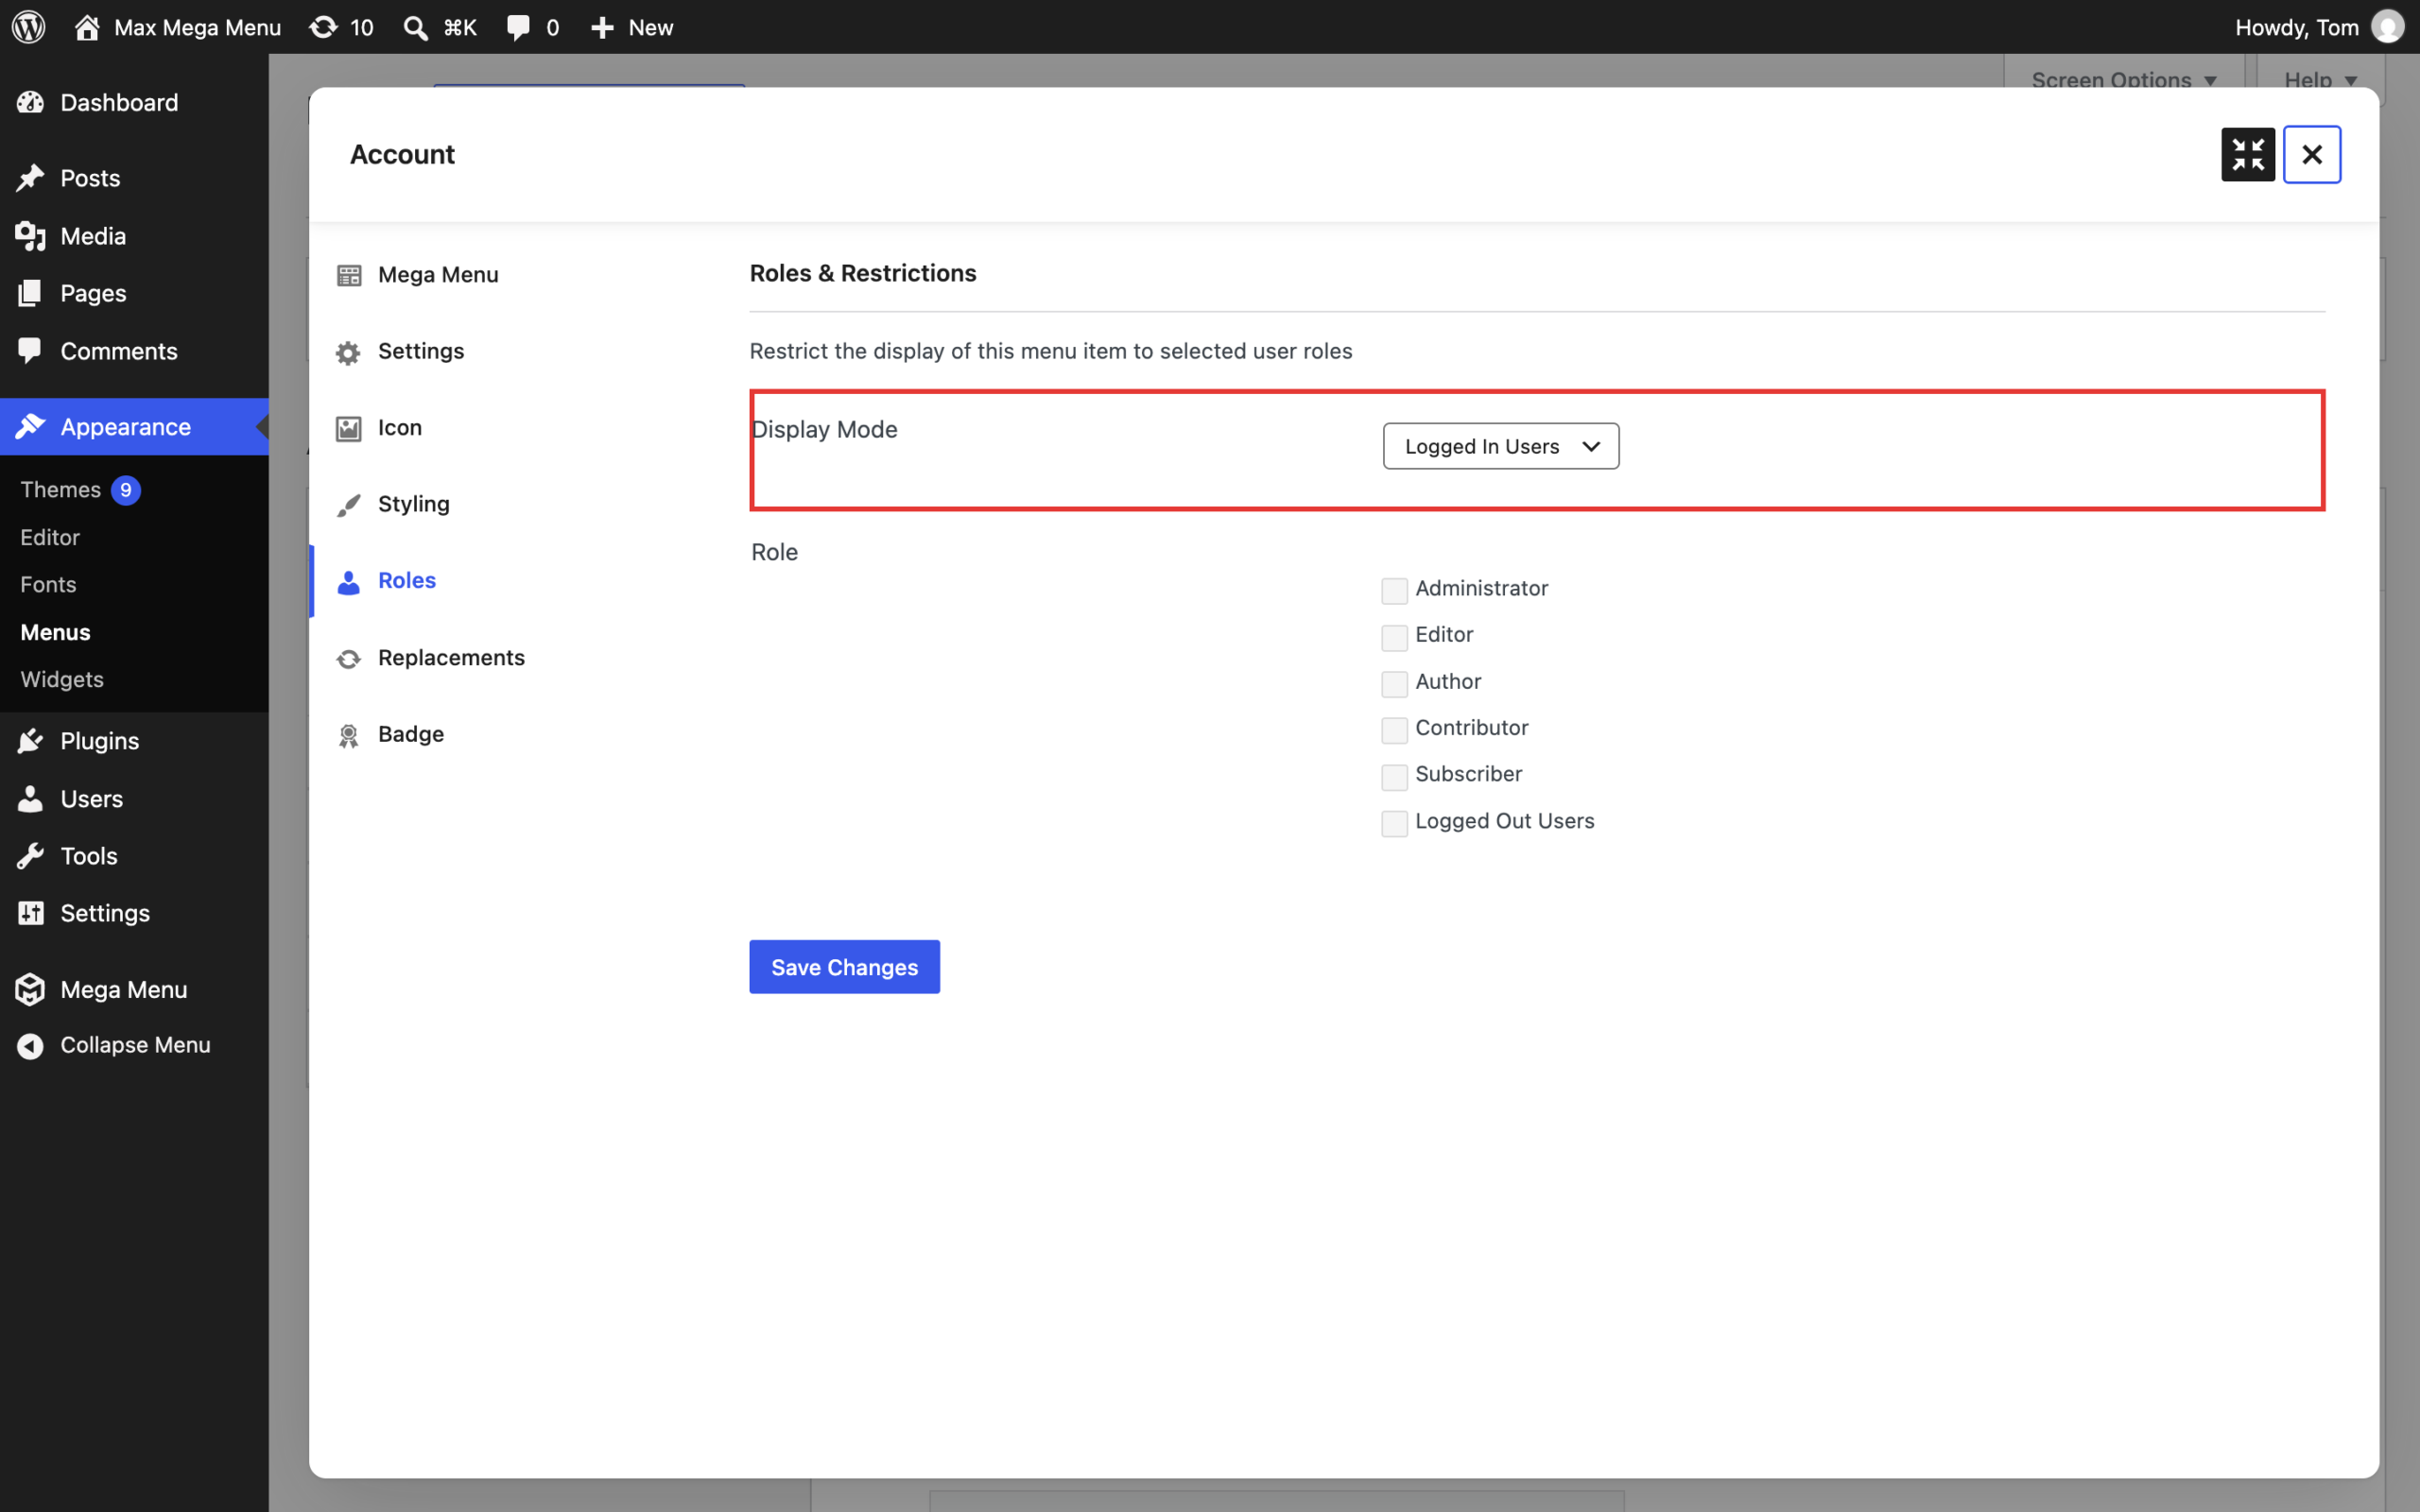
The greeting only makes sense for logged in users. Go to the “Roles” tab, set the Display Mode to “Logged In Users” and click “Save Changes”. See Roles & Restrictions for more information.
Step 4 – The result
The custom menu item now displays a greeting for the logged in user:
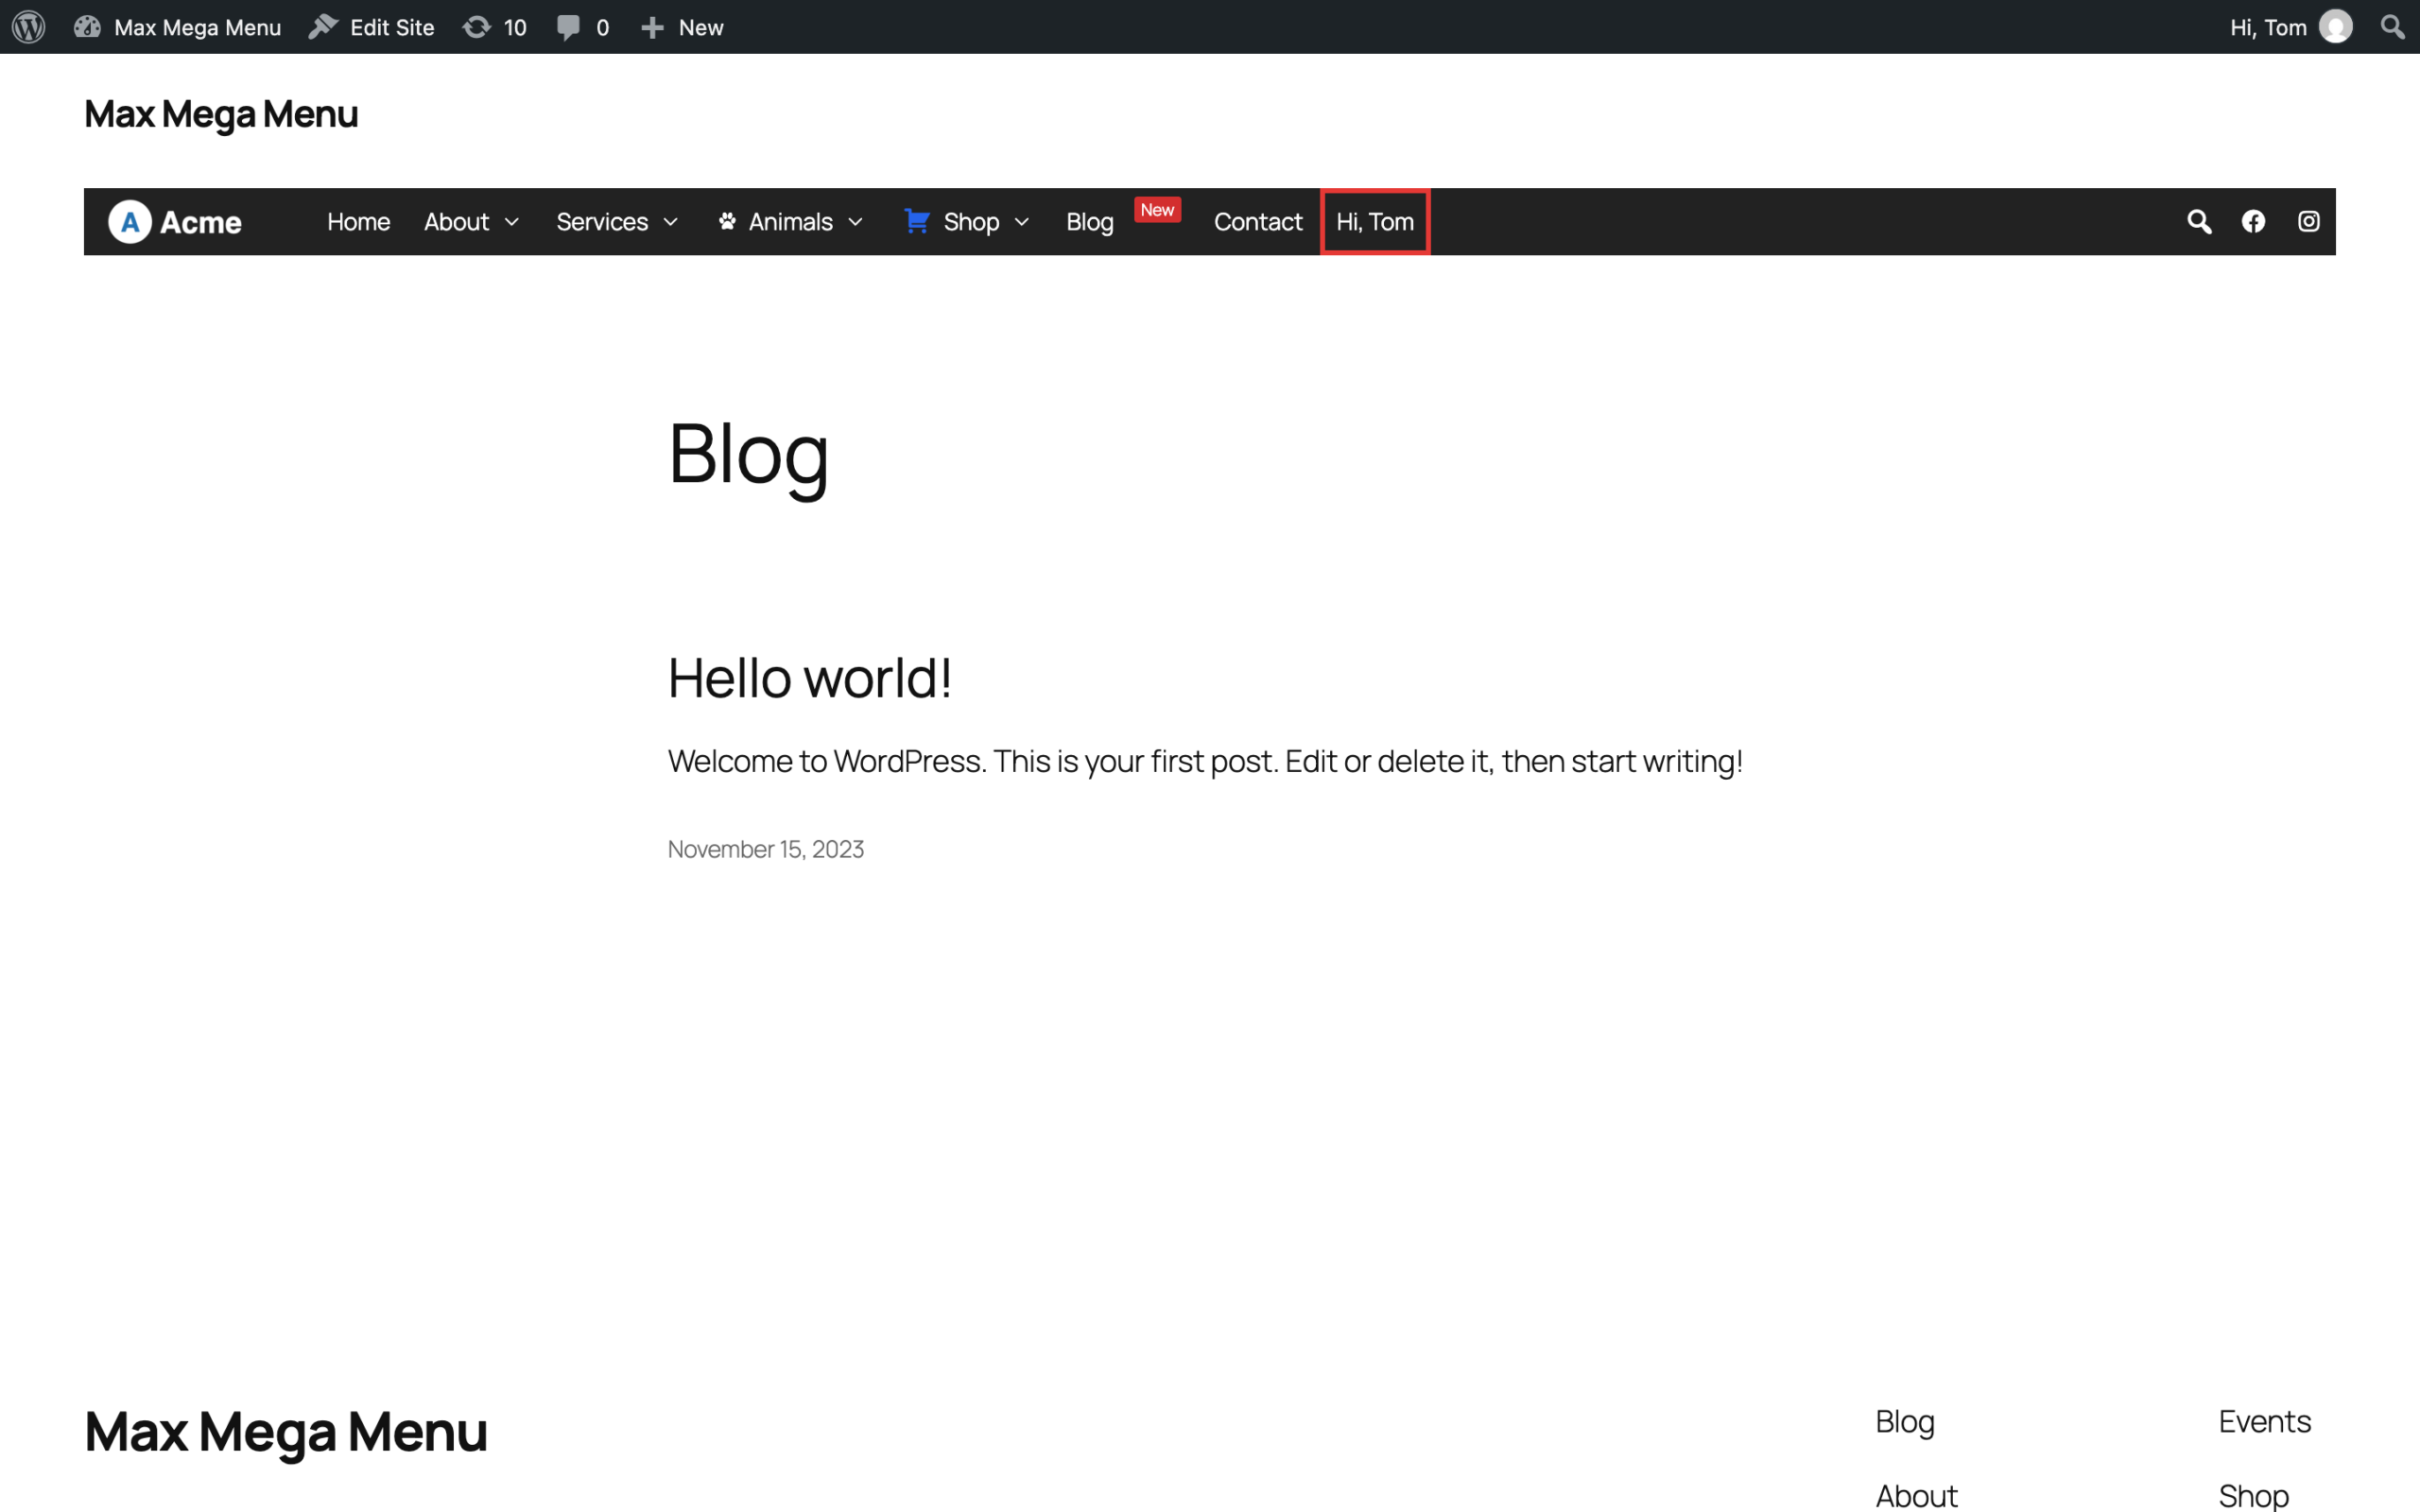
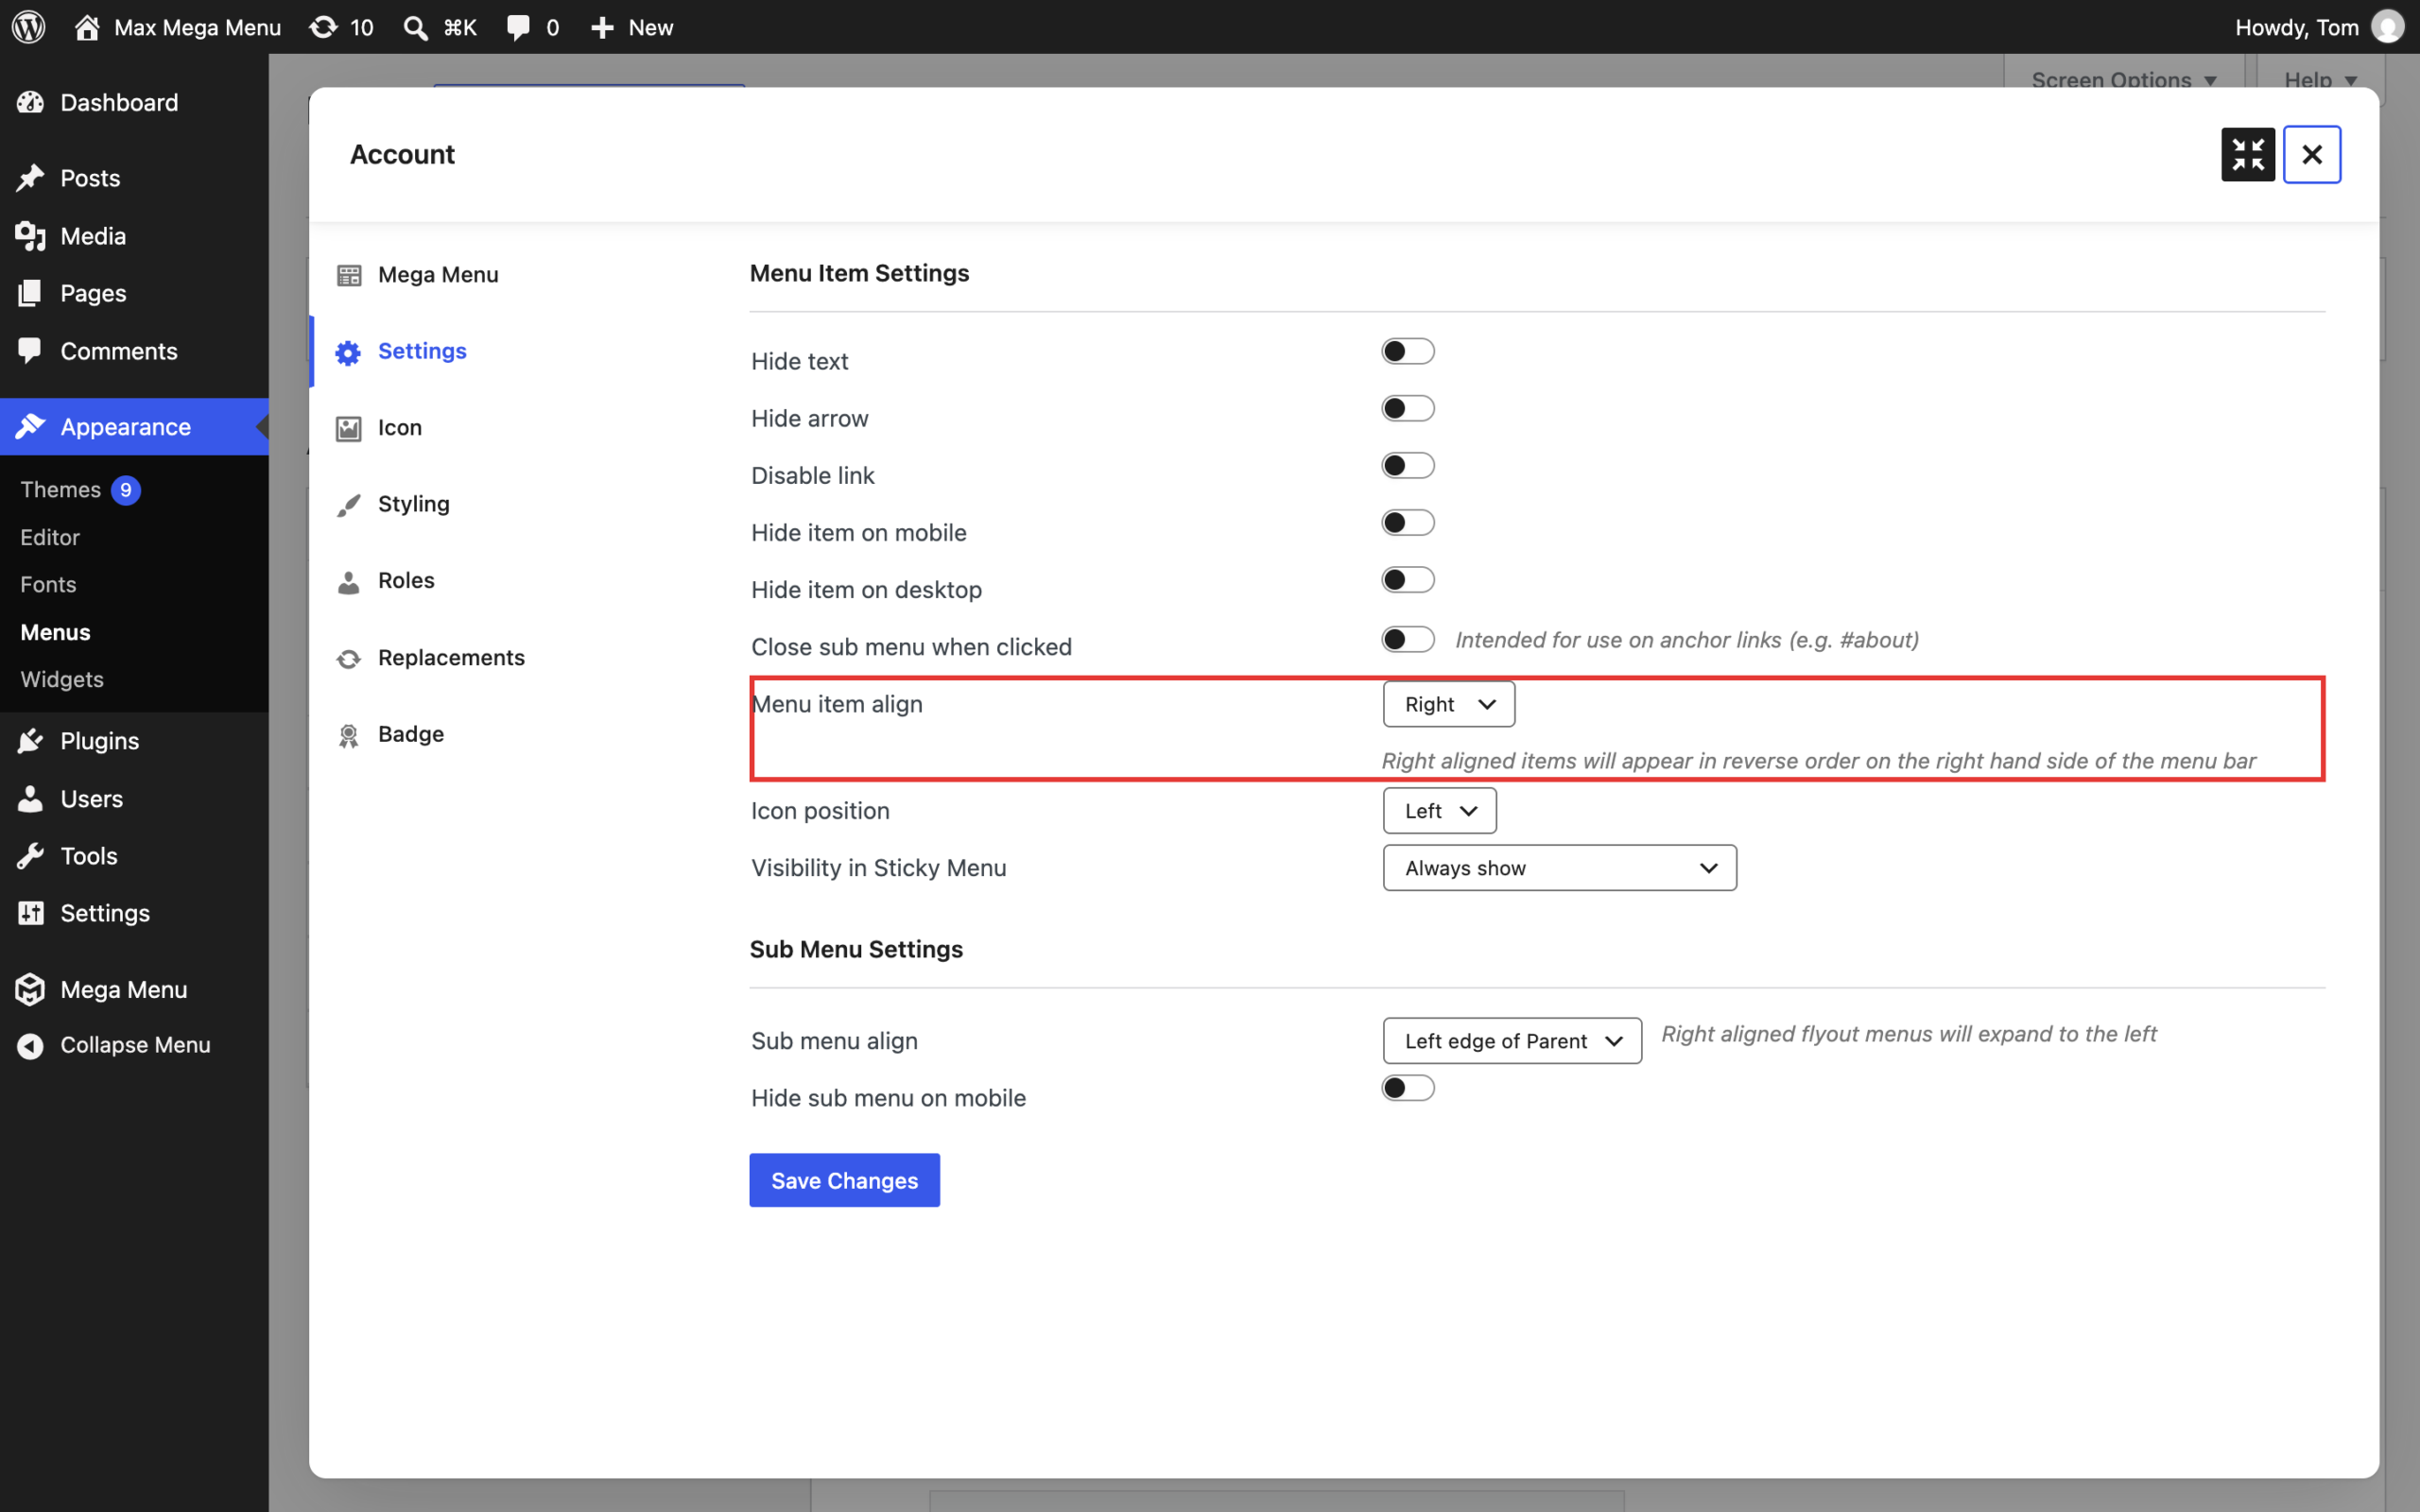
We can continue to use the other menu item settings, including aligning the item to the right hand side of the menu: