WordPress allows you to add your own CSS classes to individual menu items. The “CSS Classes” field is hidden by default, so you will need to enable it first.
Step 1: Enable the CSS Classes option
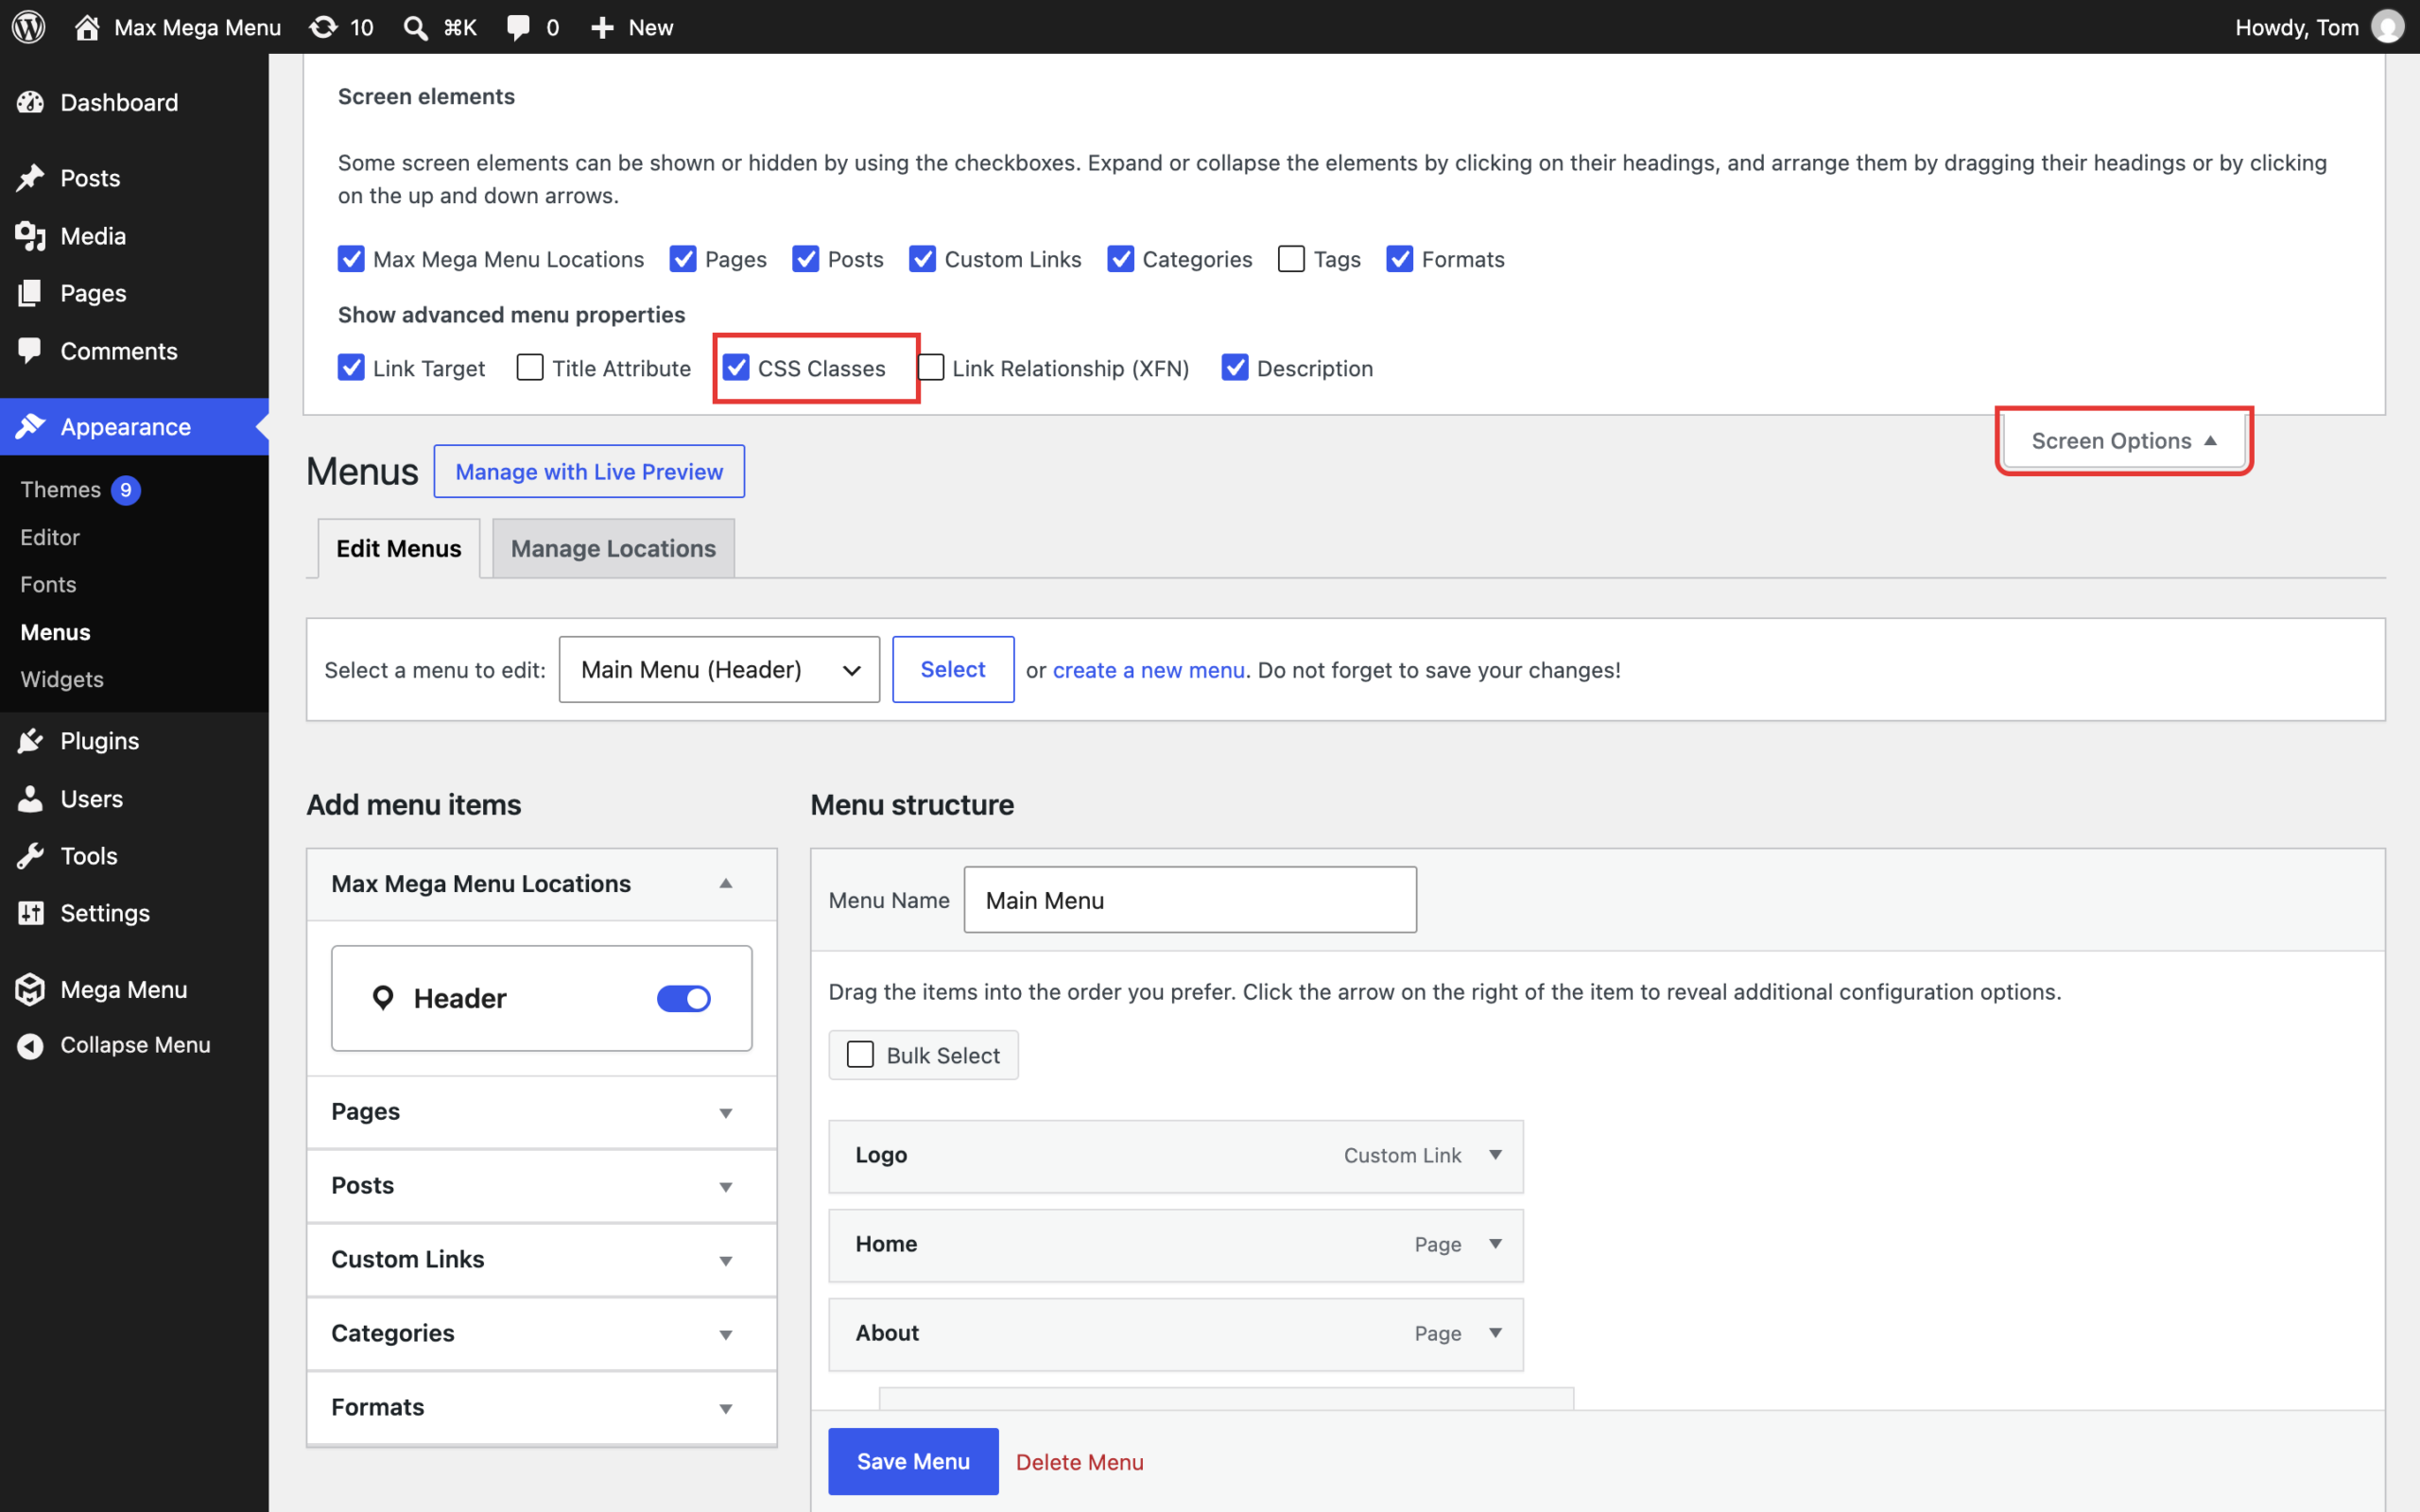
Go to Appearance > Menus and click the “Screen Options” tab at the top right of the page. Under “Show advanced menu properties”, check the “CSS Classes” option.
Step 2: Add the class to the menu item
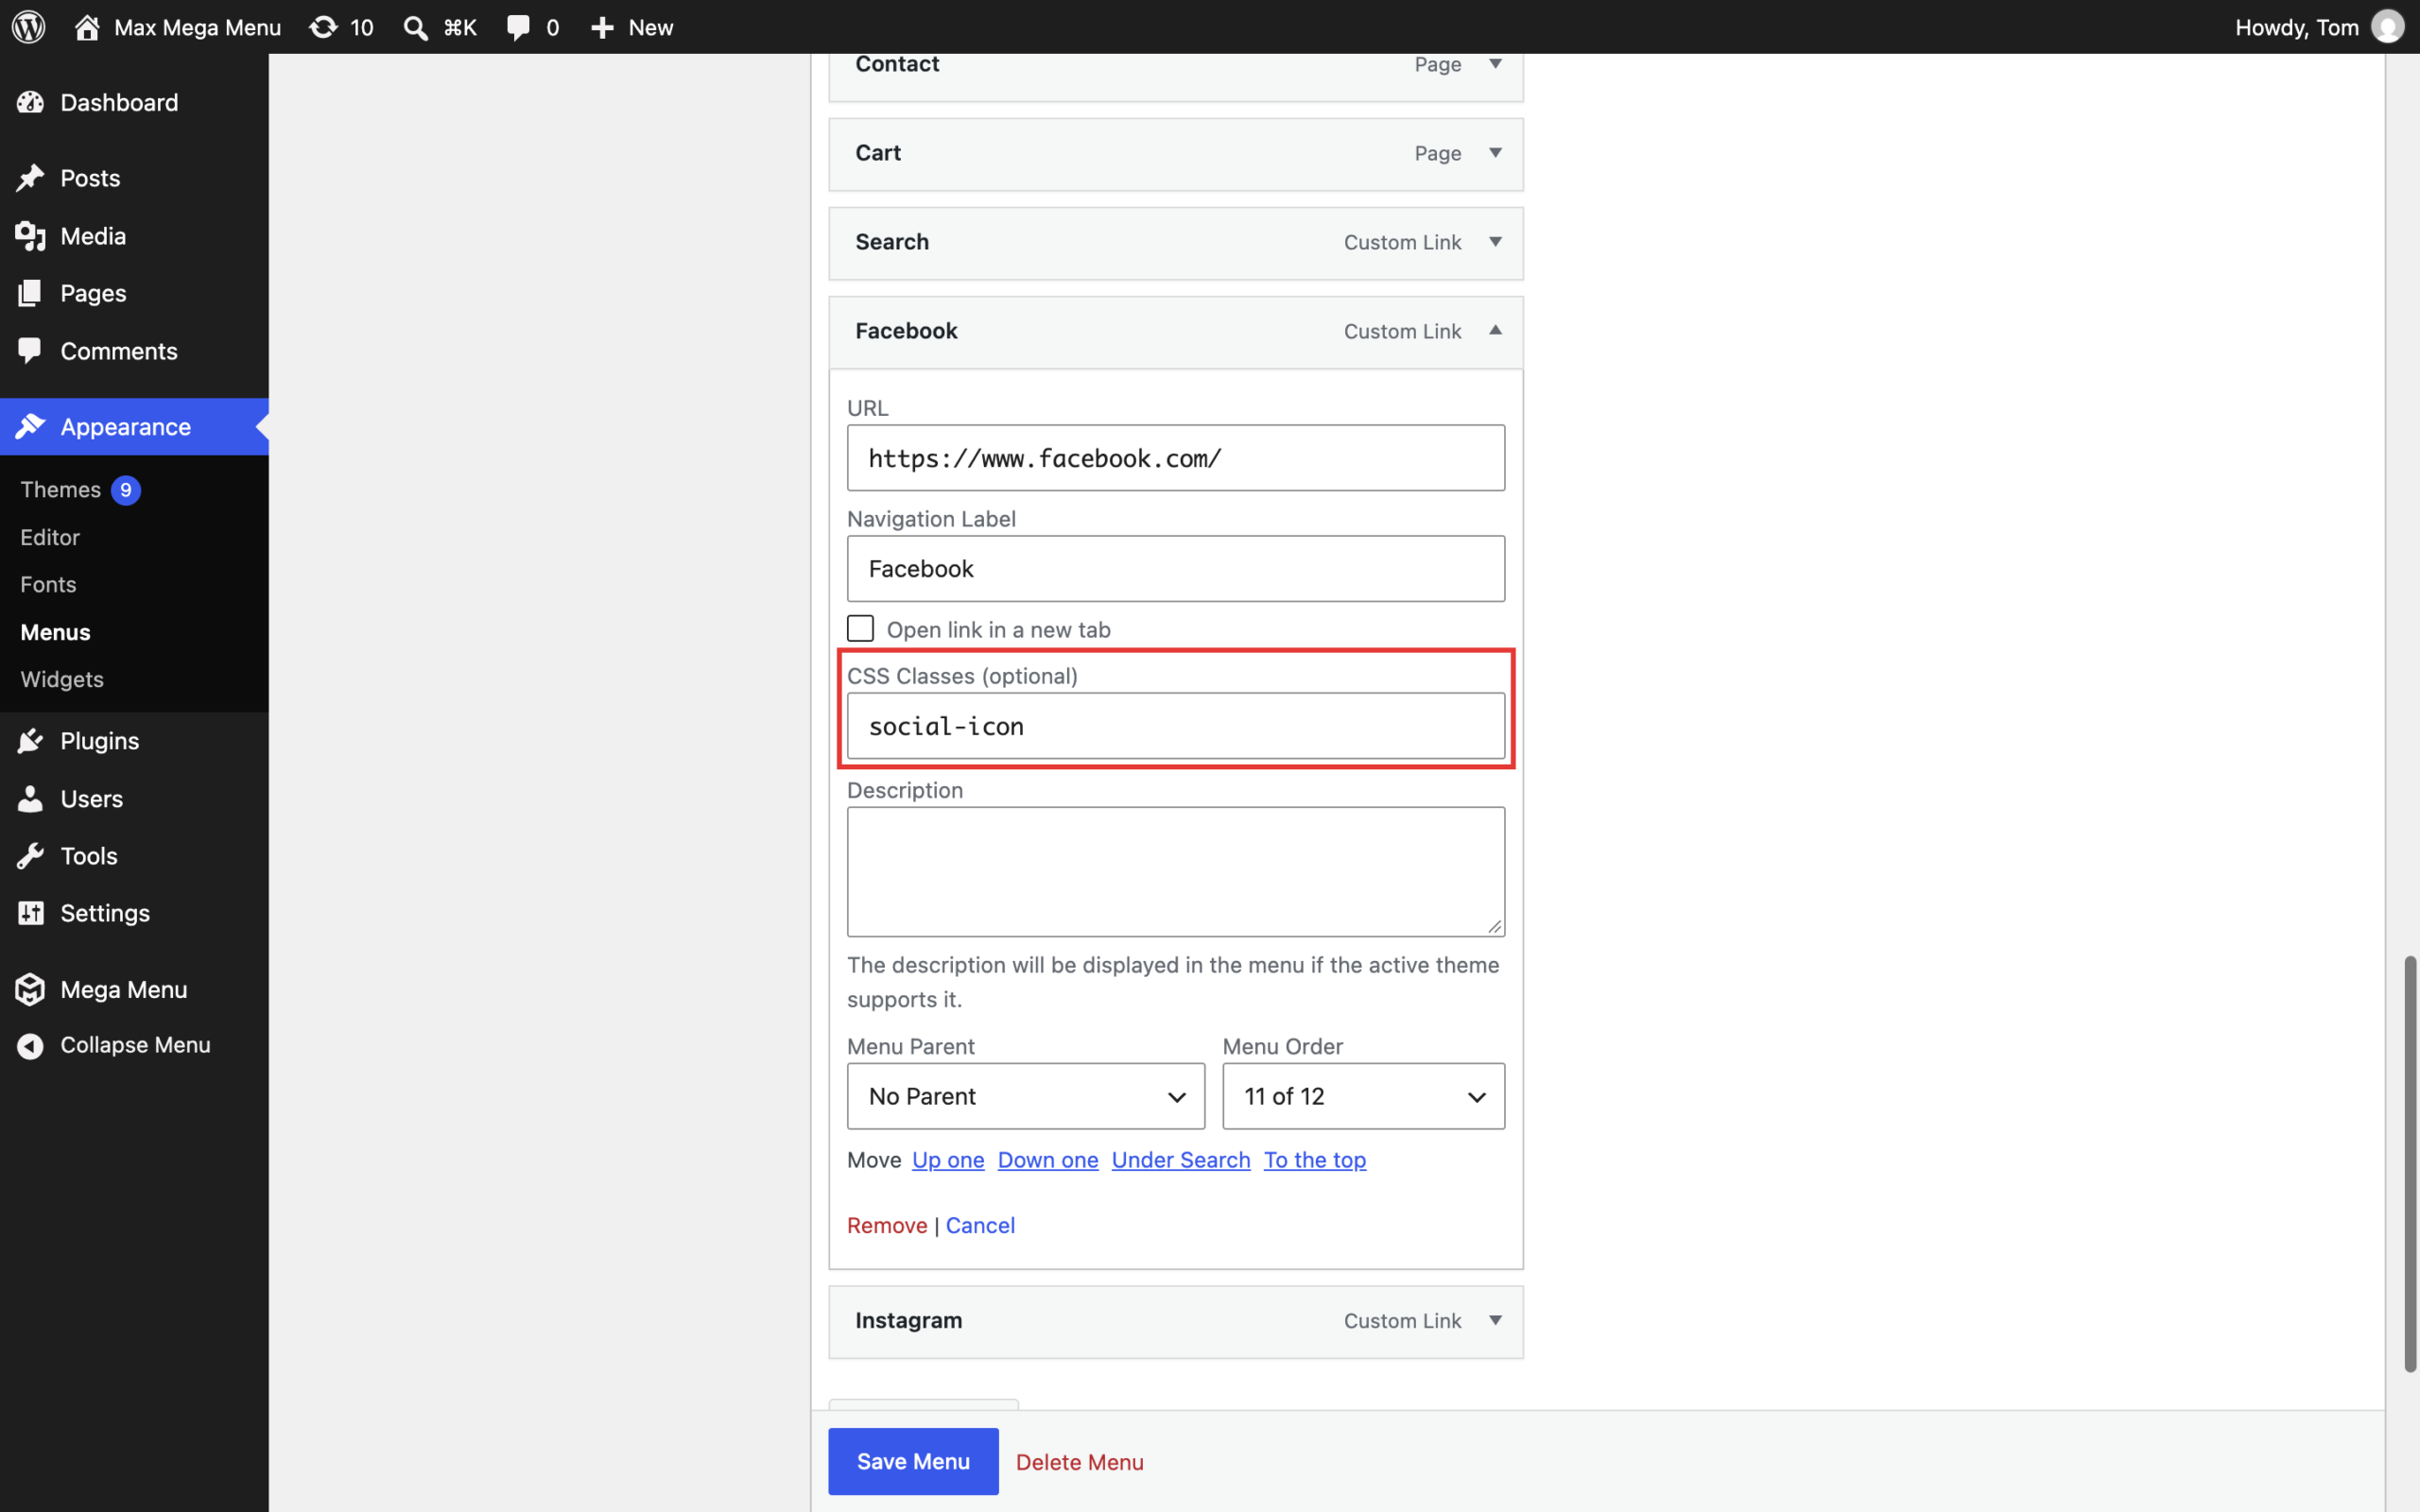
Click the arrow on the right of the menu item to expand its settings, then enter your class name in the “CSS Classes (optional)” field. Separate multiple classes with a space.
Step 3: Save the menu
Click “Save Menu”.
Max Mega Menu outputs each custom class twice on the menu item: as entered, and prefixed with “mega-“. For example, a class of “social-icon” is output as both social-icon and mega-social-icon, so you can target the item in your menu theme‘s Custom Styling using li.mega-social-icon. See How to add social media icons to your menu for an example.